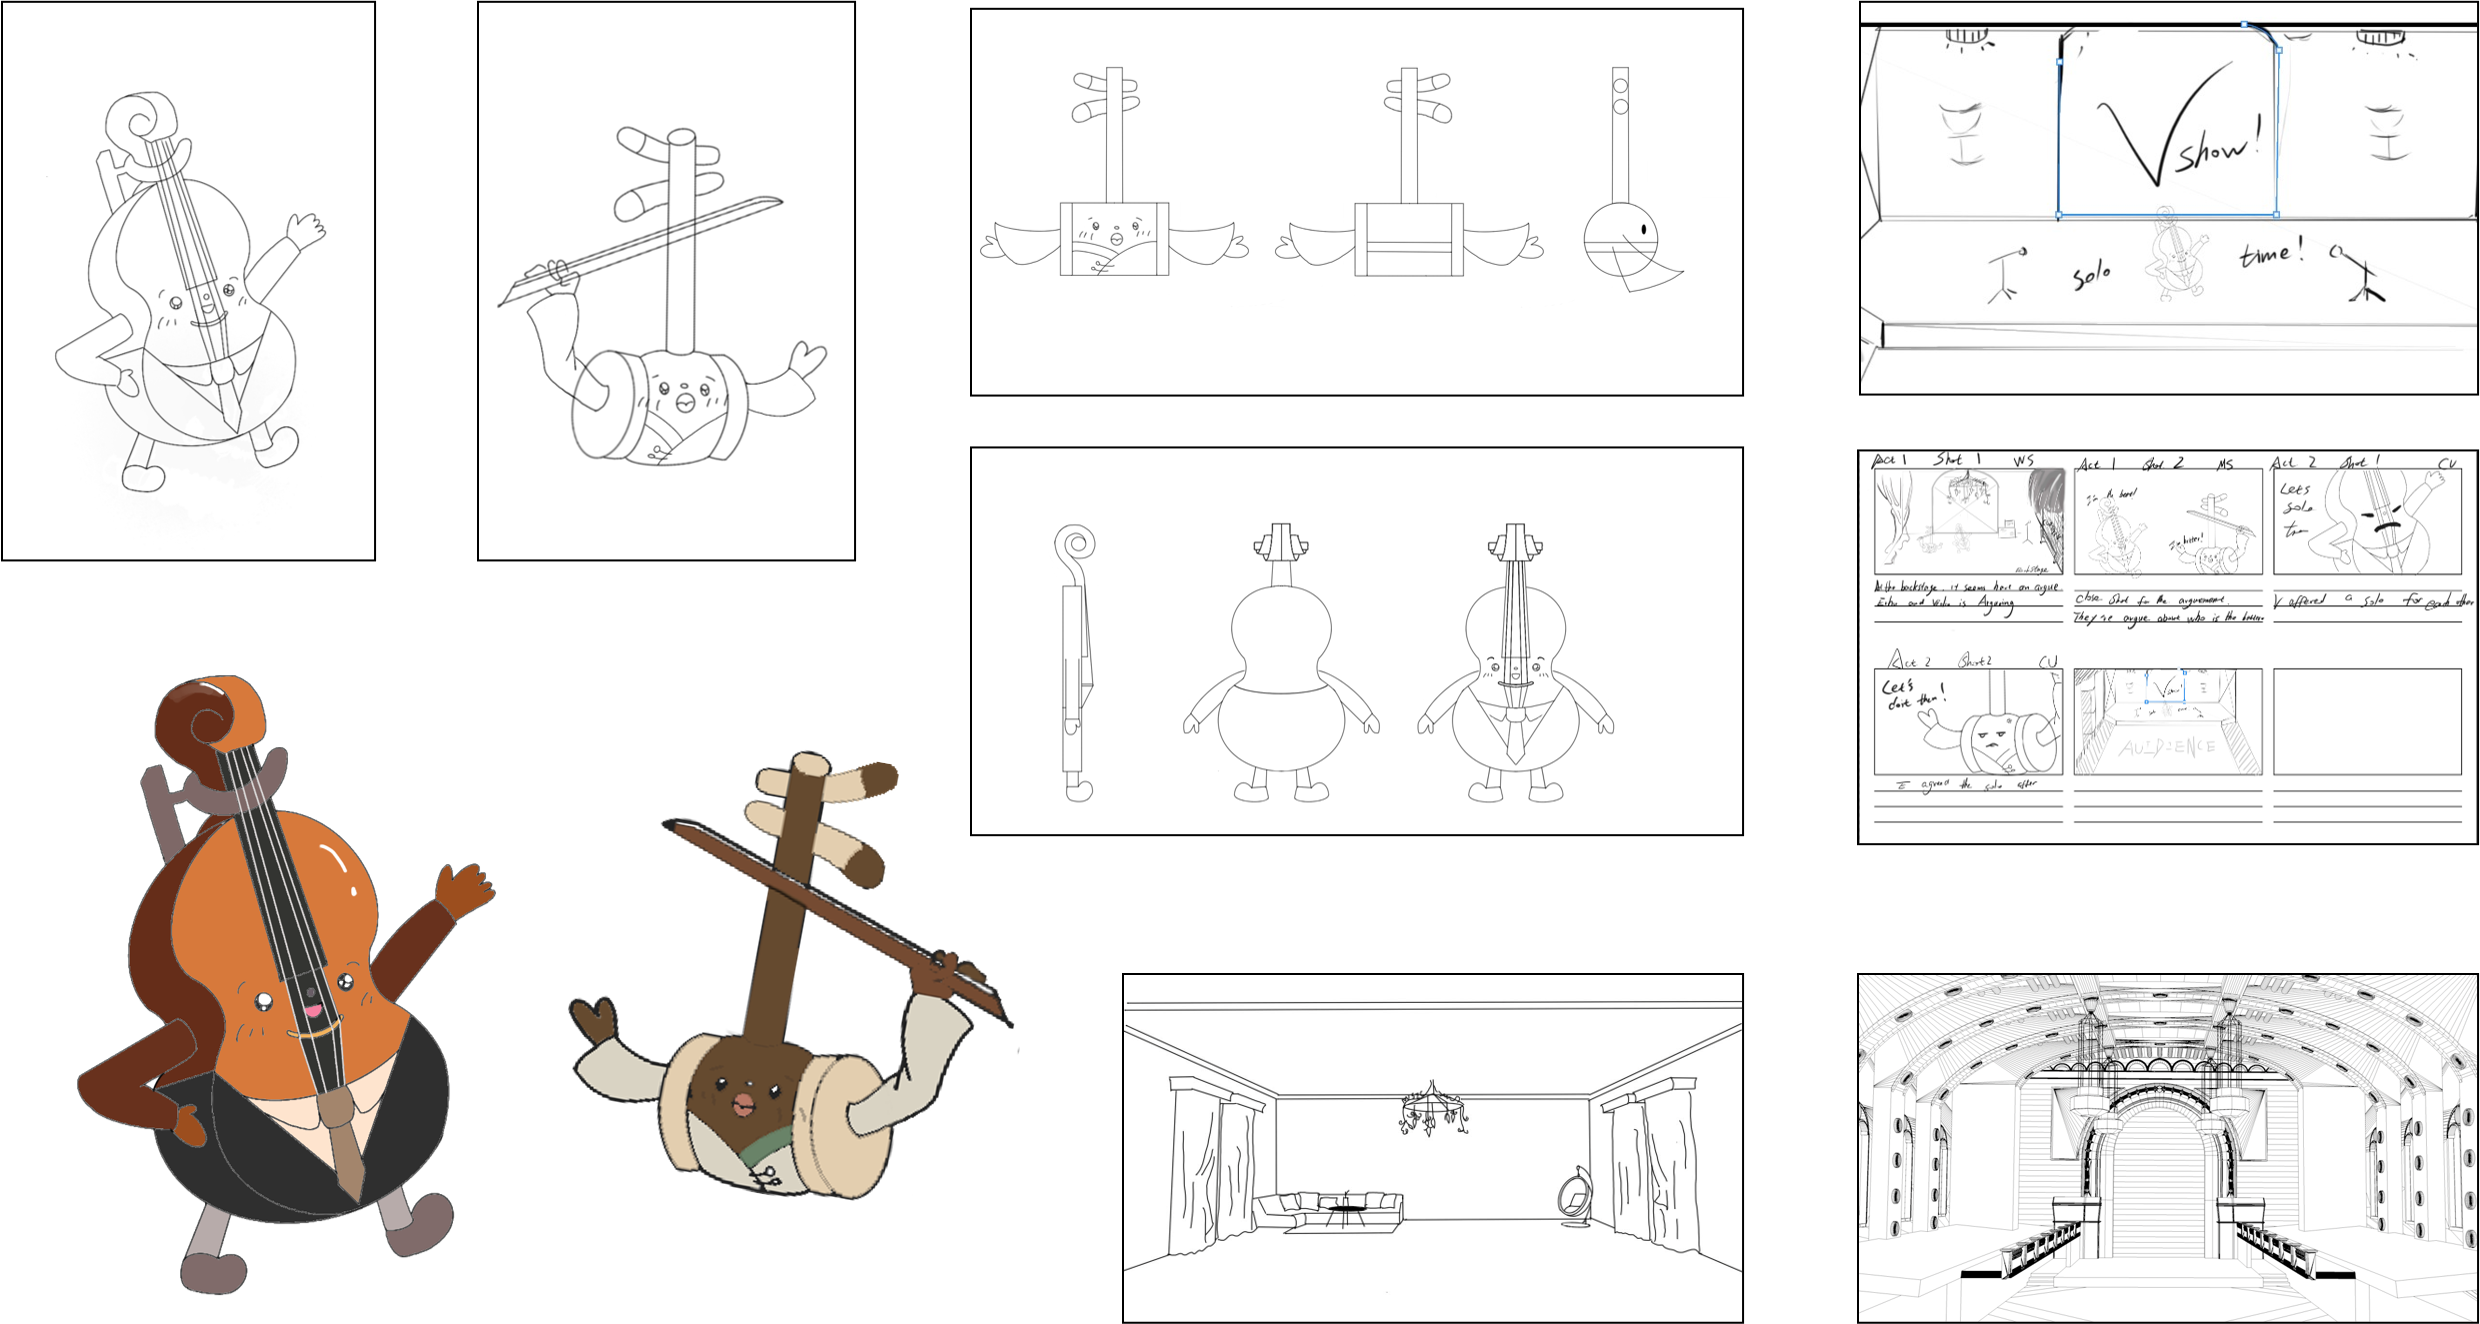
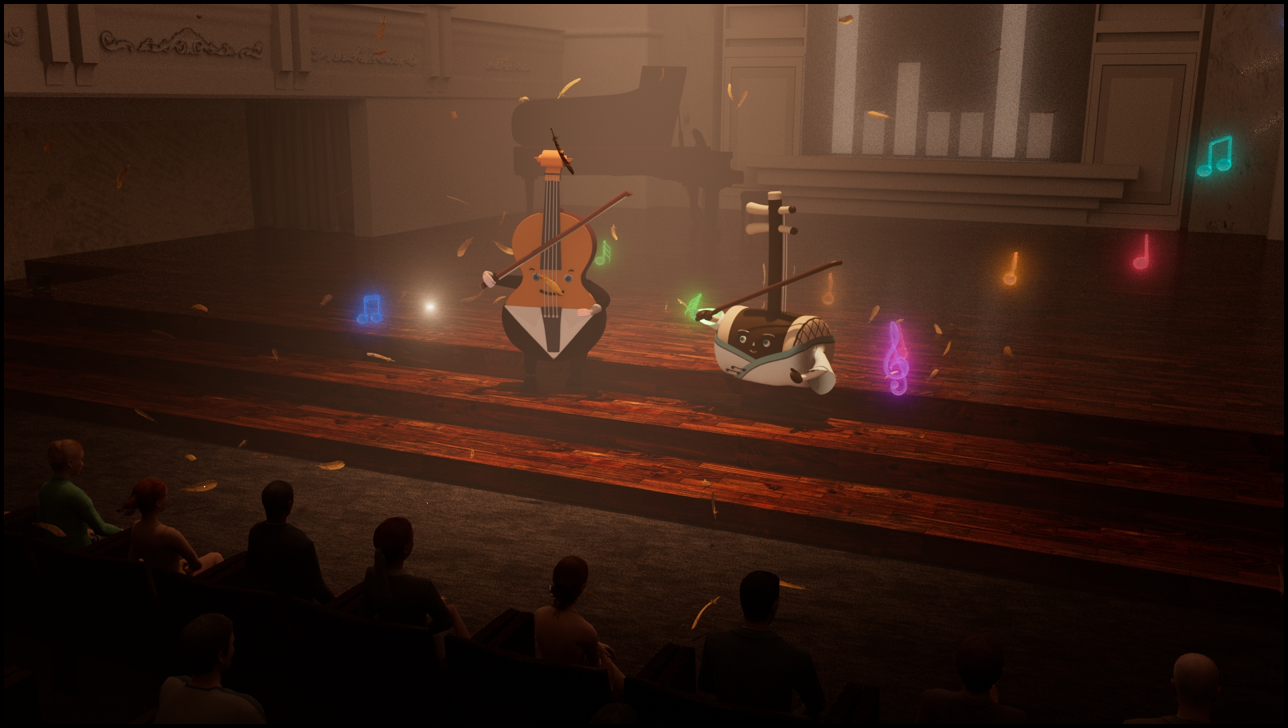
As for character design, we chose violin and erhu as main character because they are Similar in form while they both are stringed instruments. Besides, they are anthropomorphised with the limbs and facial expression, which makes the animation more vivid. On top of that, we want to present Chinese and Western instruments that embody the cultures of China and the West respectively.
The group discussed animation for the first time. We are very interested in the differences and integration of Chinese and Western cultures. At the same time, inspired by the existing works, such as Our Shining Days , which tells A battle of Chinese and Western Instruments, the theme of the our animation was determined to be an animation about an erhu and A violin. Through the ensemble of the two instruments, we want to show the conflict and fusion of eastern and western instruments.
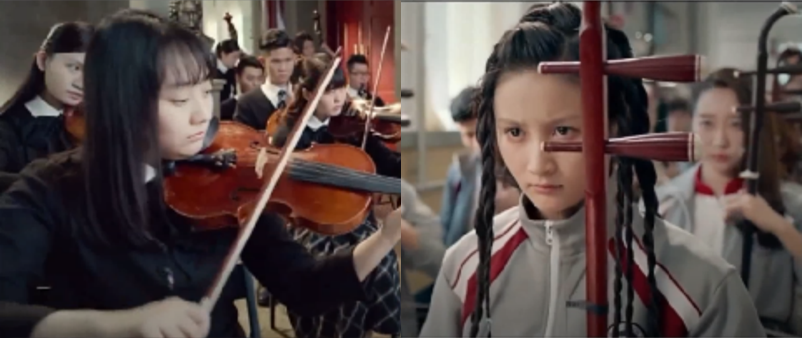
Figure 1: Our Shining Days
We further discussed the style of animation.
First, we used the animation
Music Land
for reference to consider how to personify the erhu and violin.
And we learned from some network personified animation character design as our role design reference.
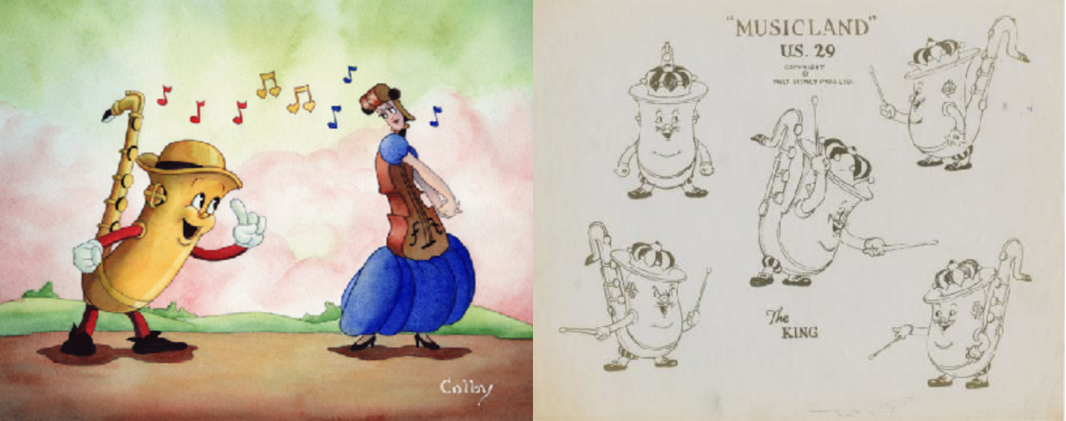
Figure 1: Music Land
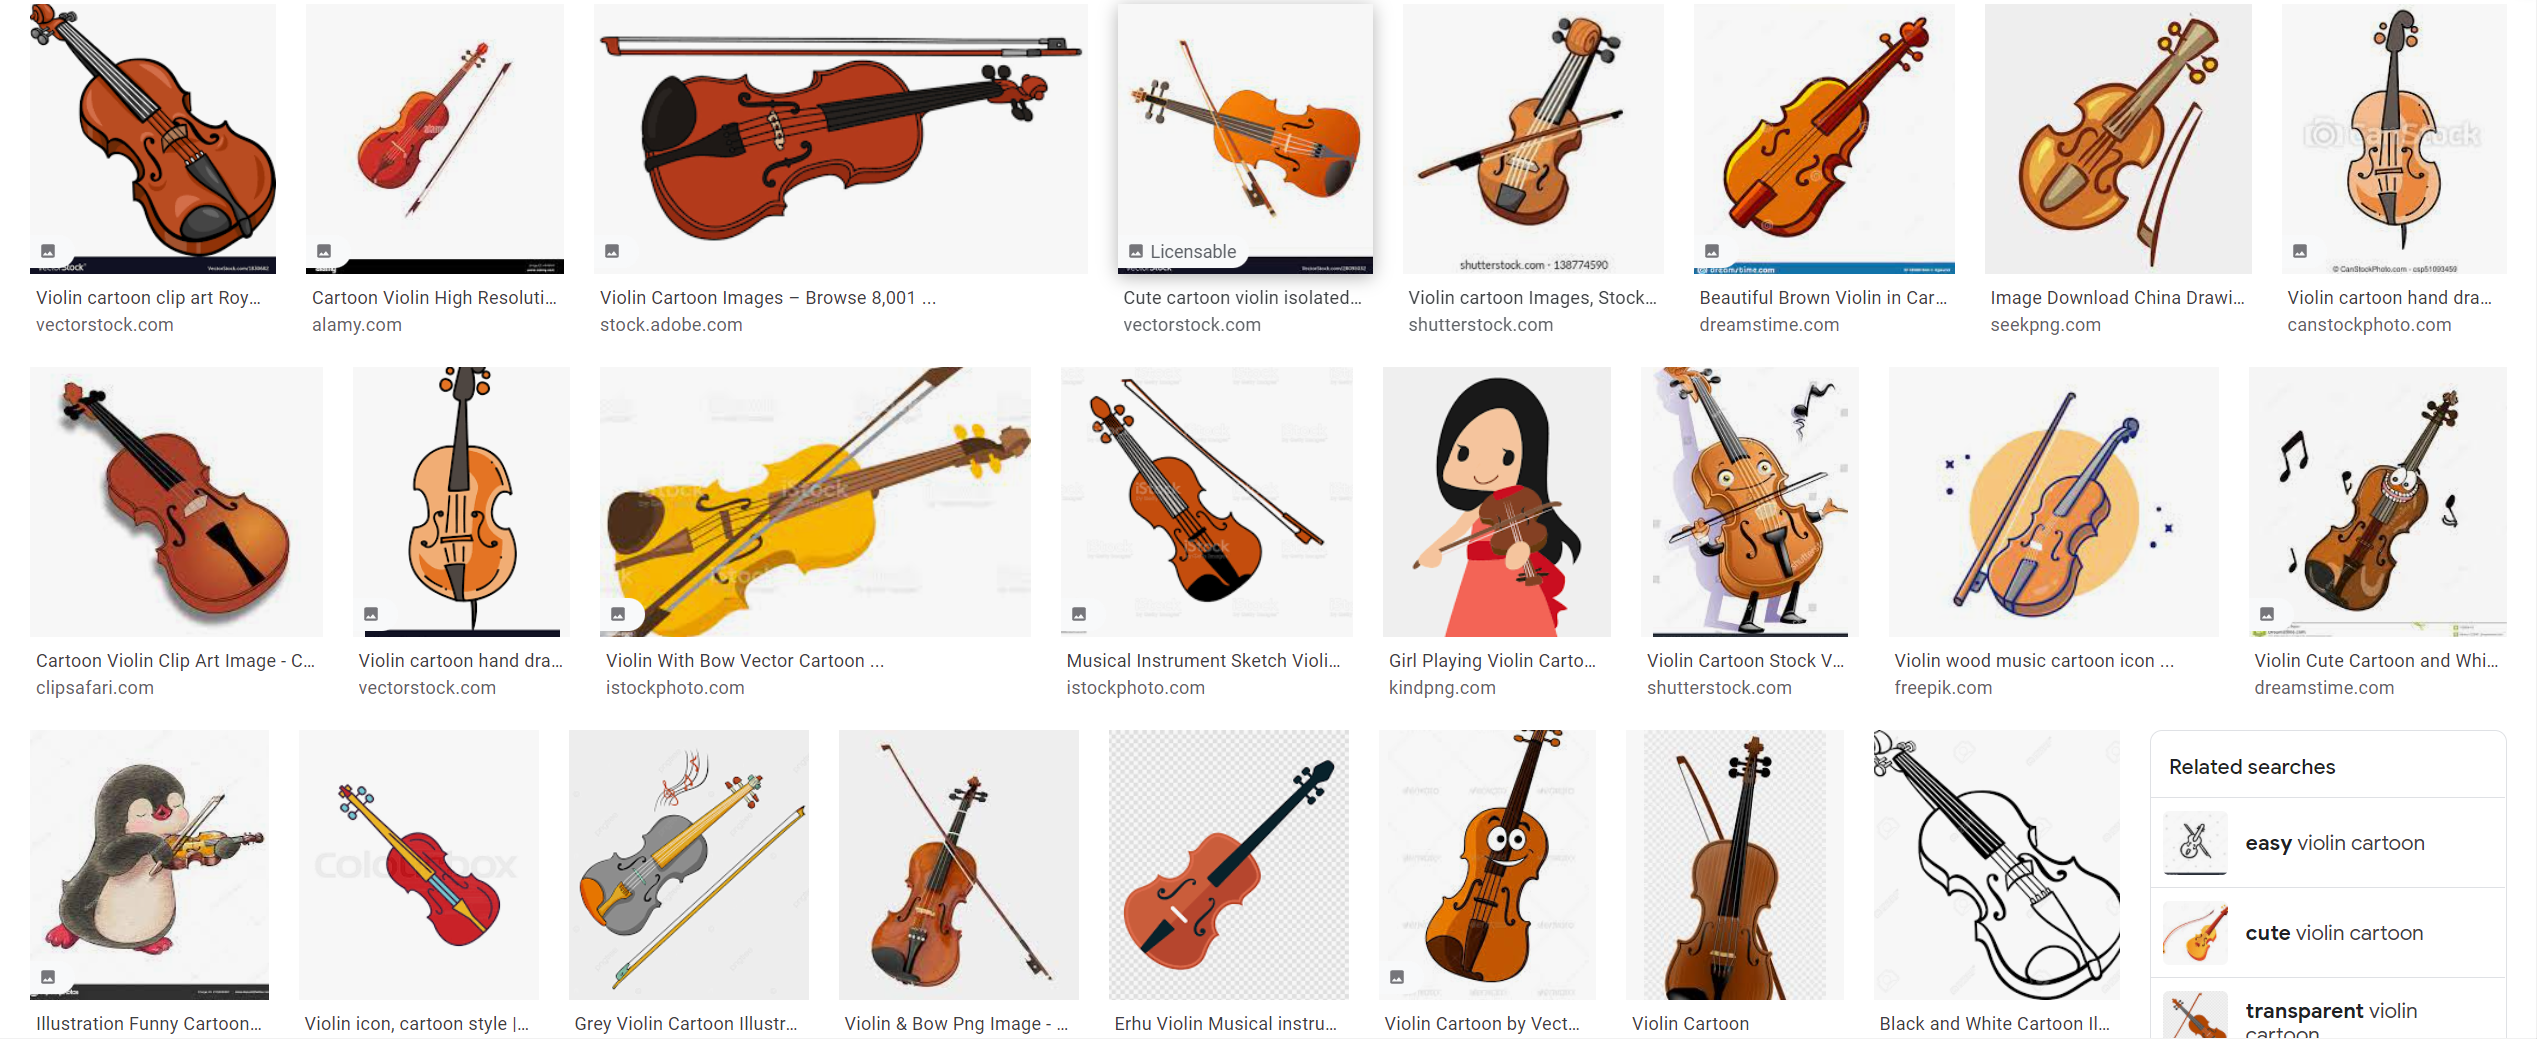
Figure 2: cartoon reference
To get inspiration for animation, Zhenyu Zhou and I went to the Cadogan hall to listen to a symphony.
The symphony was amazing beyond words.
At the same time, the scene in the concert hall was breathtaking, providing the setting for a powerful performance.
As this concert was very special, I decided to make our scene based on this concert hall.
In addition, the lighting effect of the stage was also very important, and the lighting performance of the concert hall provided me with some inspiration.
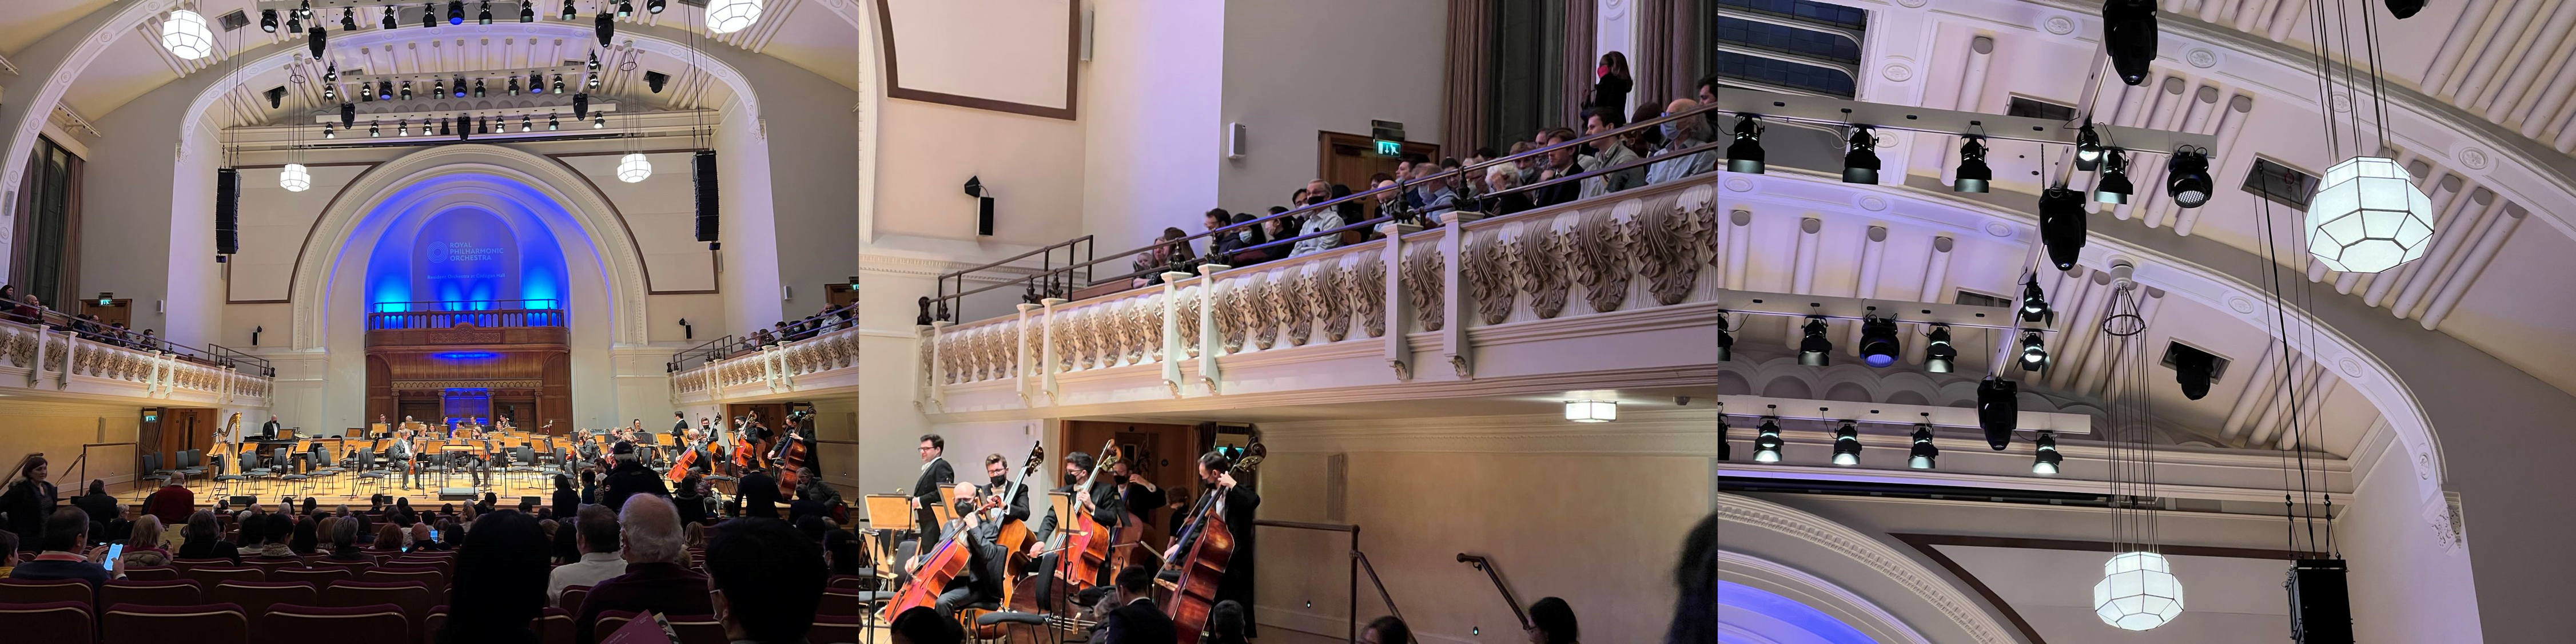
Figure 1: Cadogan Hall
I used procreate to trace the scene outline of the hall to make the scene prototype diagram.
The hall was made with prototype drawings.
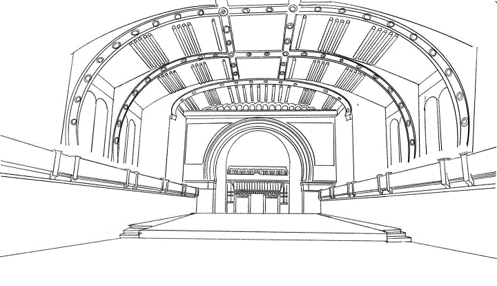
Figure 1: outlines of the hall in prototype
First, the cube and cylinder of Polygon are used to perform Boolean difference operation to obtain an outer box.
Then extrude the length of the ground on both sides of the arcade to get a frame of the arcade.
Then, in order to make the decorative edges protruding from the inside of the arcade,
I used multi-cut tool to add lines to the inner edges. For convenience,
I followed the ratio of 10% for each side, and then I used Bevel operation to pull out two edges.
If it is necessary to adjust the position, Slide Edge can be used to adjust.
Then extrude the outlined edges to create a preliminary arcade.
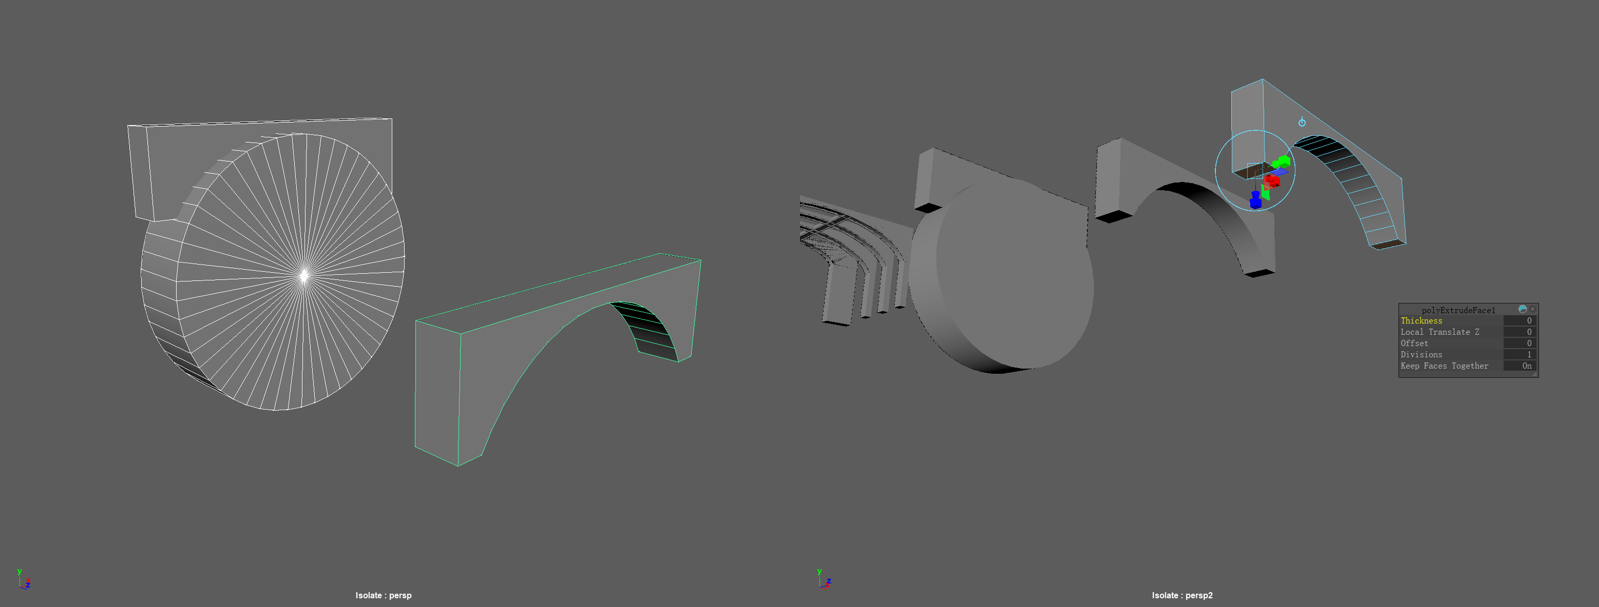
Figure 2: boolen-difference and extrude face
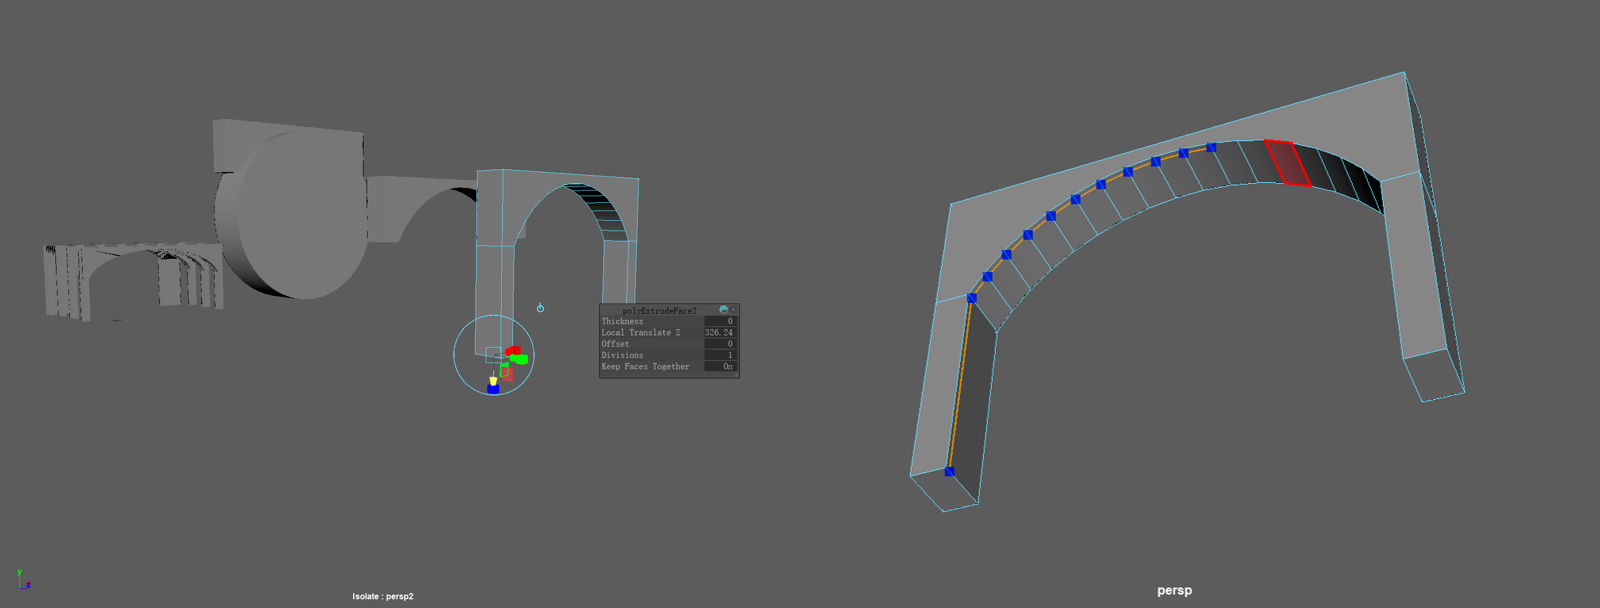
Figure 3: multi-cut to add edges

Figure 4: bevel the edge
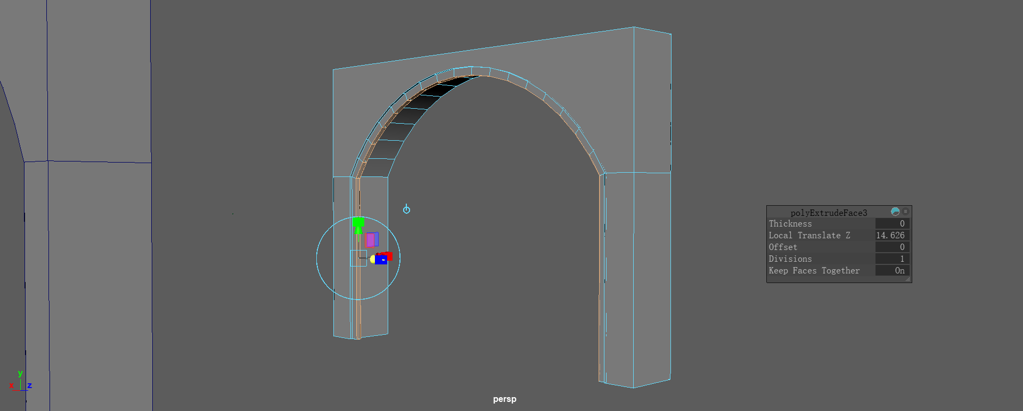
Figure 5: extrude the inner face
Likewise, the arcade in the front fo the hall was made using the similar method. The difference is that I add many cicular space for decoration, which was made by curve projection. With a nurbs circle and the booleaned mesh, project the curve on the mesh in the front view (the view is important as the projection method is decided by the camera view). Then use the projected curve on the mesh to split the mesh.
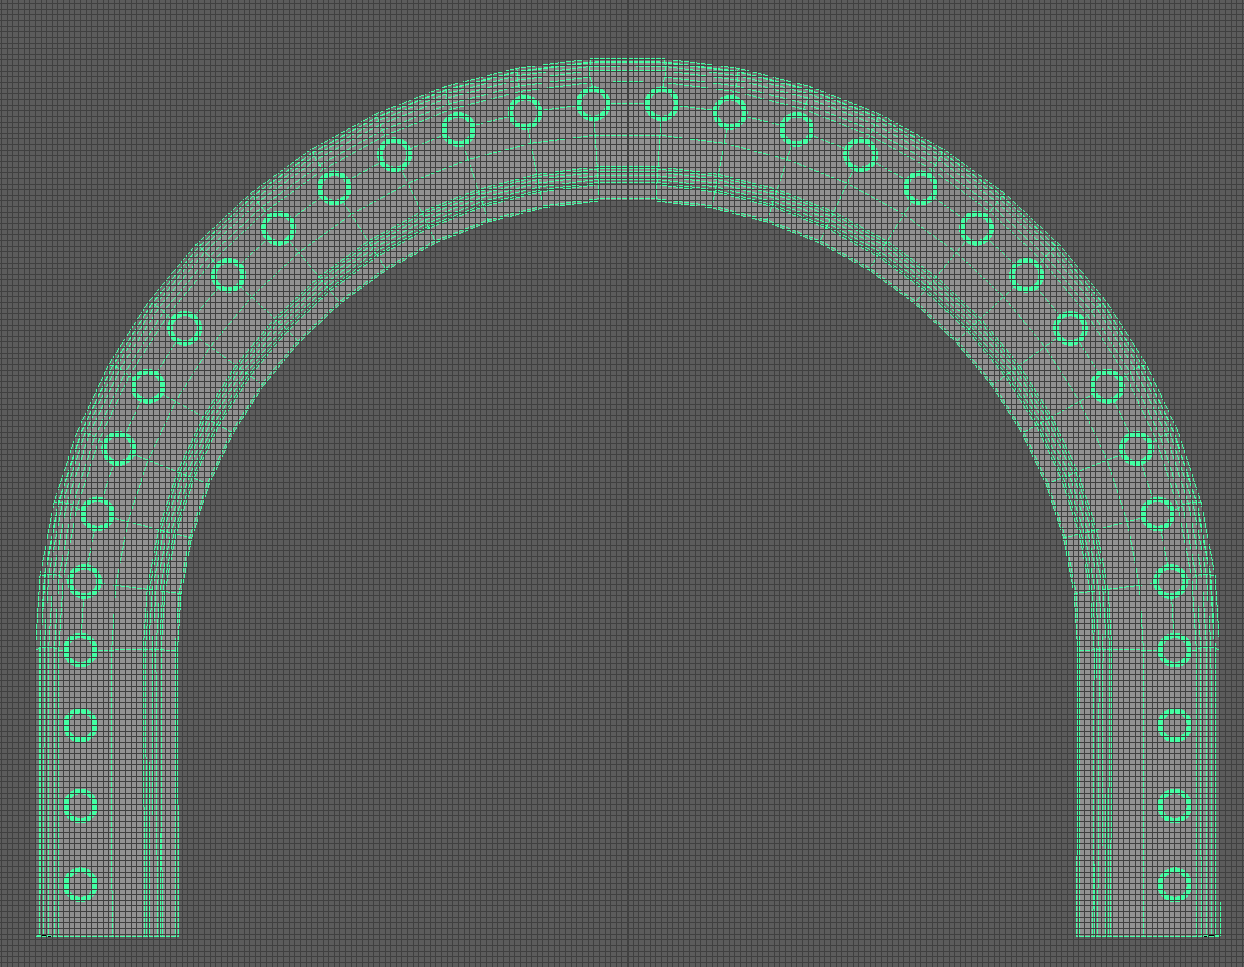
Figure 6: the arcade in the front of the hall
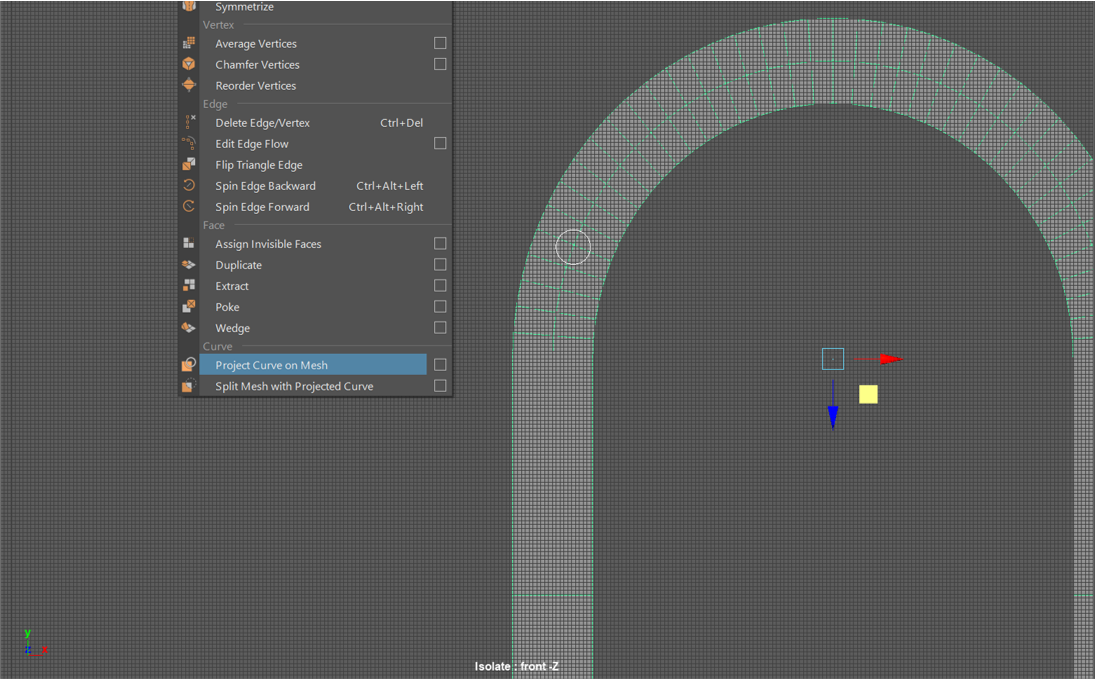
Figure 7: using projection to make decorations
Using projection tool, I made the windows as well.When modeling the frames of the window I mainly combined different meshes rather than modeled them from a single mesh, which is time-saving and efficient for our animation.
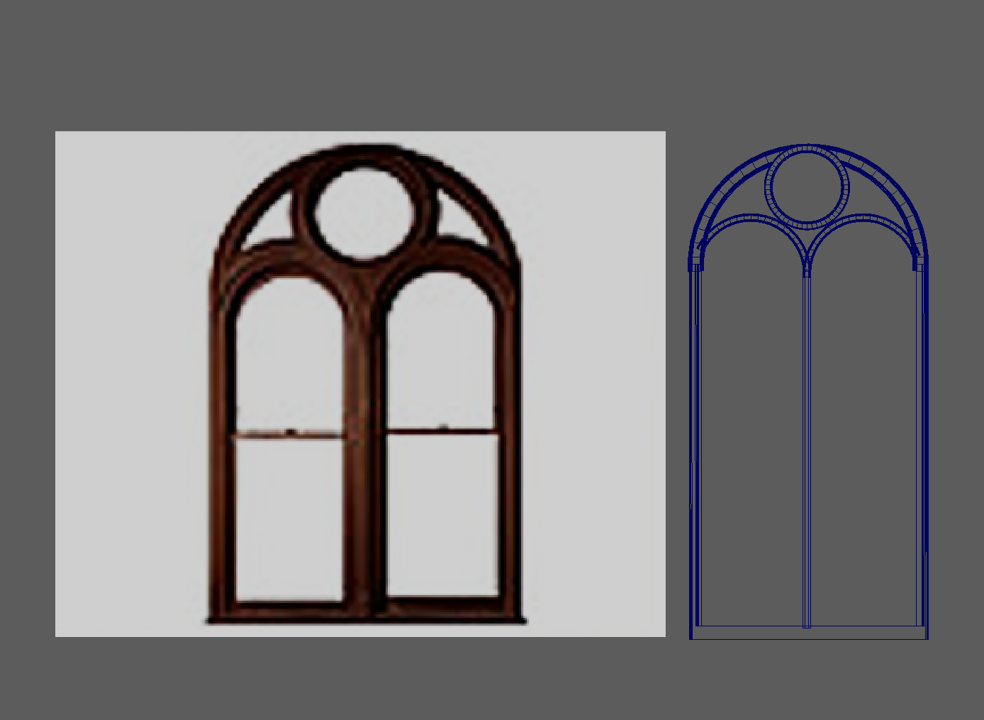
Figure 8: the window and the reference image
In order to show the conflict and transformation,
the group discussed the main plot today, considering the elements, beginning, development, climax and ending of the story.
I proposed that this process could be a three-step process,
with good performances labeled UP and bad ones labeled down.
The first segment is a solo of two instruments, which is normal,
which is UP;
And then the self expression,
again the solo part, for down. Then the ensemble, the two playing normally, is UP.
In the ensemble, the two instruments want to express themselves more, so the ensemble becomes unpleasant and becomes down.
Then the audience feedback is not good, the two instruments gradually realize the importance of ensemble,
gradually become better, and finally become UP.
UP, down, UP, down,UP, in this way, two valleys drive the story, multiple turns make the story more expressive, and the climax is the conflict and reconciliation of the two instruments in the ensemble stage.
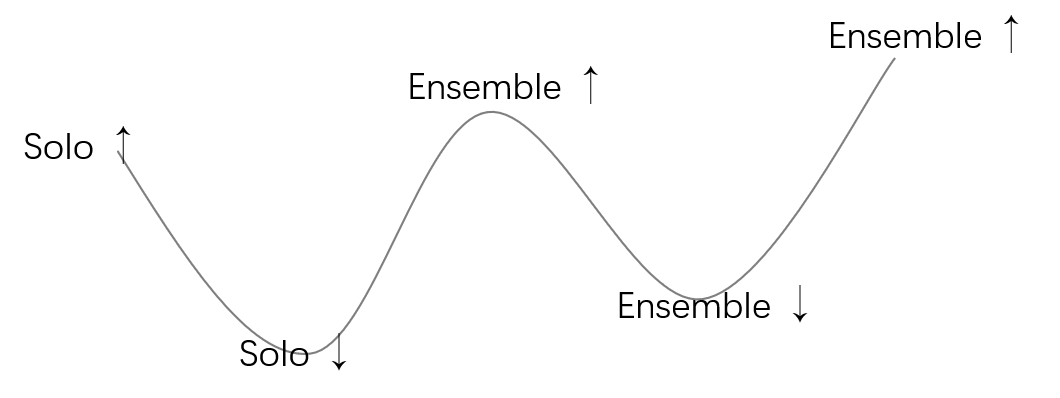
Figure 1: a three-step process
However, due to time and energy, we had to change the story into a single paragraph, with only one conflict in the middle, and the self-expression of the solo part was cut away. Although we felt that one conflict point was a little weak during production, we could make up for it through other elements such as audience, notes and so on. In addition, since we have considered two scenarios, we can present the first conflict point in the Storage room. They already clash during practice preparation, setting the stage for later episodes.
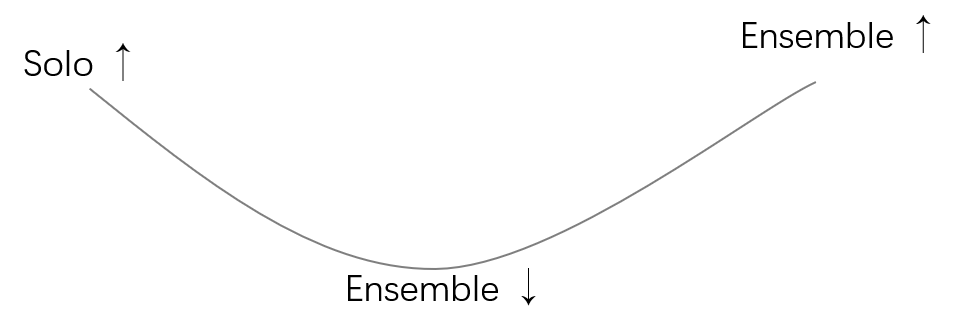
Figure 2: one turning point
According to the plot arrangement, I came back to the first scene.
The most prominent thing in the first scene is the crystal chandelier in the center of the room.
According to the given design drawing, I modeled the light in Maya.
The lamp holder is decorated with the words "Music", and below it are a series of teardrop-shaped crystal lamps.
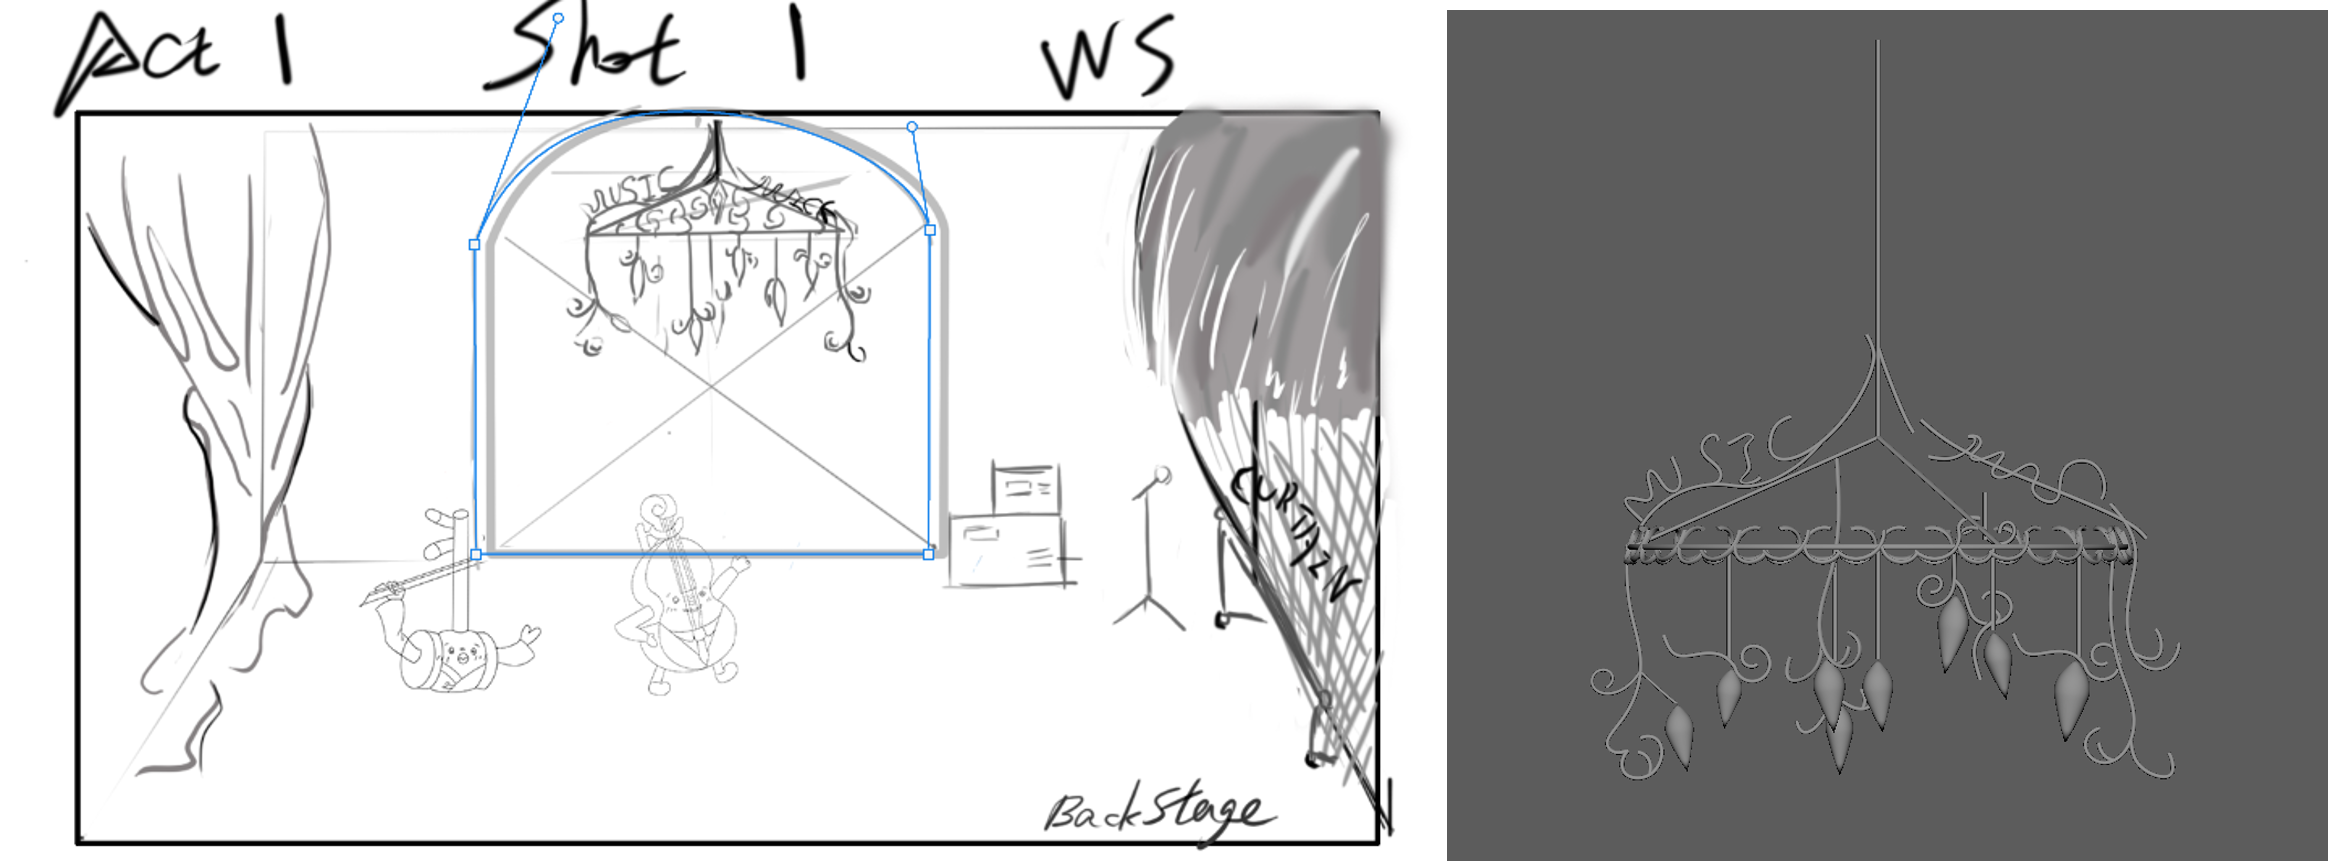
Figure 1: the crystal chandelier created from the storyboard
To make the light frames, firstly I used the EP curve tool  to draw a given shape and then I used rebuild and smooth to
make a better curve.After that, to make a three-dimensional object, I extrude the curves as displayed in Figure2
to draw a given shape and then I used rebuild and smooth to
make a better curve.After that, to make a three-dimensional object, I extrude the curves as displayed in Figure2

Figure 2: extrude faces to make polygons
Apart from modeling, I began to know about the lighting and material. Using the presetting glass material helped me to build a crystall light.
I adjusted the roughness, the transmission and so on. To implement a pleasant lighting performance, I used the mesh light  .
To obtain the final performance required much work still.
.
To obtain the final performance required much work still.
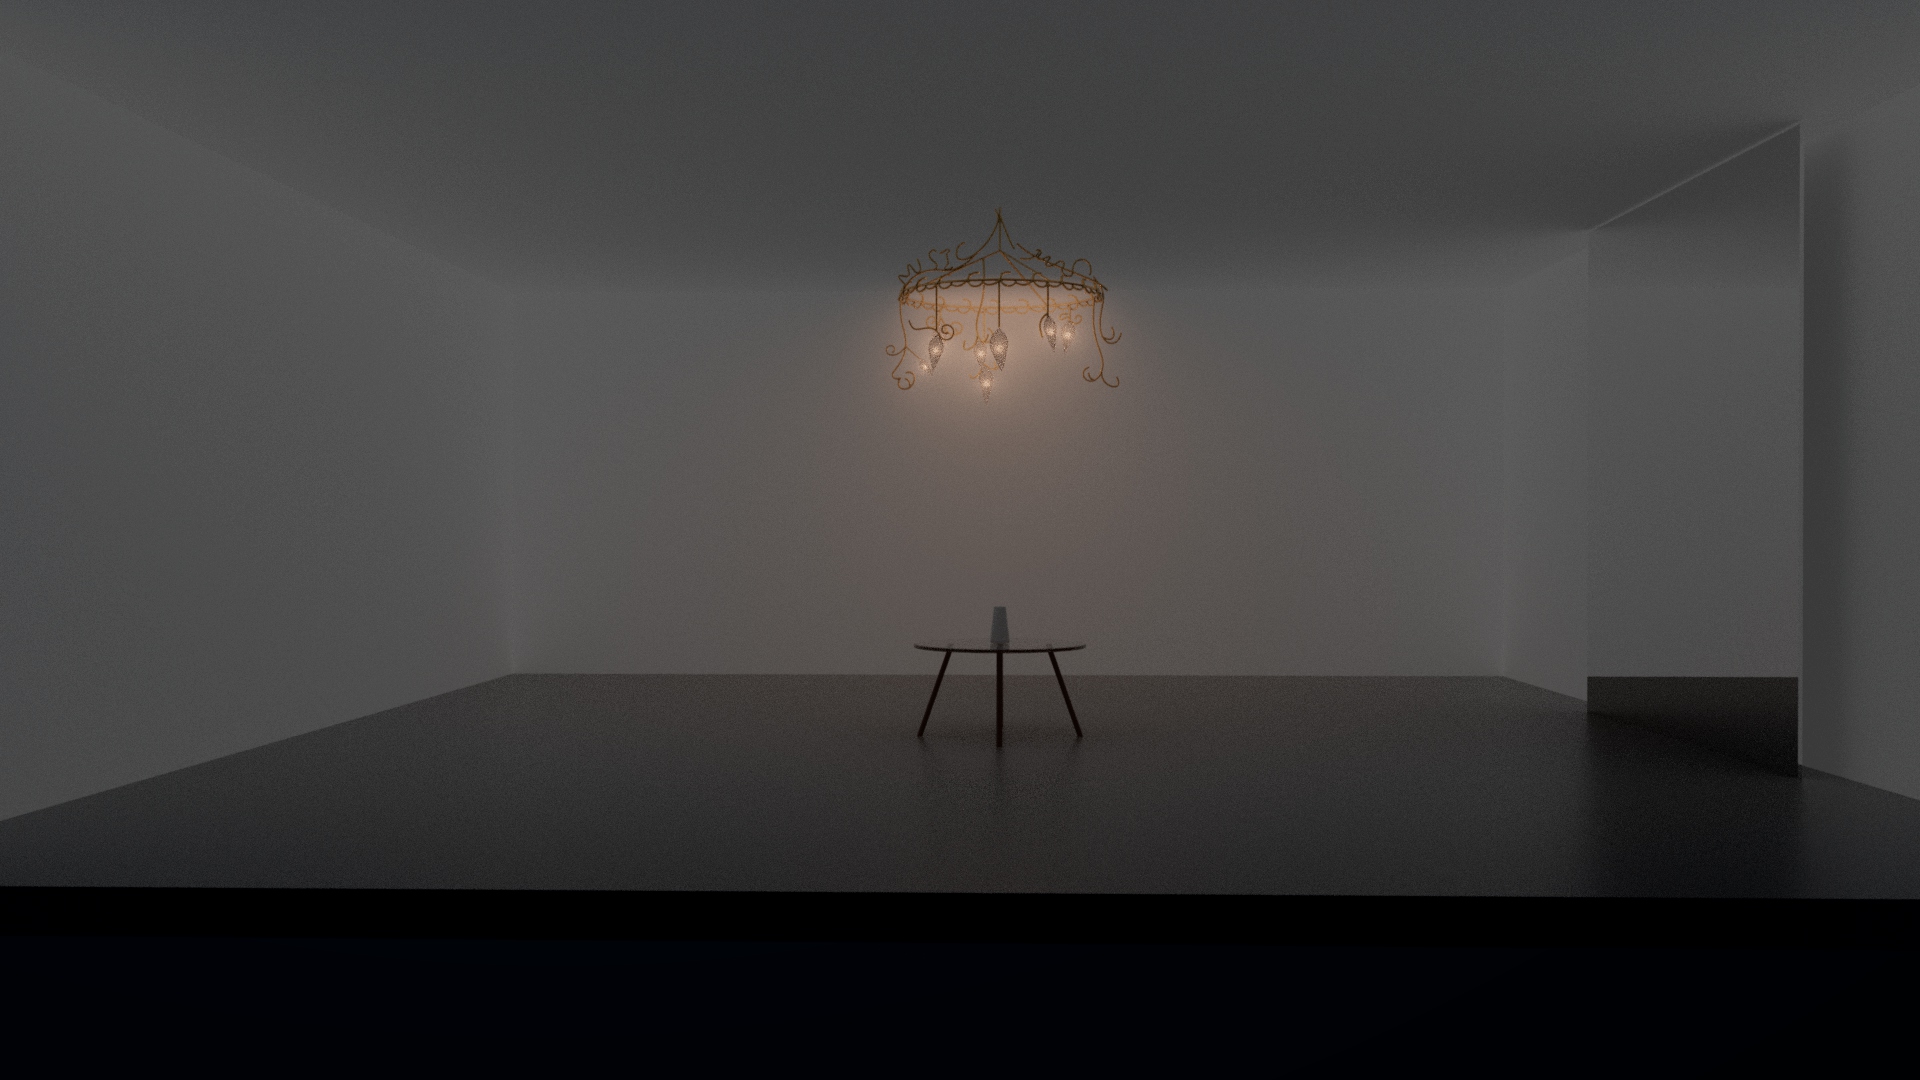
Figure 3: the lighting of the crystal chandelier
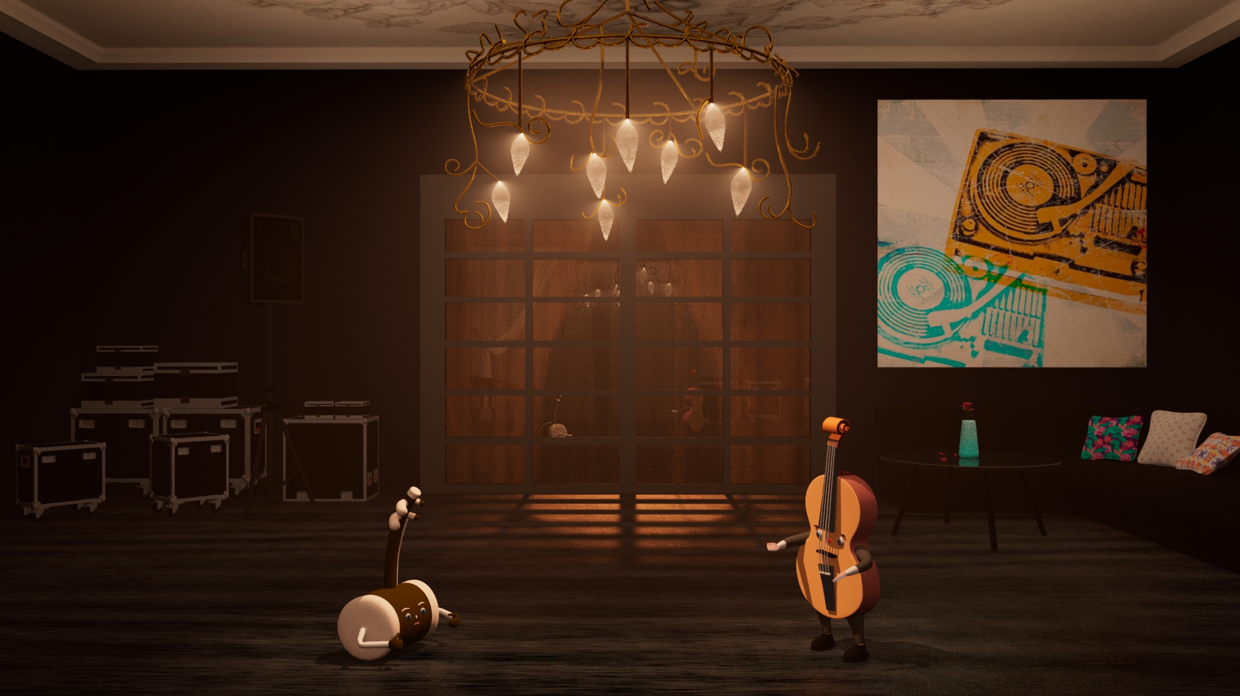
Figure 3: the final performance of the lighting of the crystal chandelier
During the process of building the scene, I became very interested in lighting.
The impact of good lighting on visual performance is beyond words.
At the same time, for each rendered image,
I found that everyone needs a center when observing a picture.
A disordered drawing always brings bad experience to watchers.
Whether the center refers to something that people focus on, or whether everything has the same style and gives a sense of wholeness,
or whether the image reflects an event that people immediately perceive could be called the centre of a visual work.
In photography, shooting is to record the picture,
to record something worth recording.
In the production of animation, too, every screen scene should be helpful to show the content.
The design of 3D animation incorporating functionality and artistry not only reflects a specific place and a certain event, but also serves as a foil for the protagonist in the animation (Yang 2021) .
Here we do not deny some pictures irrelevant to the theme, some pictures can simply demonstarte pure special effects. But no matter what kind of purpose,a visual product which can let people quickly capture information is successful. Here I extract two key words. One is information, the theme, the conceptual and the narrative of the animation; The other is concentration, the central element of every frame.
A concert needs an audience. When we were considering the production of audience,
we thought a lot of plans. First, we wanted to add the audience screen in the postproduction by AE or PR,
but we gave up considering the possible inconsistency of some screen styles.
The second was to use white models in the scene, without lighting, with the way of black shadows.
Then we found the right audience kits and loaded the animation by importing mixamo,
and finally put it into the scene. The number of different characters in the scene is about 50-60,
using different sitting positions and colors of clothes, filled the whole music hall.

Figure 1: using mixamo to load animations
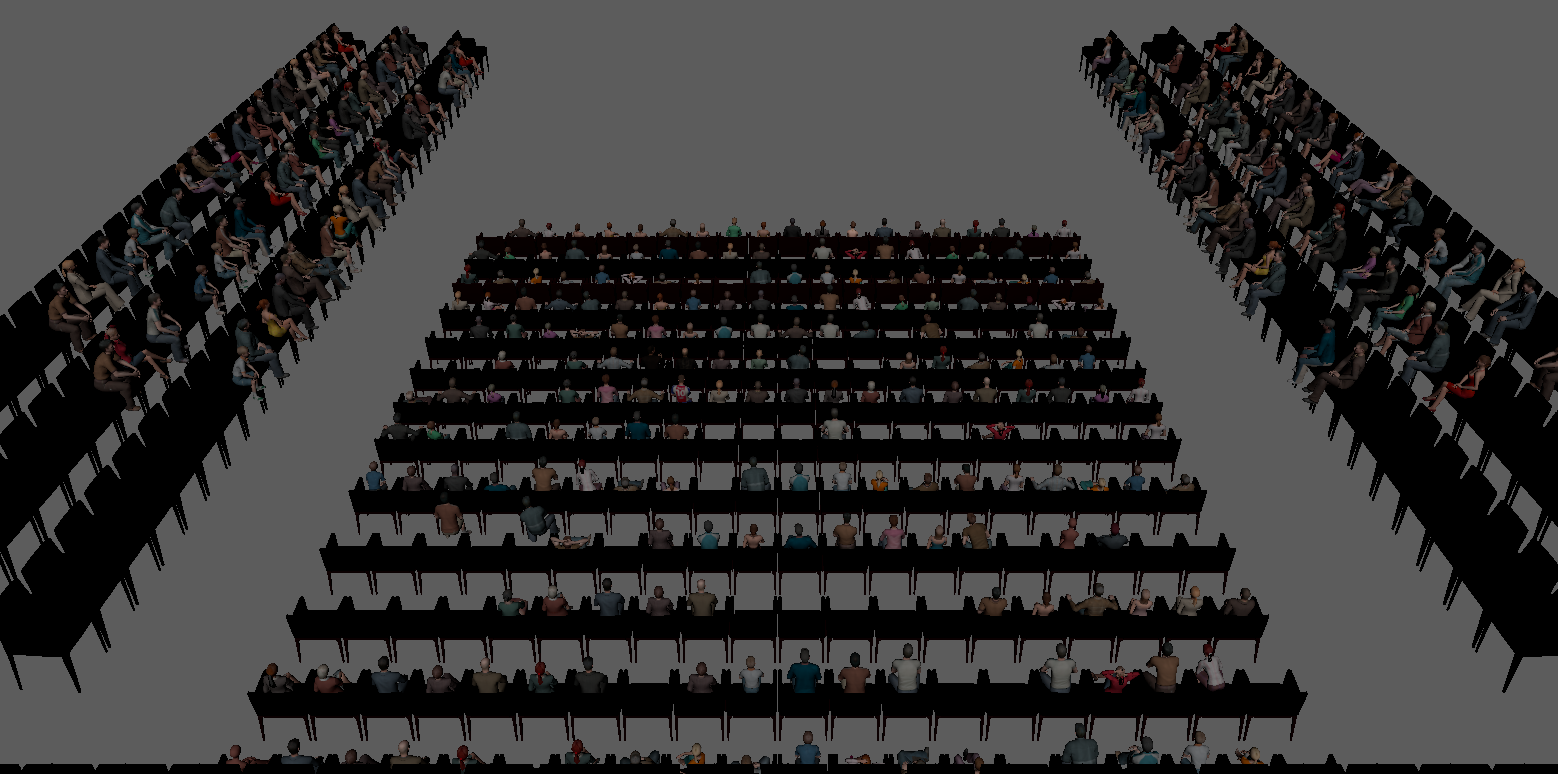
Figure 2: audiences in the hall
Then, according to the actual scene of cadogan concert Hall, there are many searchlights and speakers on the roof. Due to time constraints, we found existing equipment materials and added them to the concert hall. So far, the concert hall was almost completed.

Figure 3: searchlights and speakers
With the basic scene modeldd, I made the Erhu while Zhenyu was responsible for the Cello.
The production of erhu is relatively simple, mainly the production of the instrument rods of erhu.
Here, I made them separately and finally adopted the method of combine.
Boolean arithmetic was used to make the slot of the instrument rod, and the protruding outline of the erhu body was made by bevelling.
The hand making is a conventional hand making method, but we designed two joints to control the movement of the hand in the anthropomorphic way.
We thought that the semi-anthropomorphic way would make the erhu more lovely.
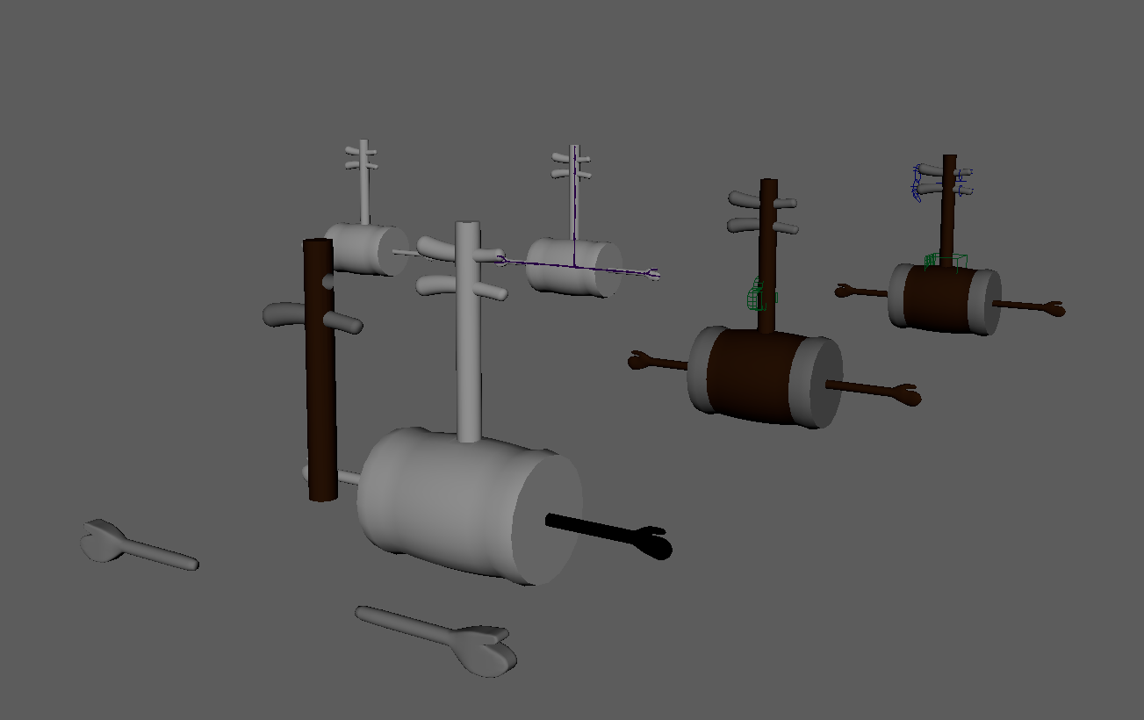
Figure 1: the process of modeling erhu
Once the scene and character are made, the next step is to import the character into the scene,
adjust the size and style, etc. The size of Erhu and Cello in our initial setting is larger than that of the final version.
The initial image is suitable for the storage room, but some disharmony will be found after it is put into the hall.
So I reduced the size and specified the current model size for subsequent modeling and animation.
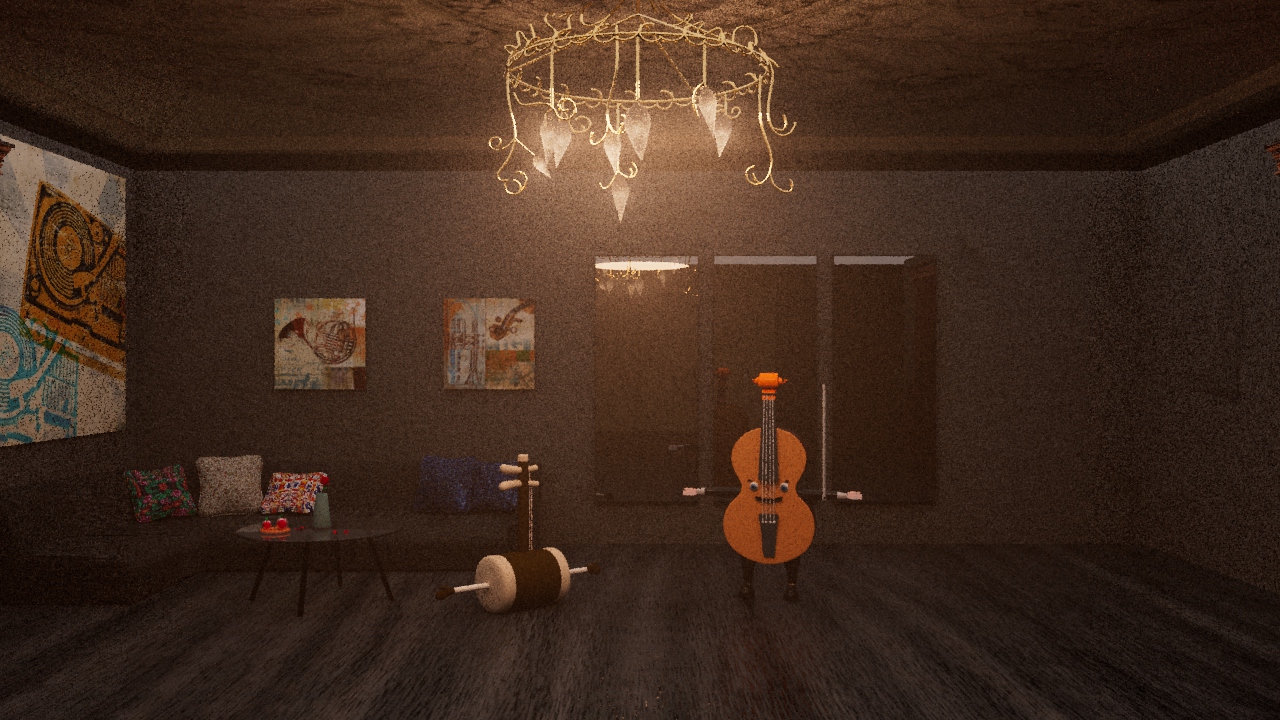
Figure 1: put the characters into the scene
In order to make the erhu more vivid movements.
I have carefully bound the strings and poles of the erhu.
In the beginning, the animation of the strings and rods was stiff, and the bending action was not smooth. Later,
I found that it was the segmentation problem. Then, in order to make the strings more smooth,
I added many bones to make them bend freely.
Firstly, I added IK Spline to the strings and rods. In order to achieve the bending effect,
point control is needed to control the control curve obtained by adding IK. The Figure 1 shows the curve generated by IK.By adjusting the curve, the skeleton can be smoothly bent,
and the points on the curve can be controlled through the cluster (Figure 2).
Finally, a total controller is used to combine all clusters on the curve,
and the deformation performance is controlled by adjusting the weight of each (Figure 3).
to the strings and rods. In order to achieve the bending effect,
point control is needed to control the control curve obtained by adding IK. The Figure 1 shows the curve generated by IK.By adjusting the curve, the skeleton can be smoothly bent,
and the points on the curve can be controlled through the cluster (Figure 2).
Finally, a total controller is used to combine all clusters on the curve,
and the deformation performance is controlled by adjusting the weight of each (Figure 3).
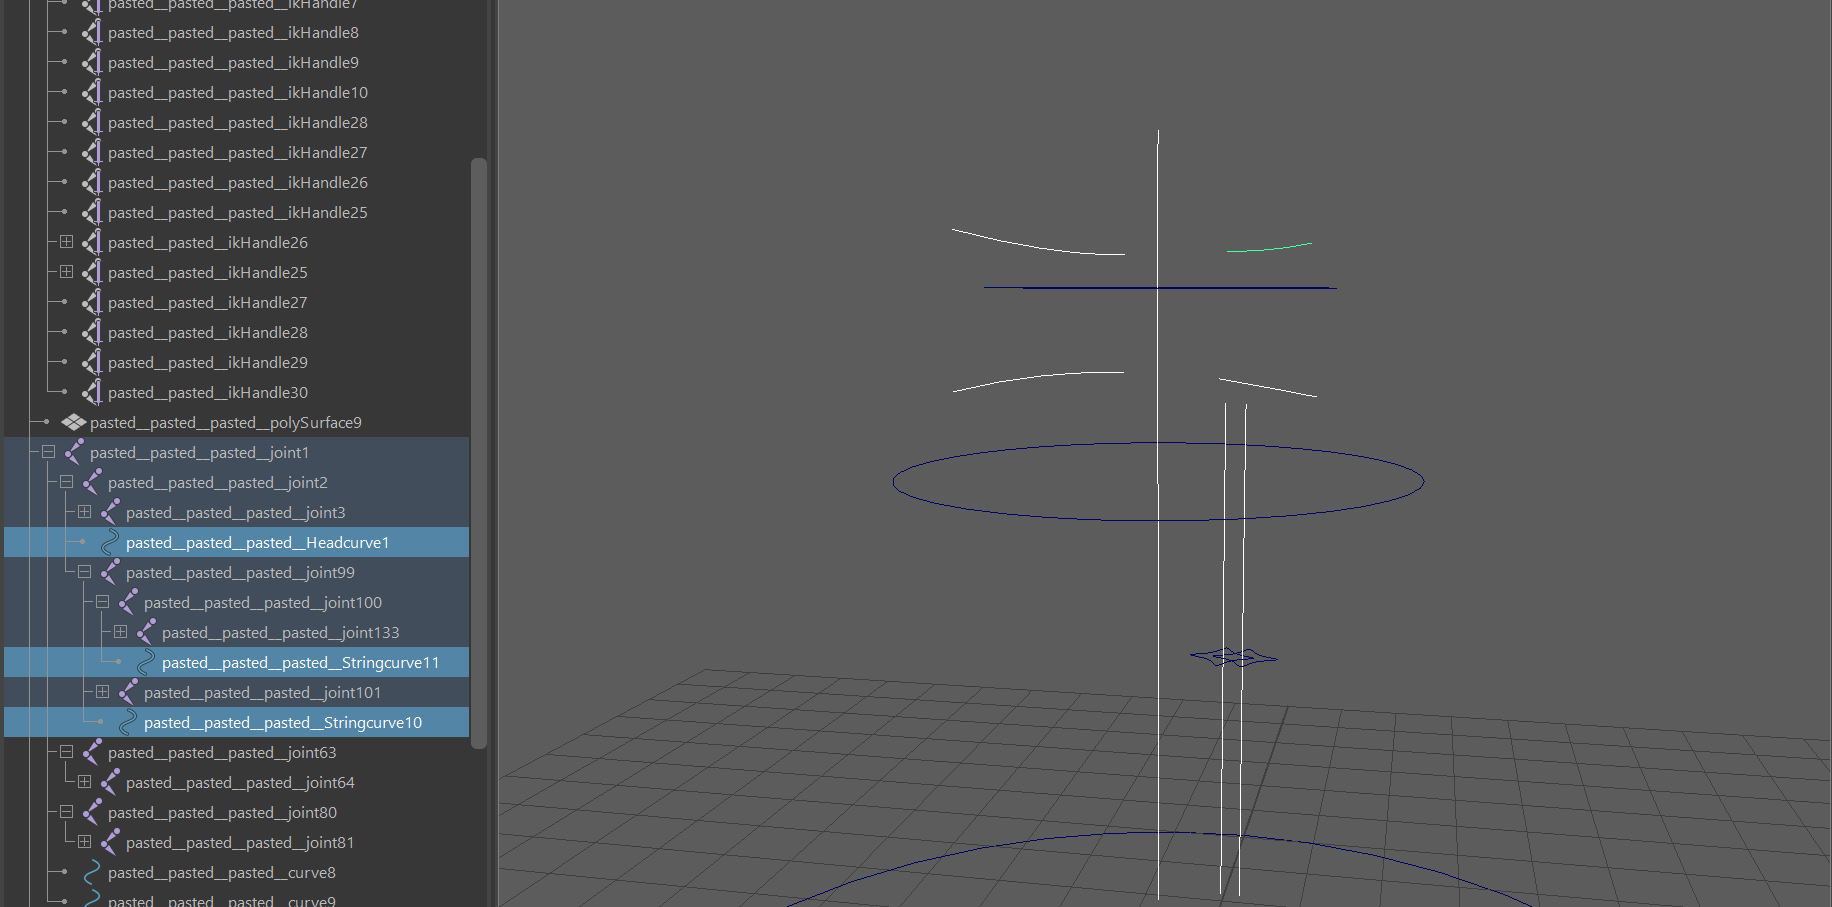
Figure 1: the curve generated by IK Spline Handle
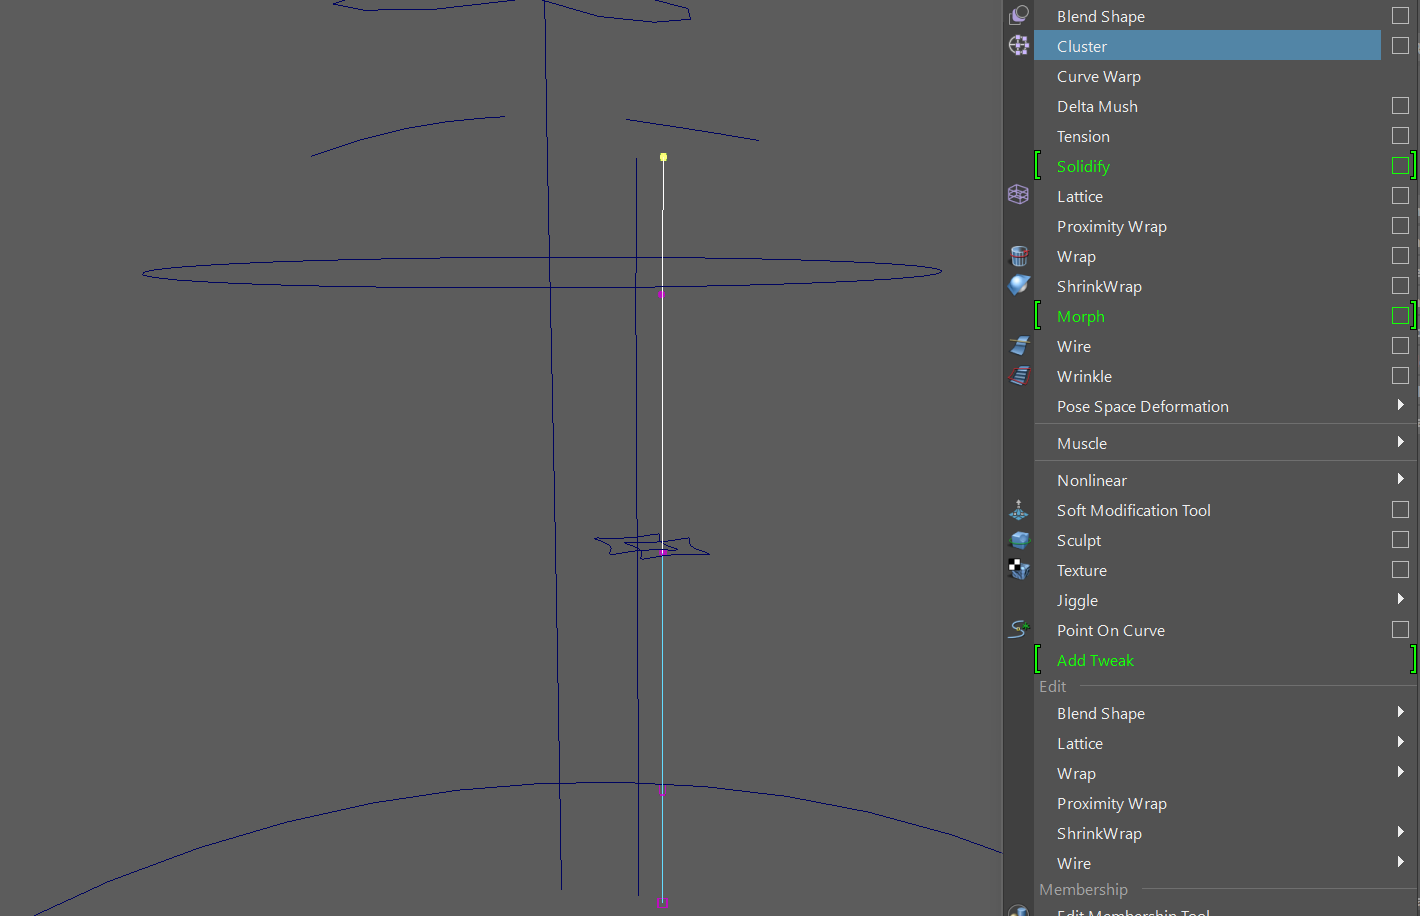
Figure 2: add cluster to control the vertex
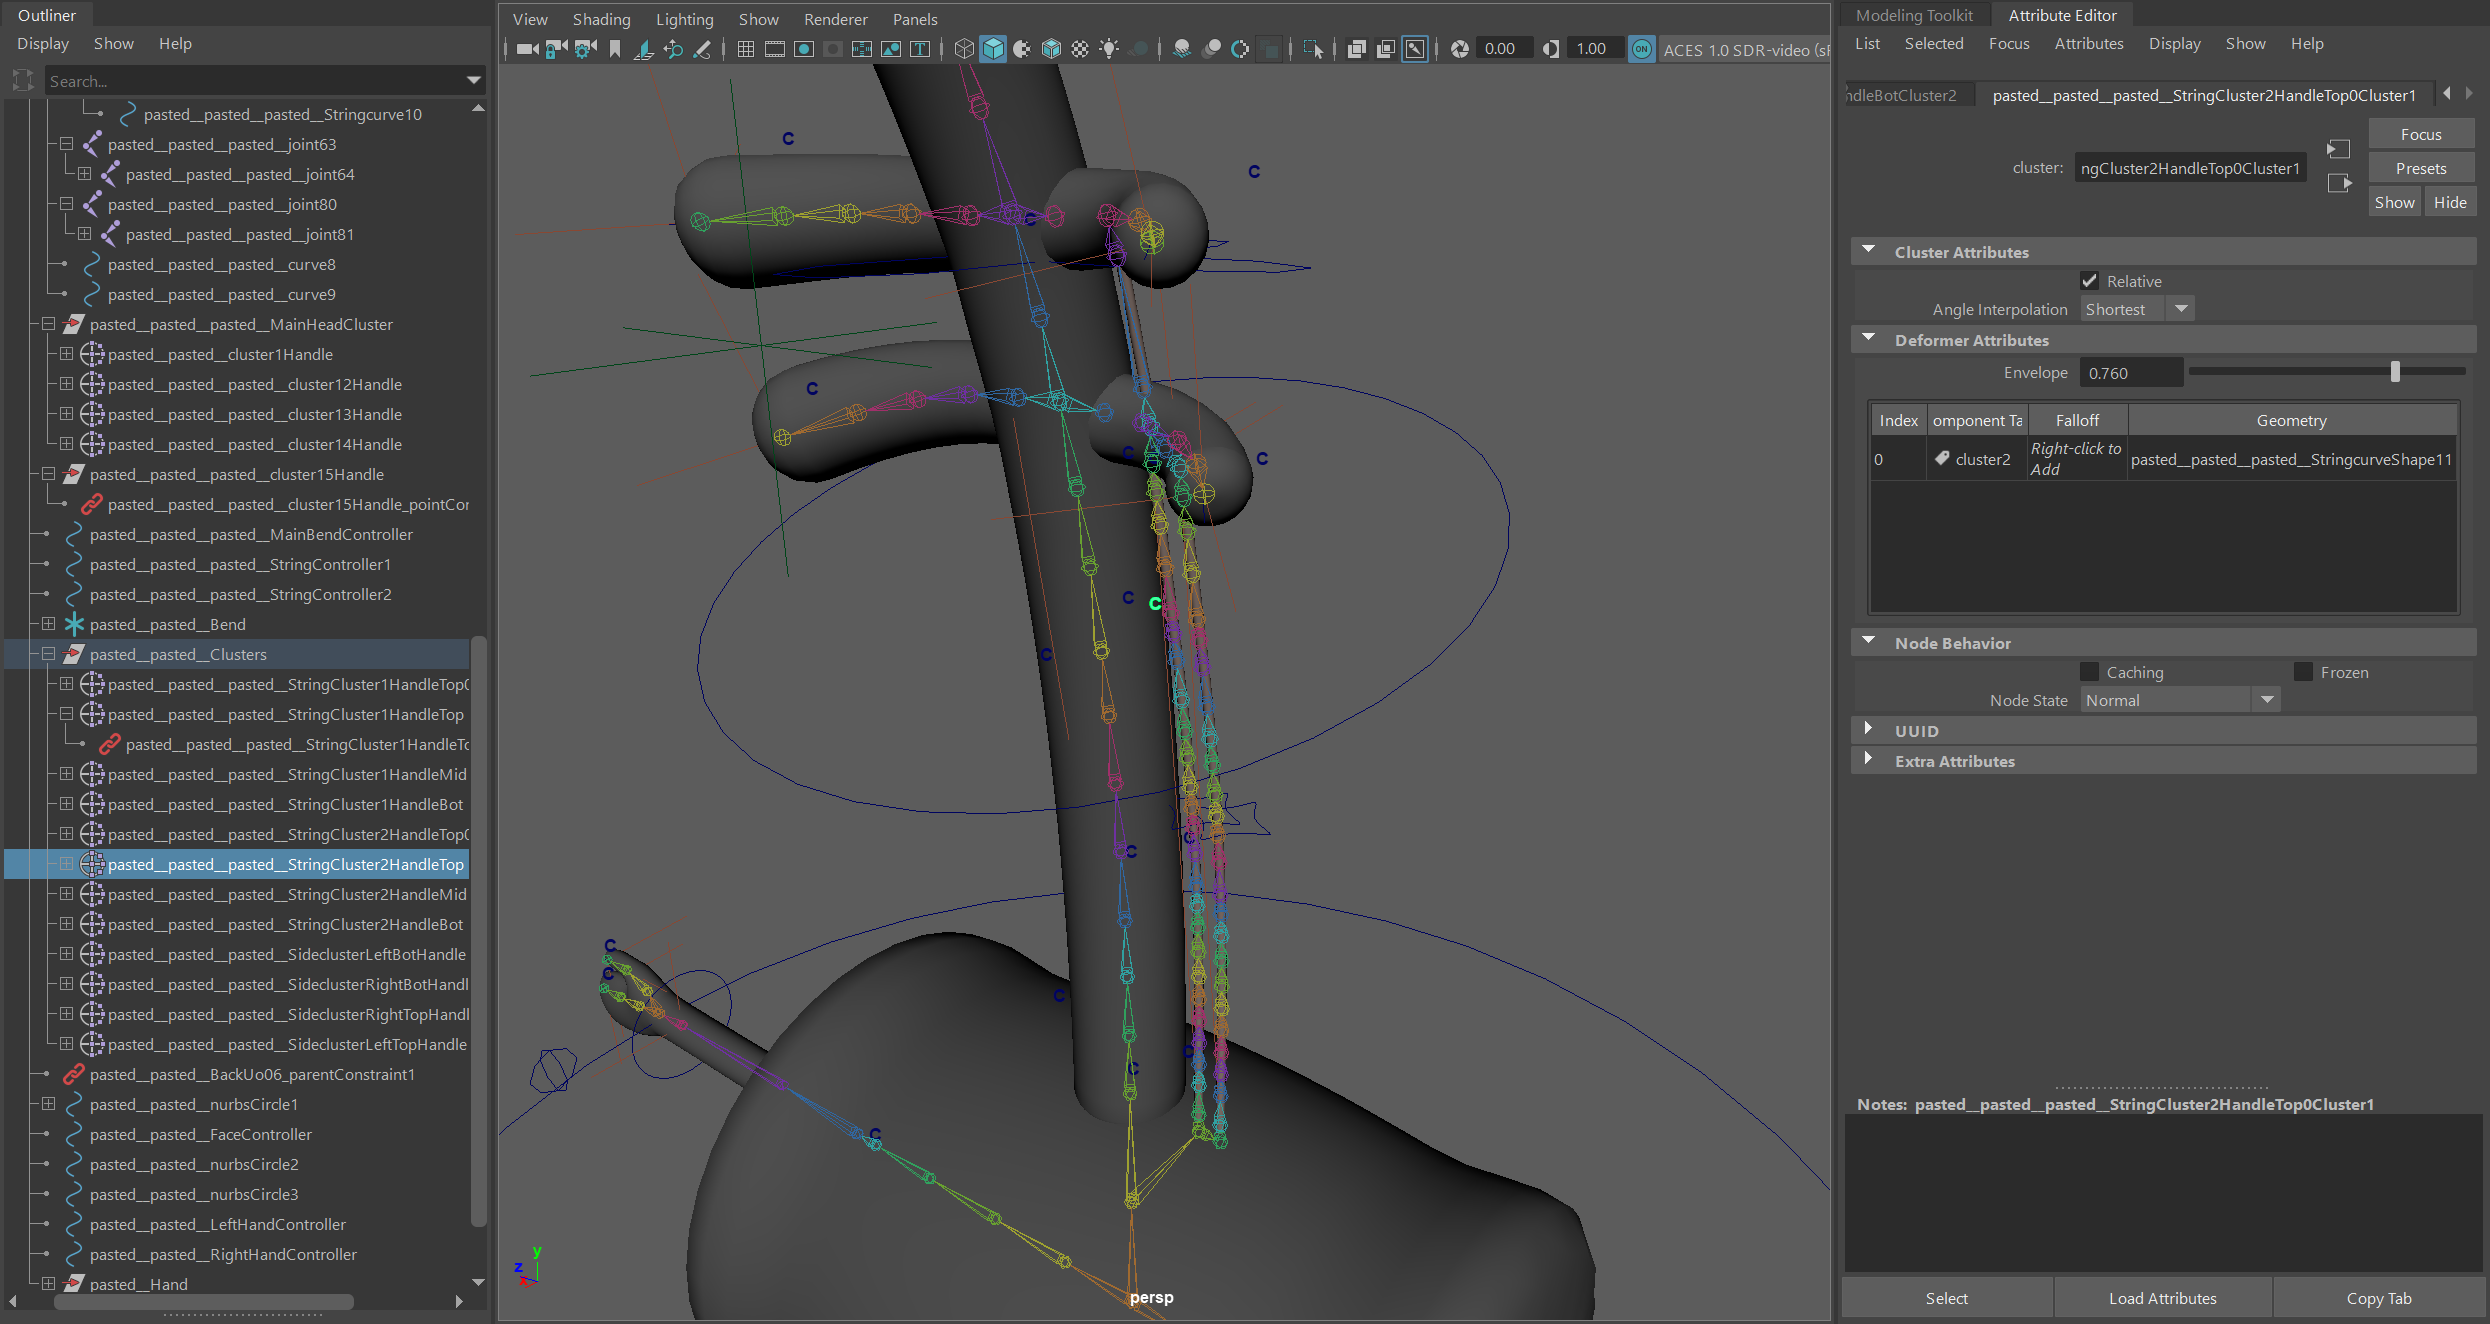
Figure 3: adjust the envelope
After part of the preparation, we had a certain division of labor, and I continued to be responsible for the scene lighting and lens.
There are relatively few academic papers on animation on the Internet,
and many available materials are also related to photography or film.
In the study of animation, I want to explore a separate targeted field.
Therefore, I want to explore its feasibility and specific operation methods in animation production based on lens knowledge.
I learned the term the language of the lens first time in Mercado’s book (2019) "The Filmmaker’s Eye" which actually took an insight into the scope of films. Nevertheless, these theories could be applied in animation as well.
Likewise, about the camera, different spatial distance of shots influences emotional and rational appeals (Kim, Lee & Choi, 2019) . As for the composition, Ward (2002) gave a definition of it and introduced the way to implement a good composition. When it comes to lighting, Loe and Rowlands (1996) presented a lighting design framework. These researches profoundly helped me theoretically and practically.
Material is a key element of the presentation. In the process of animation production,
I have more understanding of the material. Add normal maps for more realistic physics, add some reflection, metal, etc to make the image look better.
As you can see in the Graph Network map for the floor (Figure 1), there are base colour, roughness, bump properties attached to the map.
The physical effects before and after as shown in the picture are very obvious.
Material learning also laid a foundation for me to create better picture performance later.
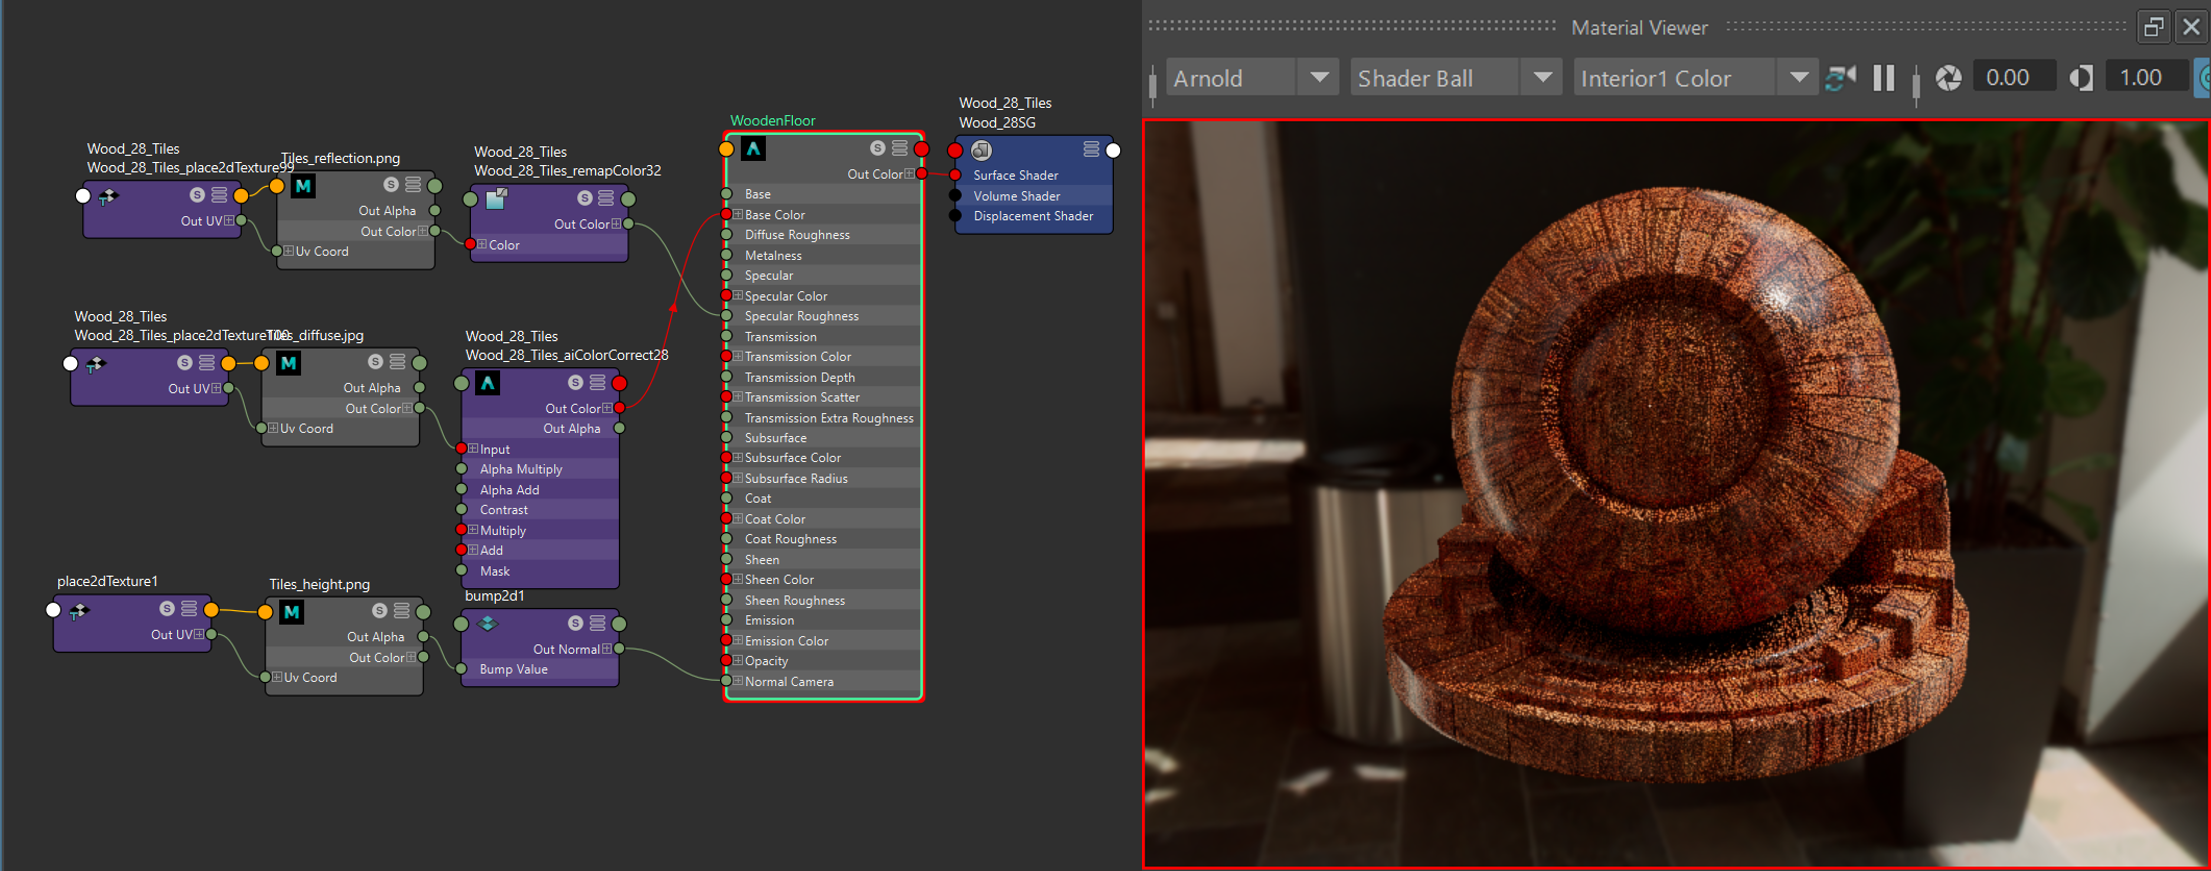
Figure 1: graph metwork of the floor material
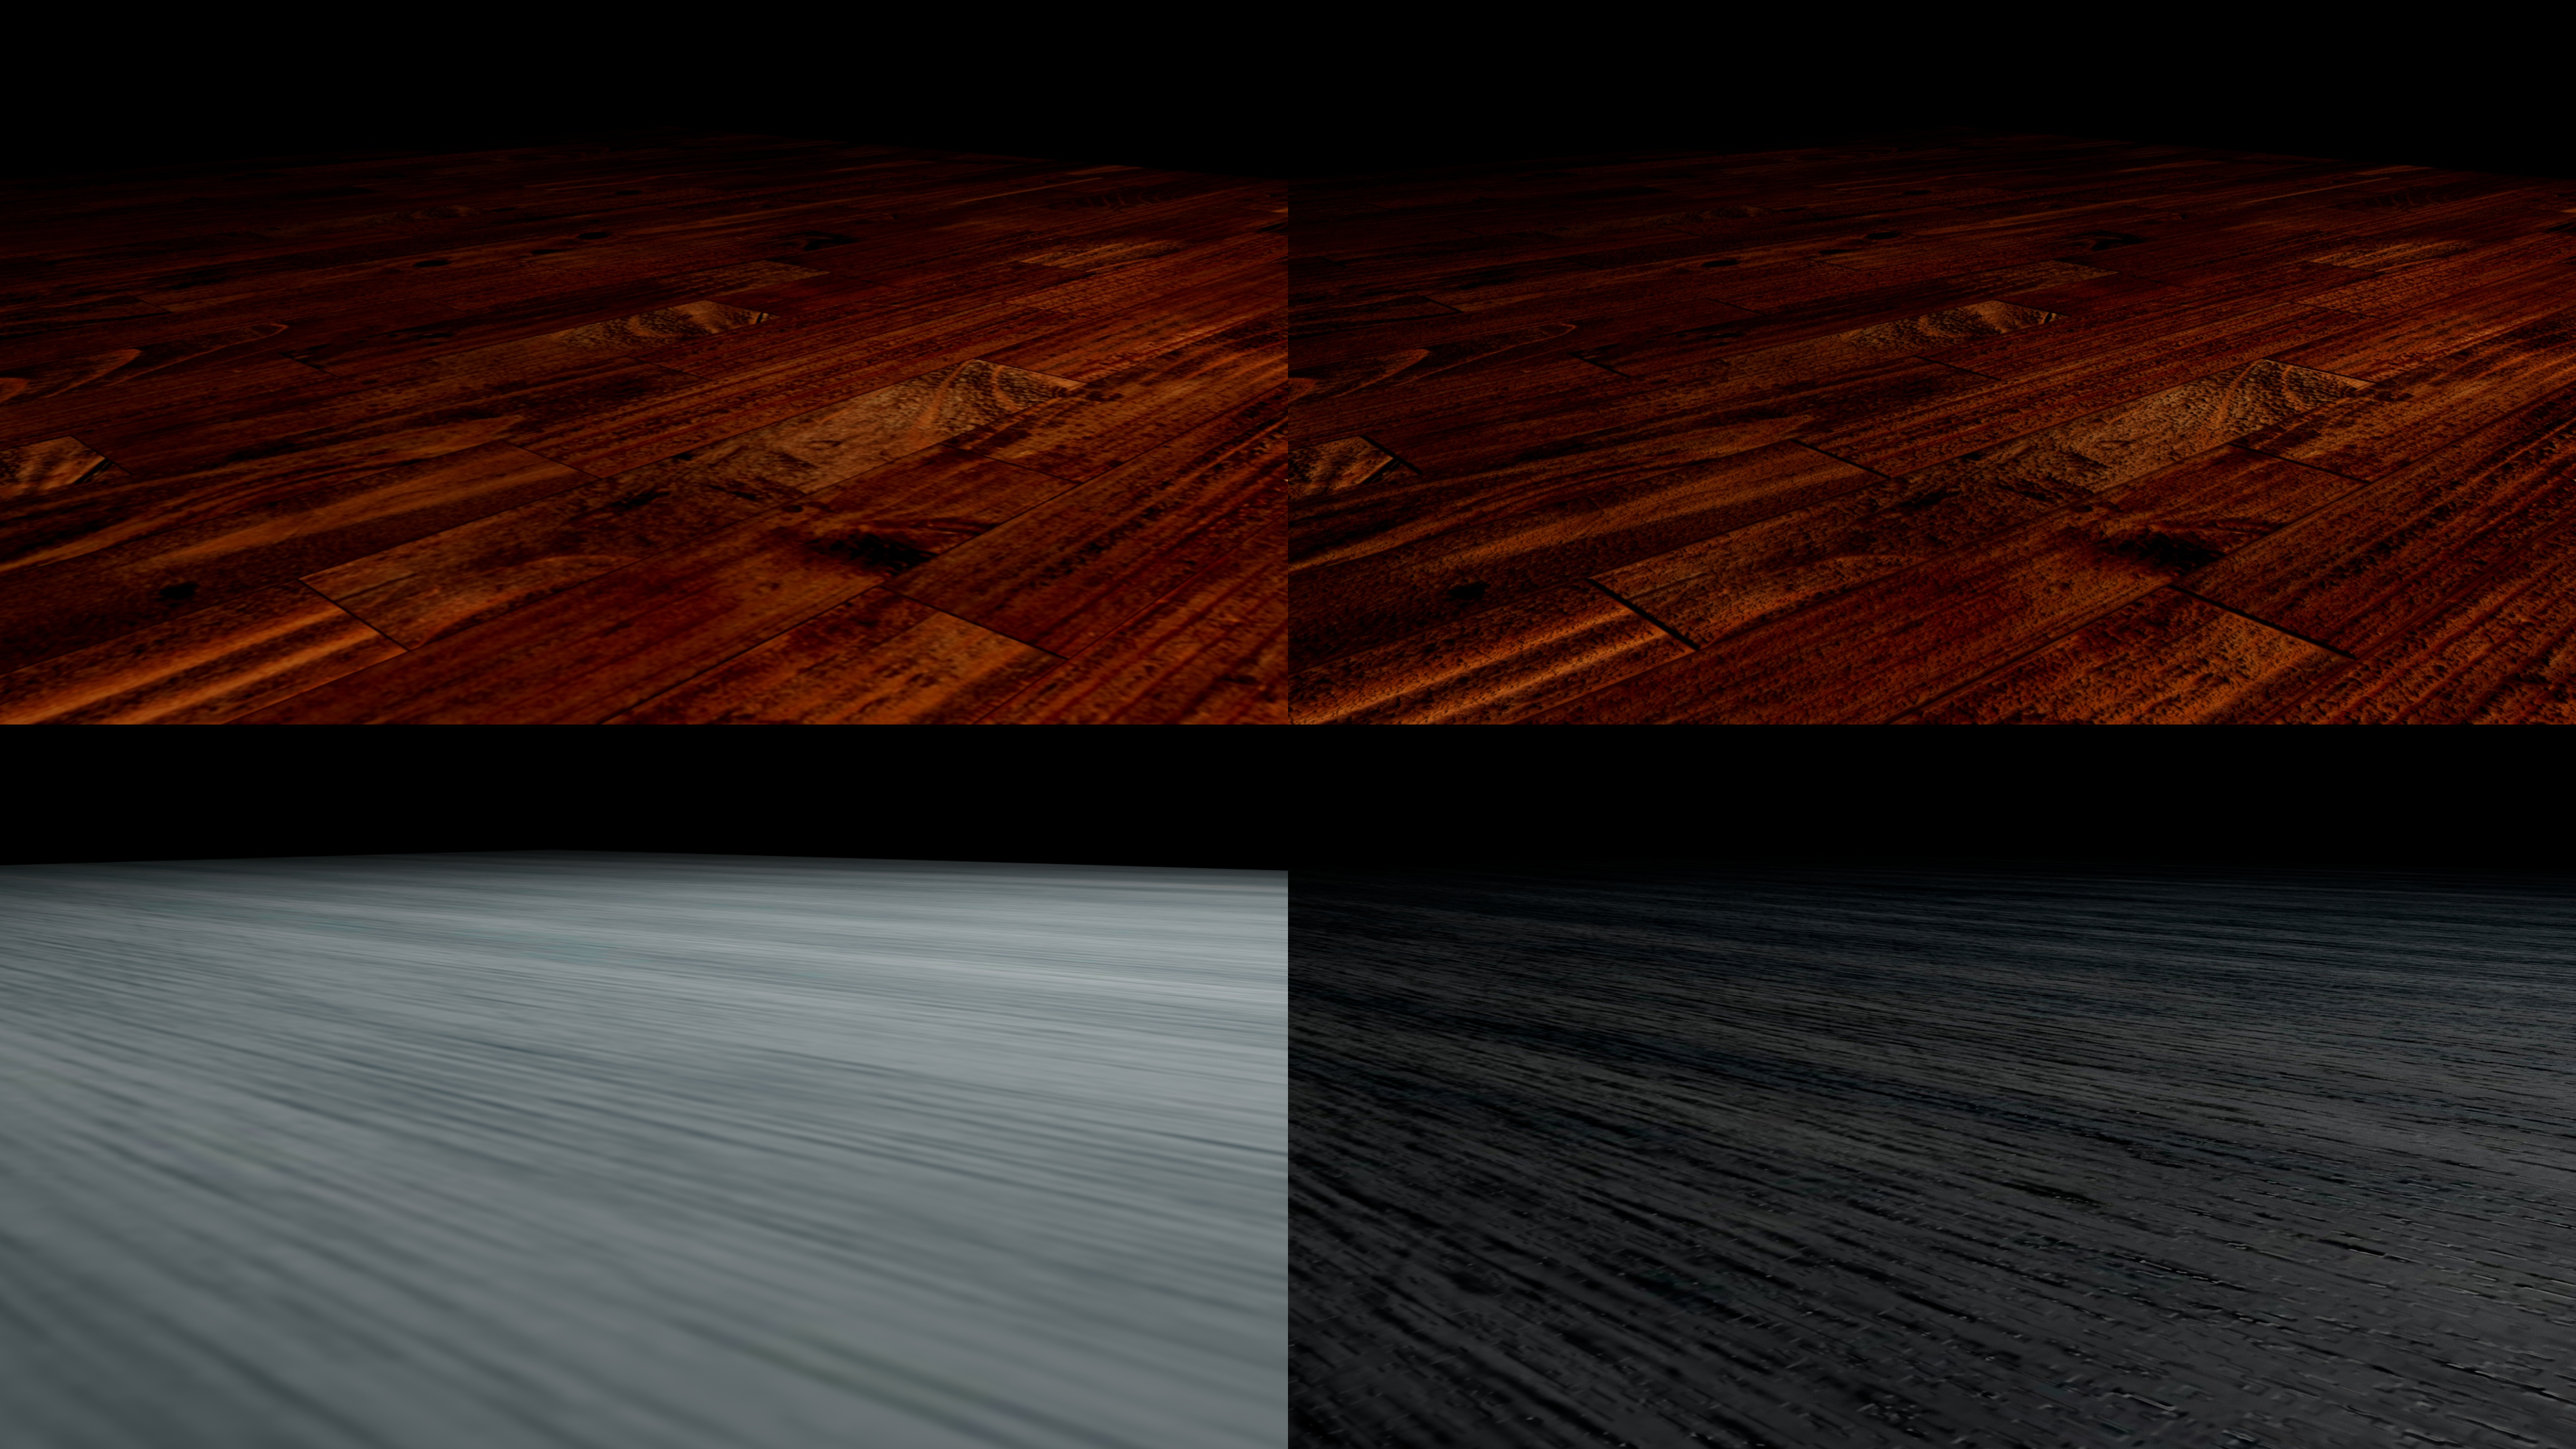
Figure 2: before (left) and after (right) adding bump texture
When making erhu jumps, I followed the basic animation rules.
Bouncing is an action in the form of a parabola, as shown in the figure.
The Y-axis of the animation curve is green in the form of a parabola.
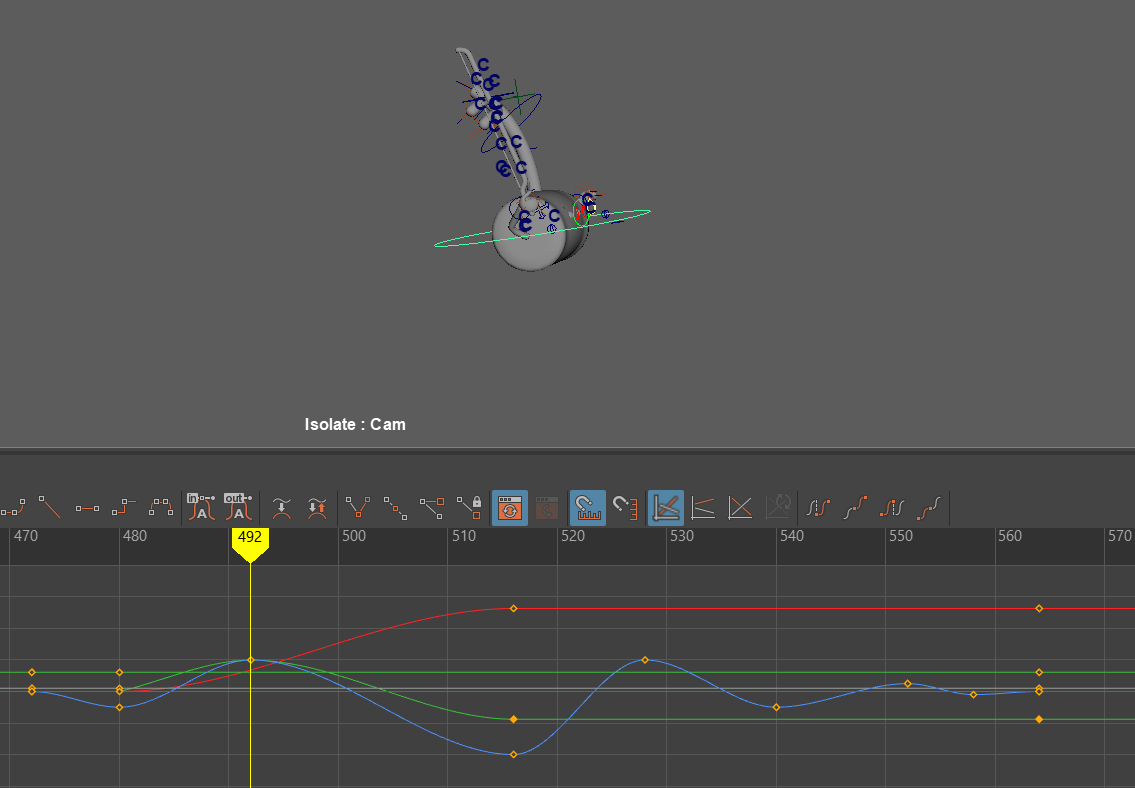
Figure 1: the animation curve of the jumping of erhu
The rule of thirds is the most common method to draw the audience’s eye to the centre of interest
(Maleš, Heđi, & Grgić, 2012)
.
The golden section can help achieve pleasing visual demonstration.
Framing is another compositional tool.
These conceptions are significant for my selections of certain frames of the animation.
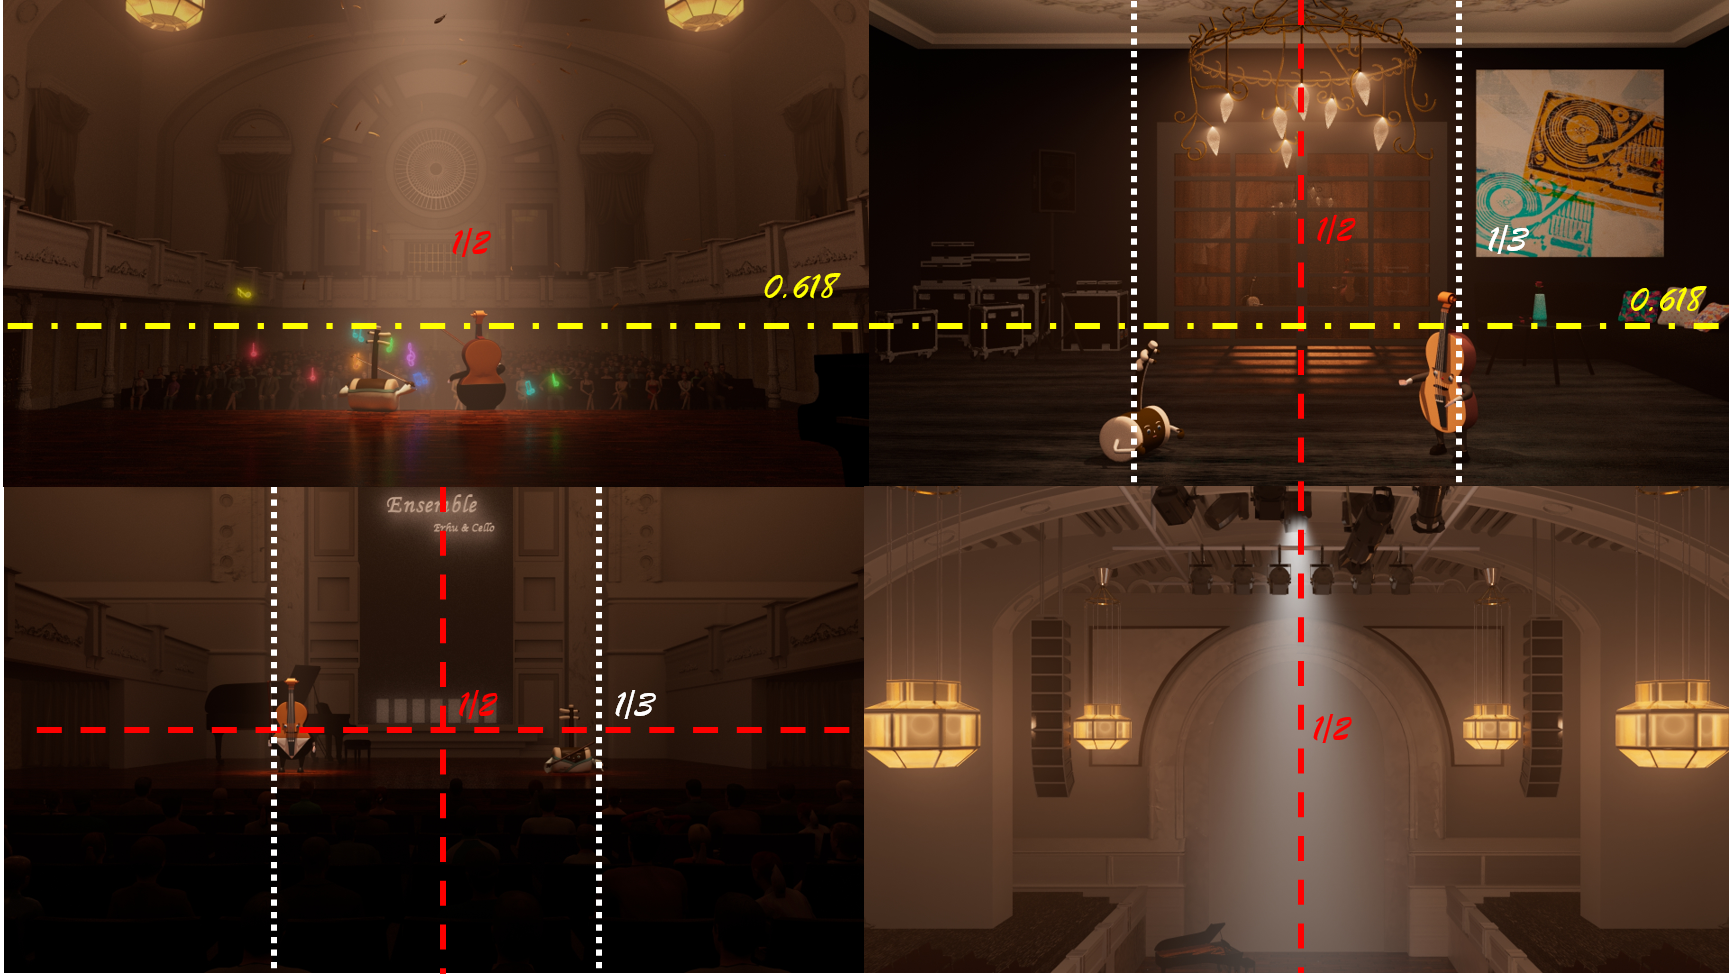
Figure 1: the compositions utilized in the animation
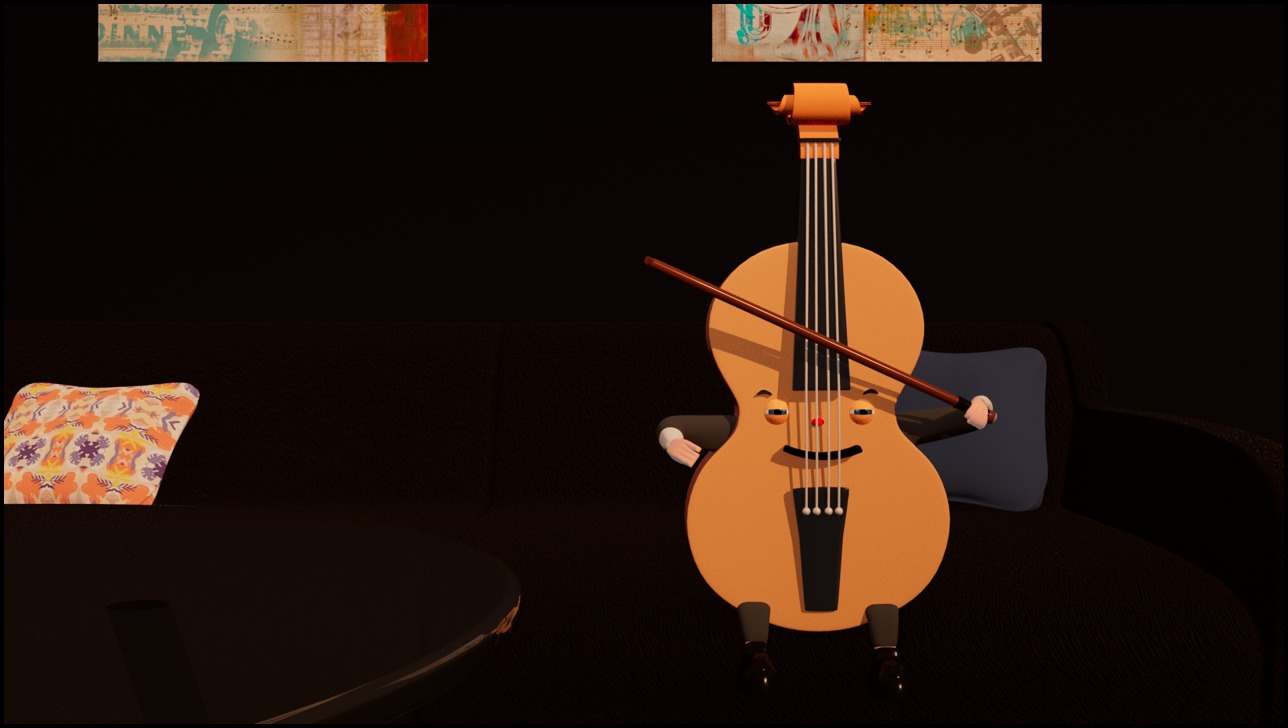
Erhu represents traditional Chinese musical instruments and I added many things with Chinese elements,
such as Chinese-style tables and chairs, Chinese porcelain and several representative instruments, such as Guzheng,
Pipa and Huqin. Likewise, Similarly, in the violin part, more representative western elements are added,
such as Western furniture and wall murals of other Western Musical Instruments.
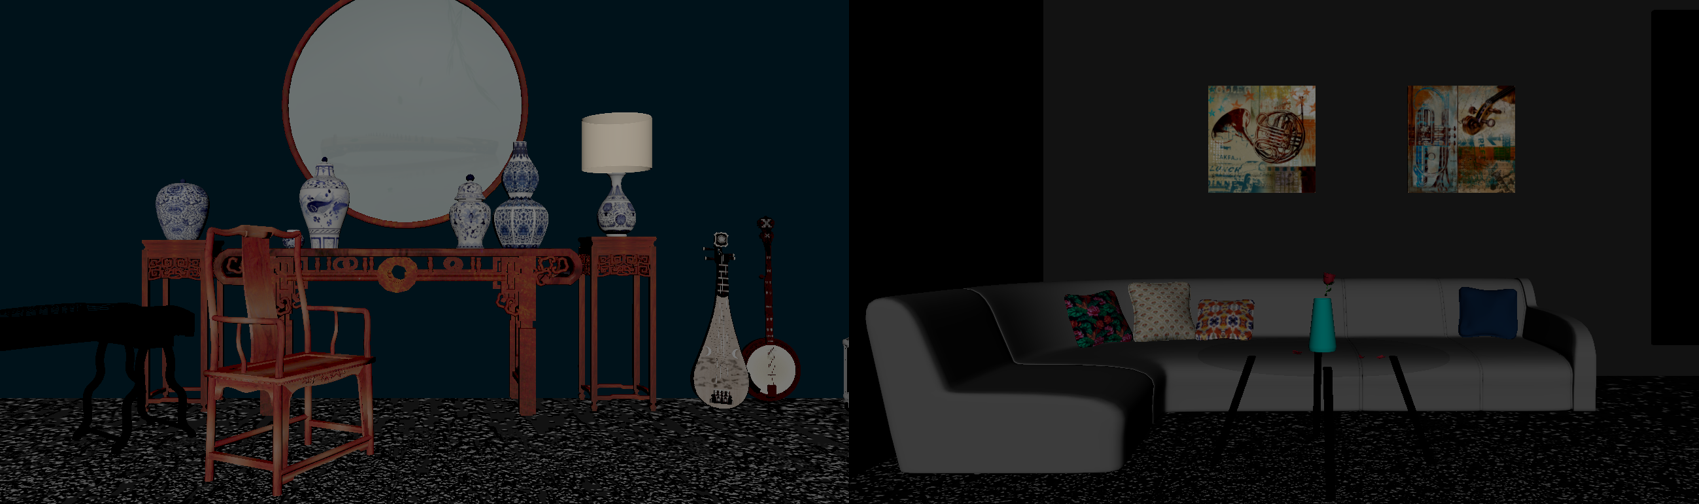
Figure 1: cultural elements in the first scene
In this part, we started to move forward, and I started to work on the second scene.
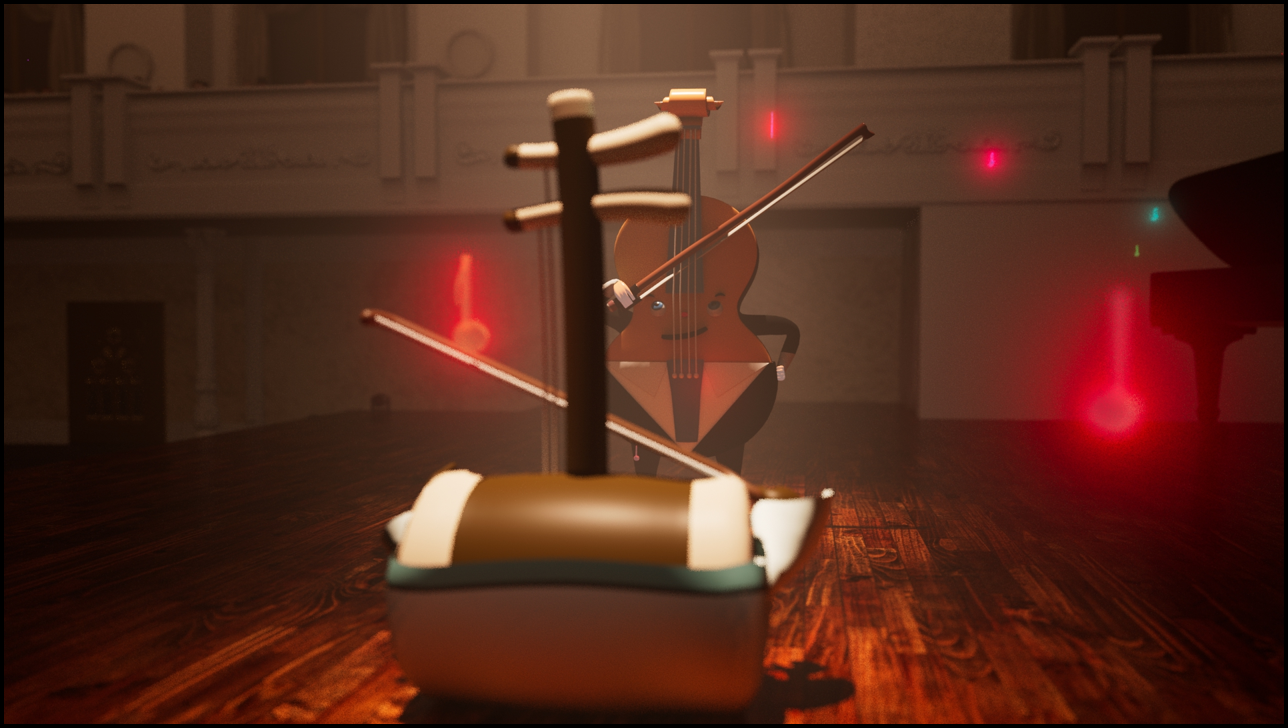
For the searchlight part, I attached a lot of disk light to the searchlight to create a realistic stage effect.
In the later animation production, spotlight made a great contribution to our animation effect,
and also provided support for my theory. Using light can greatly improve our ability and
efficiency to convey information through animation, focus light, and create visual centers.
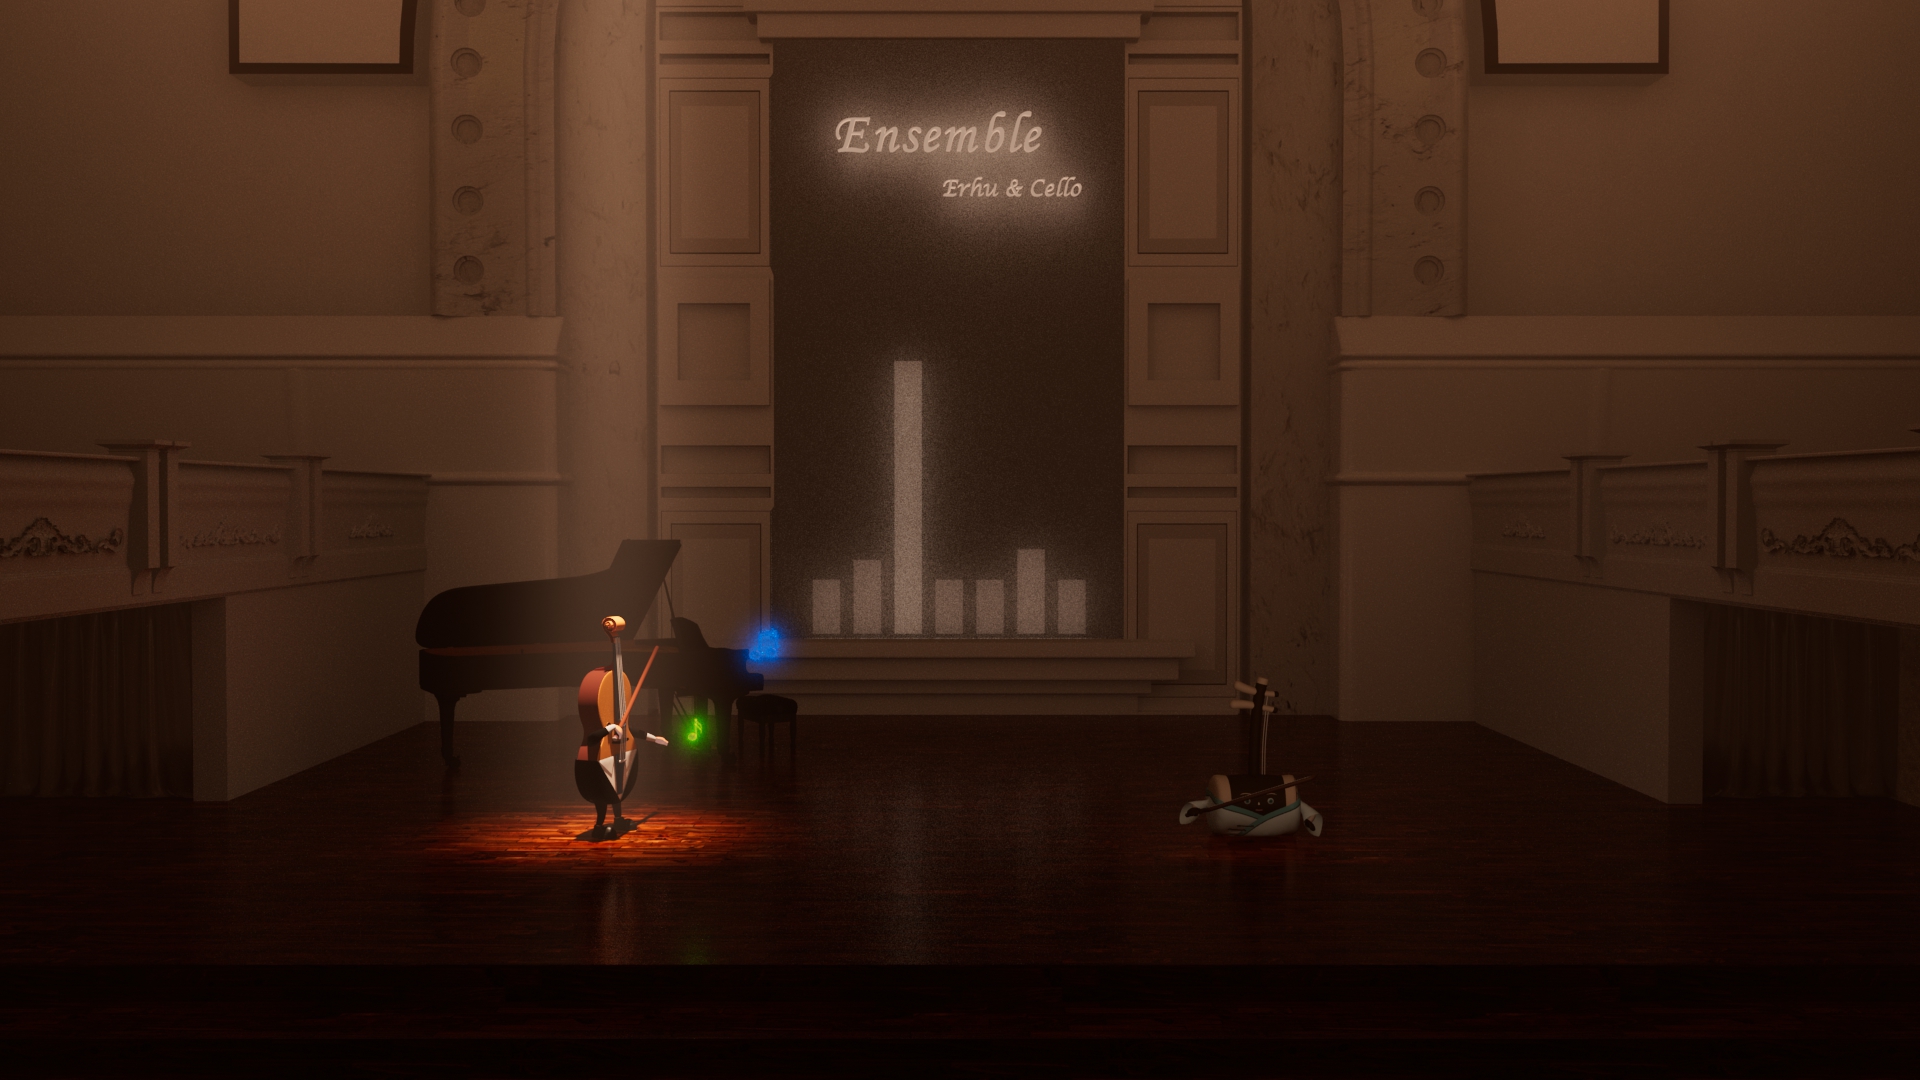
Figure 1: using spotlight to highlight the character
The implementation of the constrain of the spotlight is not a easy work. As we can tell from the Figure 2, the spotlight group incorporates three elements, the lighting model, the disk light and the circular curve controller. Firstly, I adjust the position and rotation of the light according with the light mesh, then, group them. After that, I use the circle as an aimconstrain of the group.
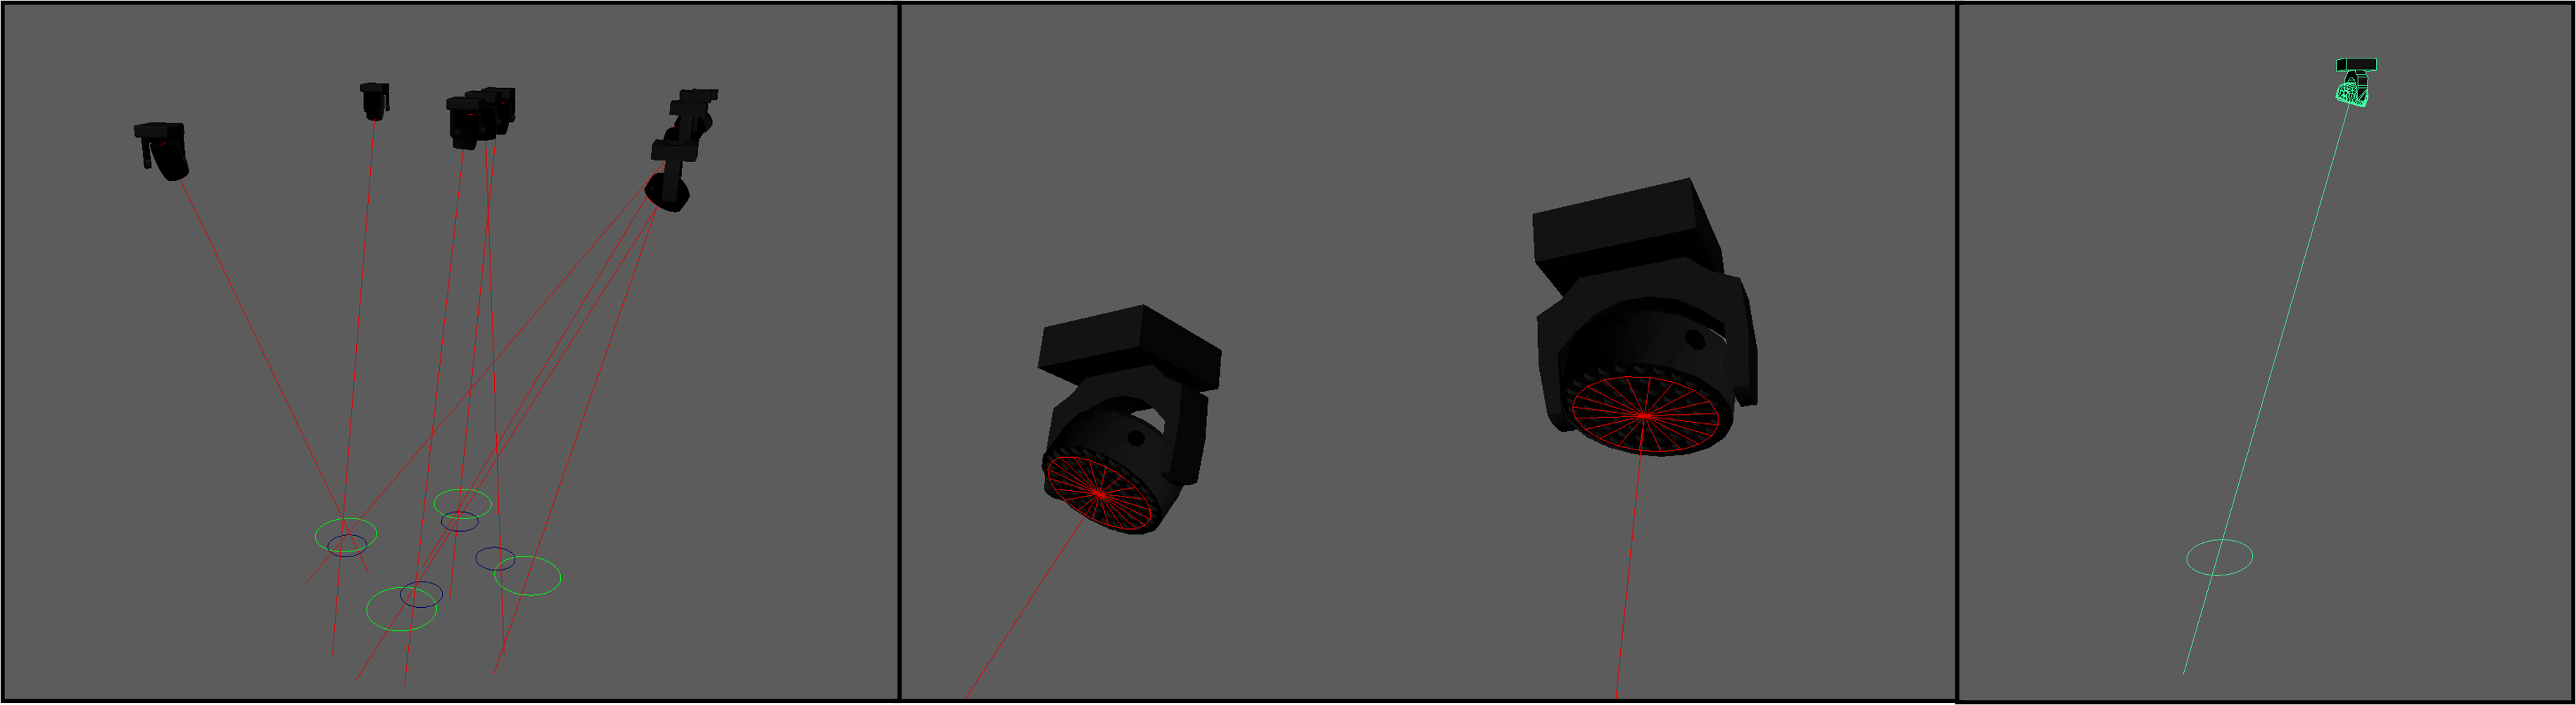
Figure 2: contrain of the spotlight
Initially, our notes were designed anthropomorphic, but they were not well implemented by our group member. In this case,
I remade them in a formal way which turned good outcome in the end. I made them followed the reference picture. Most of the notes
were made by the extrude method using curves.
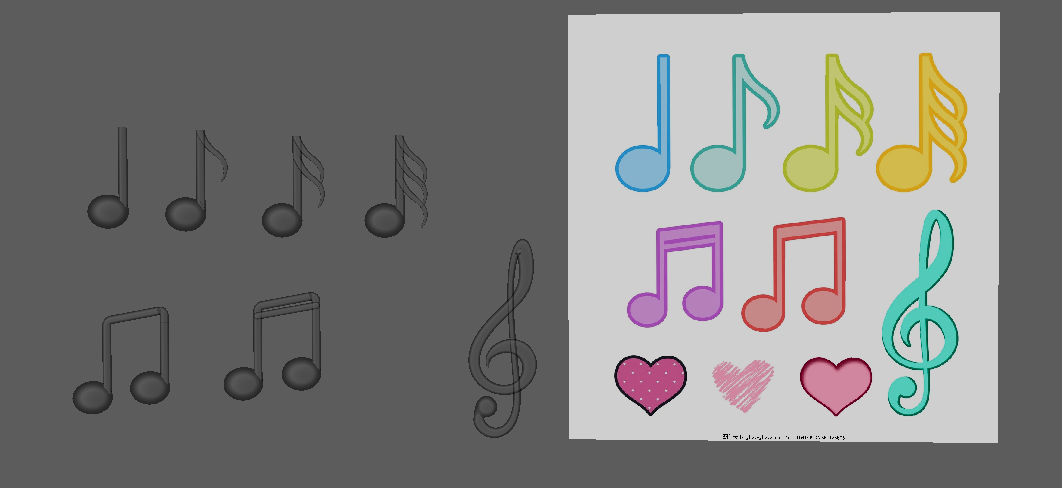
Figure 1: notes modeling
The different one is the last note Xi.
1. Draw the curve according to the graph, and then rebuild and smooth the curve. (Figure 2)
2. Duplicate a new curve and straighten, then delete the history.(Figure 3)
3. Select the original curve and the new line and use BlendShape  so that the line can be changed to the shape of the original curve by adjusting the values.
4. Create a cylinder with enough sections to bend.(Figure 4)
5. Using the Wire  deformer, select the cylinder and press Enter, then select the line and press Enter.
6. Set crossing effect in cylinder inputs to 1.
7. Adjust curve in the blendShape of the straight line to 1 to complete the production of this note.(Figure 5)
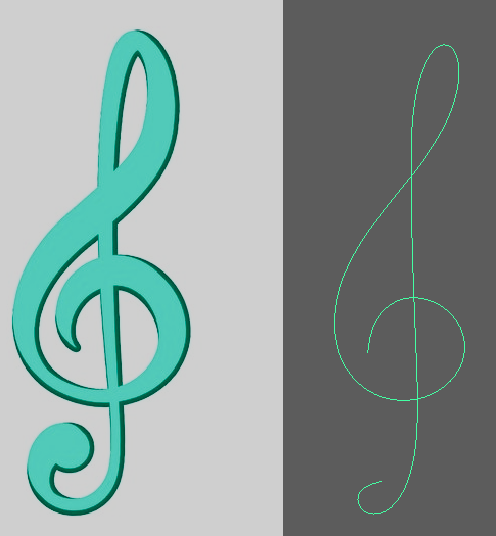
Figure 2: draw a curve
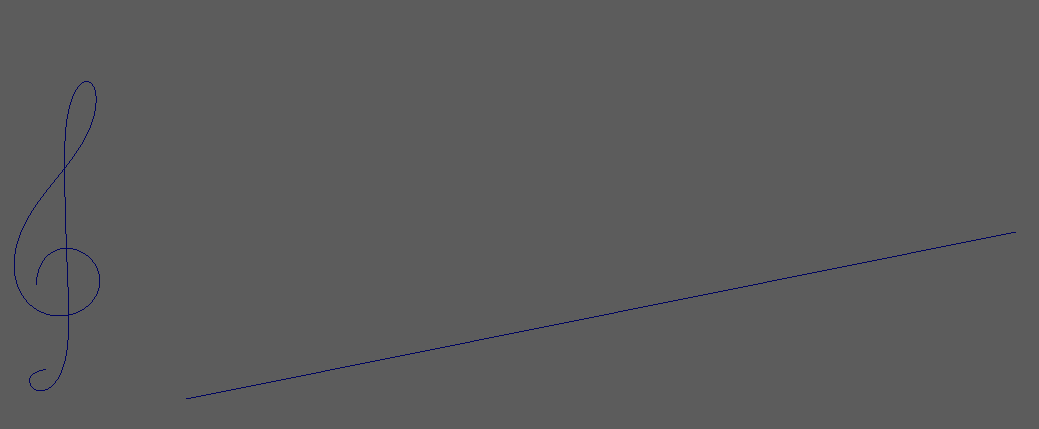
Figure 3: duplicate a new curve and straighten
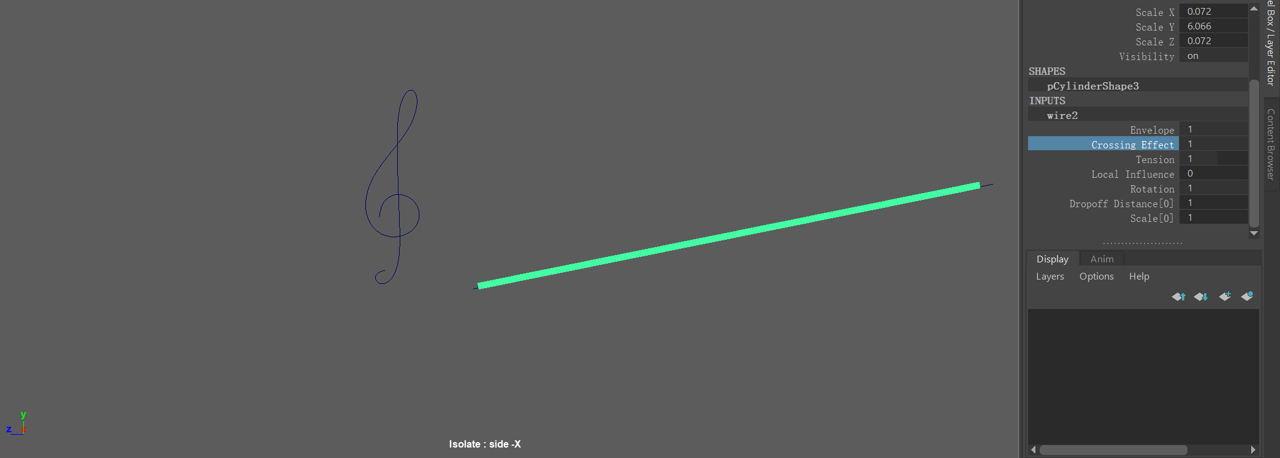
Figure 4: create a cylinder
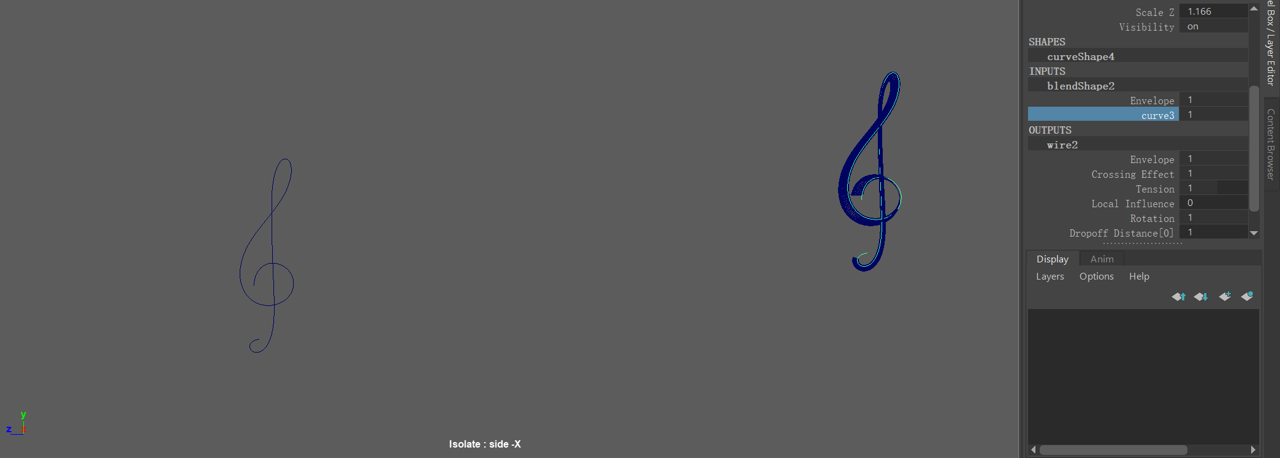
Figure 5: use Blend Shape and Wire to make
As demonstrated in Figure 1, the floating Stave makes the ensemble nicer. The making process is similar to that of the notes. The difference is that I set keys for the
moving lightig mesh. Note that we need to set its movement within the object space in order to promise that it can move paralleling with the designed curve (Figure 2).

Figure 1: the shining strave
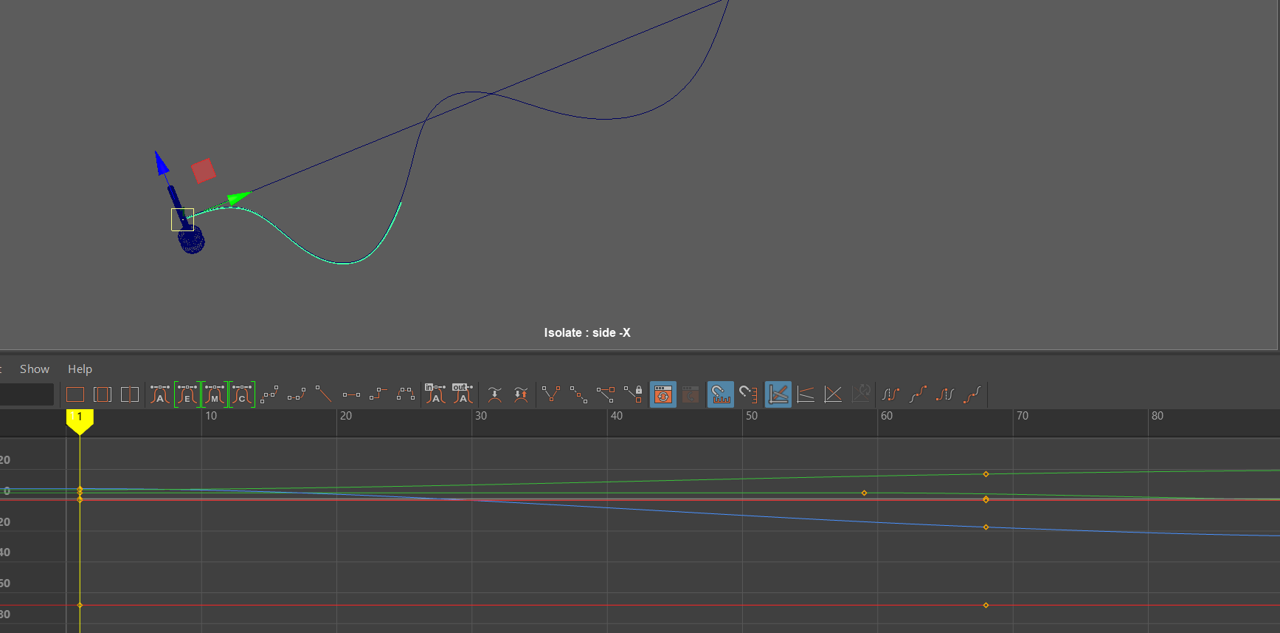
Figure 2: animated by the object space
After the animation of the first scene was completed, we further divided the work.
In the animation of the second scene, I was still responsible for the scene design, then responsible for the lighting and camera,
and also made the walking animation of the entrance.
I refer to the Angry Animator-tutorial-2:walk cycle (Figure 1) mentioned in the course when making the walk. Walking mainly consists of three key parts. The first is translation. When WALKING, I let the master controller move at a uniform speed. Then each step, the displacement of one foot in the same period of time is the same offset as the displacement of the controller, in order to keep static. Plus, the height of the character is also the lowest when the foot lands and the highest when the foot is lifted.
Figure 1: Angry Animator -tutorial-2 : walk cycle
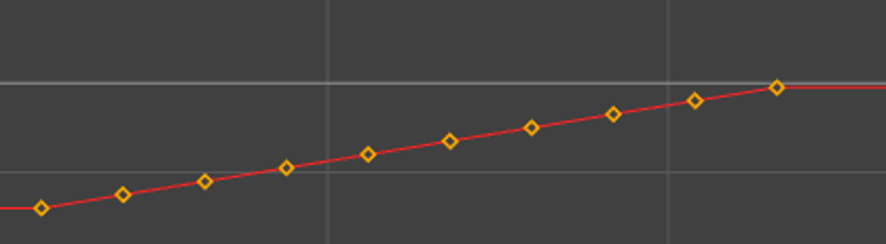
Figure 2: the curve of the main translation offset
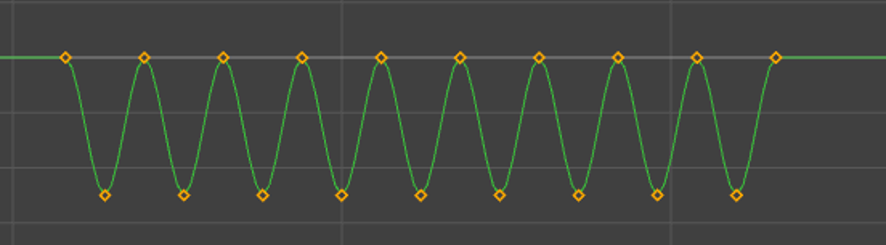
Figure 3: the curve of the height translation offset
Figure 4: the curve of the foot translation offset

Figure 5: walking of Cello
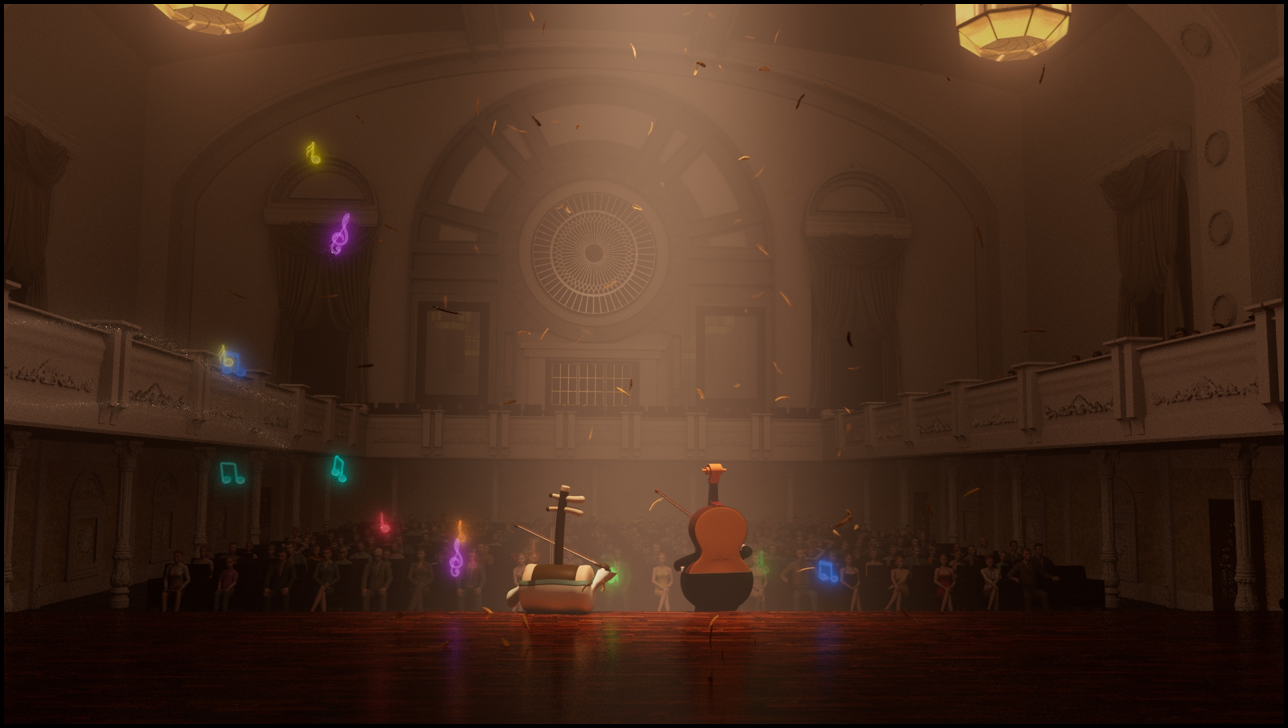
When making the opening shot, I substituted the scene and character distribution from distant to close-up,
and the lighting changed from bright to dark, and then the spotlight was placed on the protagonist.
Use lighting to highlight the characters and draw the audience's attention and visual interest. Taking Cello as an example,
I included Both Cello and the audience in the picture with a north side shot from walking and following to turning around,
so as to make the shot show more information and implement "informative" animation as I want to research.
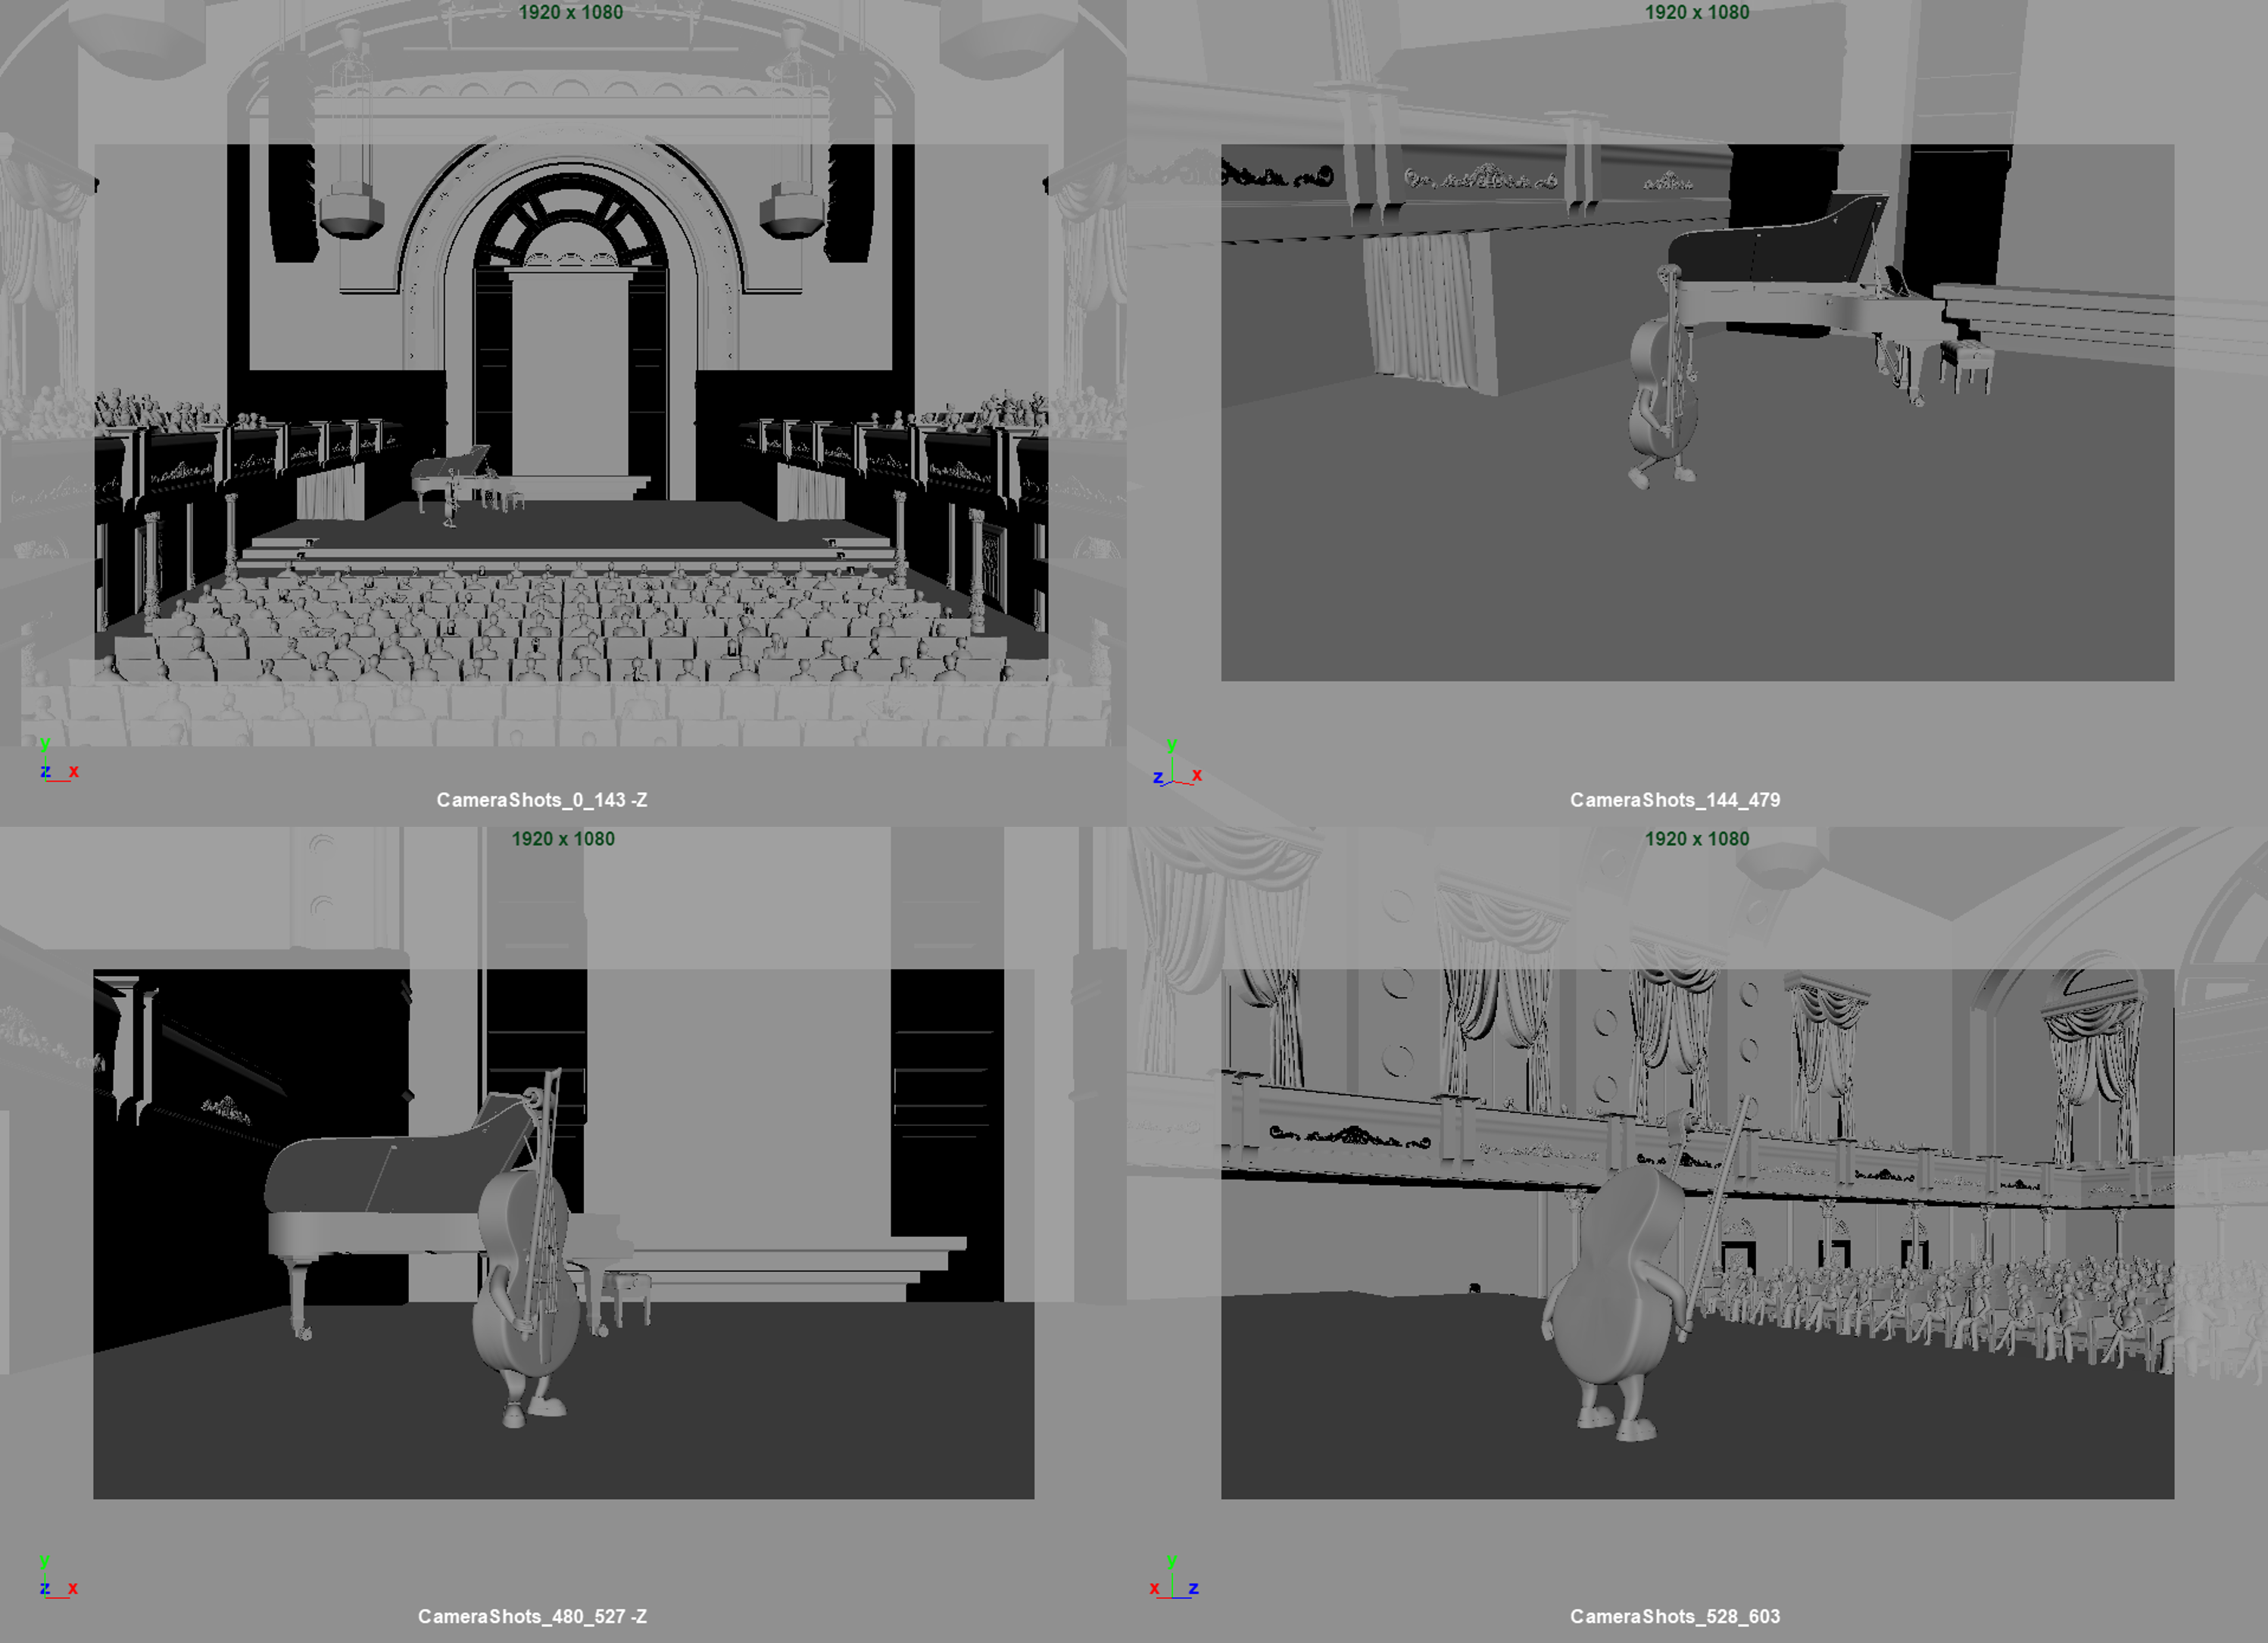
Figure 1: camera setting in the beginning
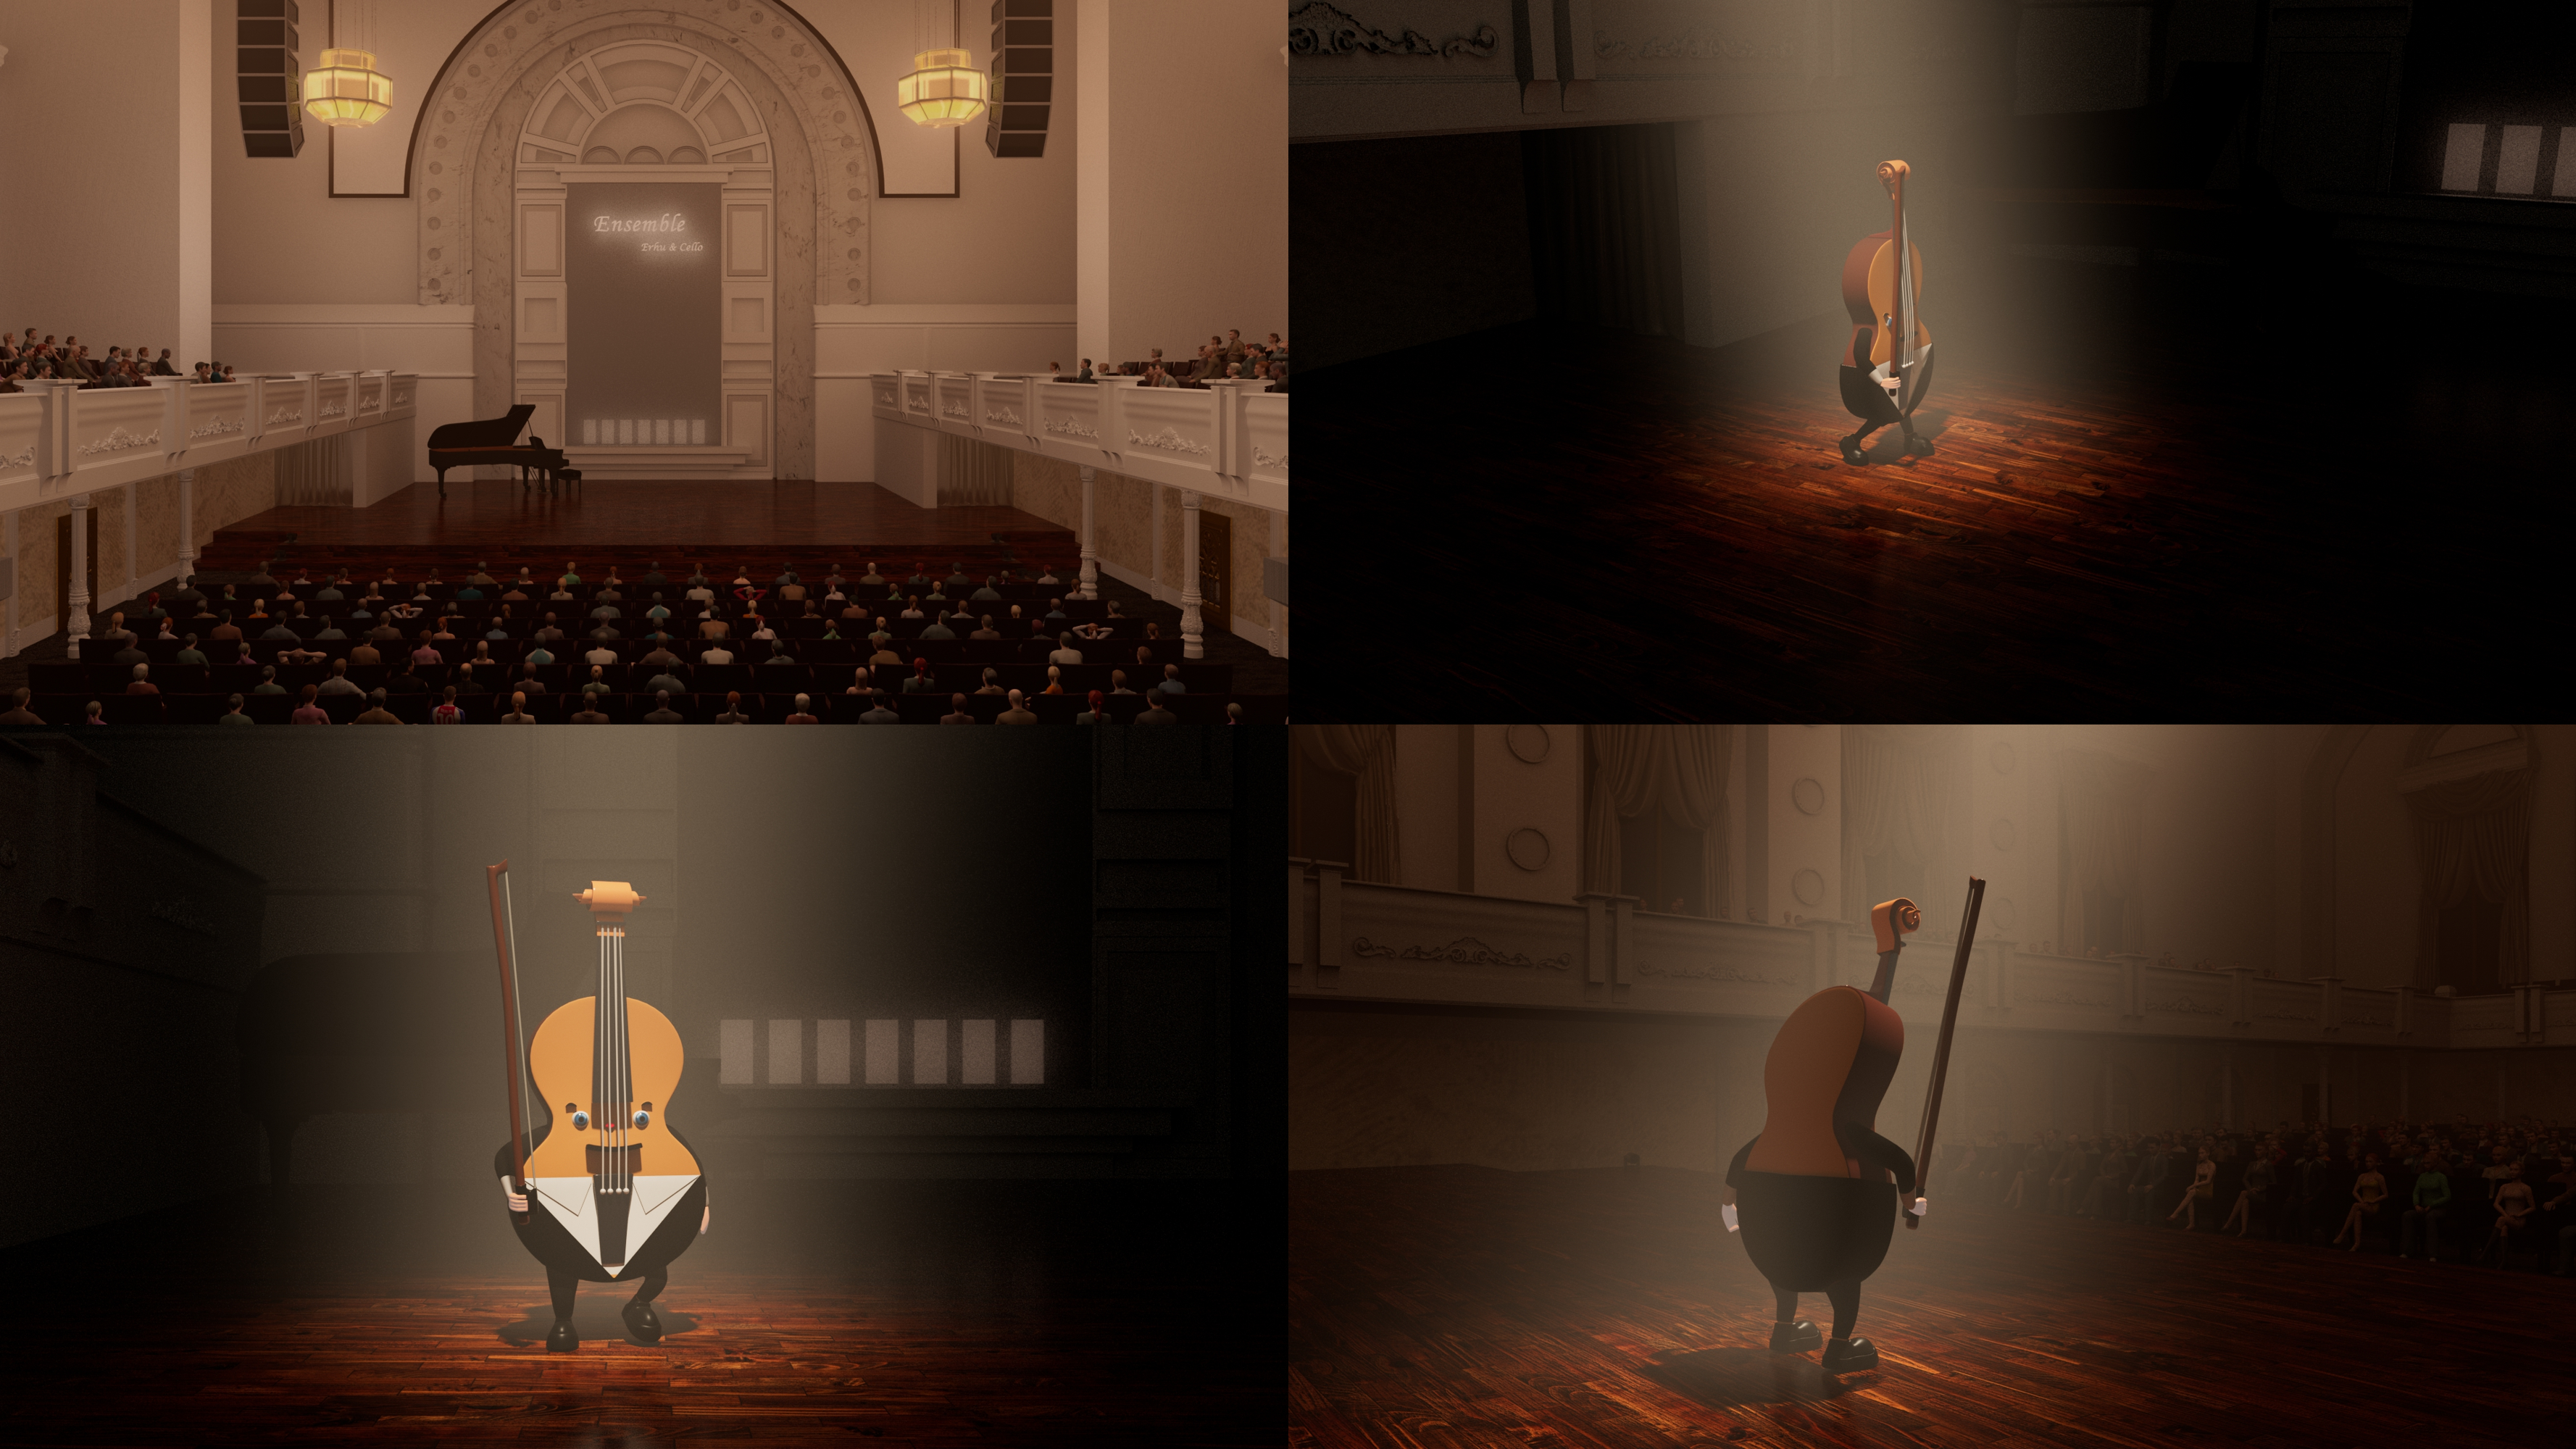
Figure 2: different lighting to attract the audience
I added some audience previously into the hall to fill the chairs, but we need to use some more audience to foil the plot,
and let the animation content more rich. I add shots of the audience when the plot changes. They have exclusive animation, such as
admiration at the beginning, beating with the music,and commenting when the music turns bad.
For each shot of the audience, I carried out separate lighting and camera Settings. Depth of field (DOV) was mostly used to highlight the individual audience,
and the combination of static and moving shots made the picture more vivid.
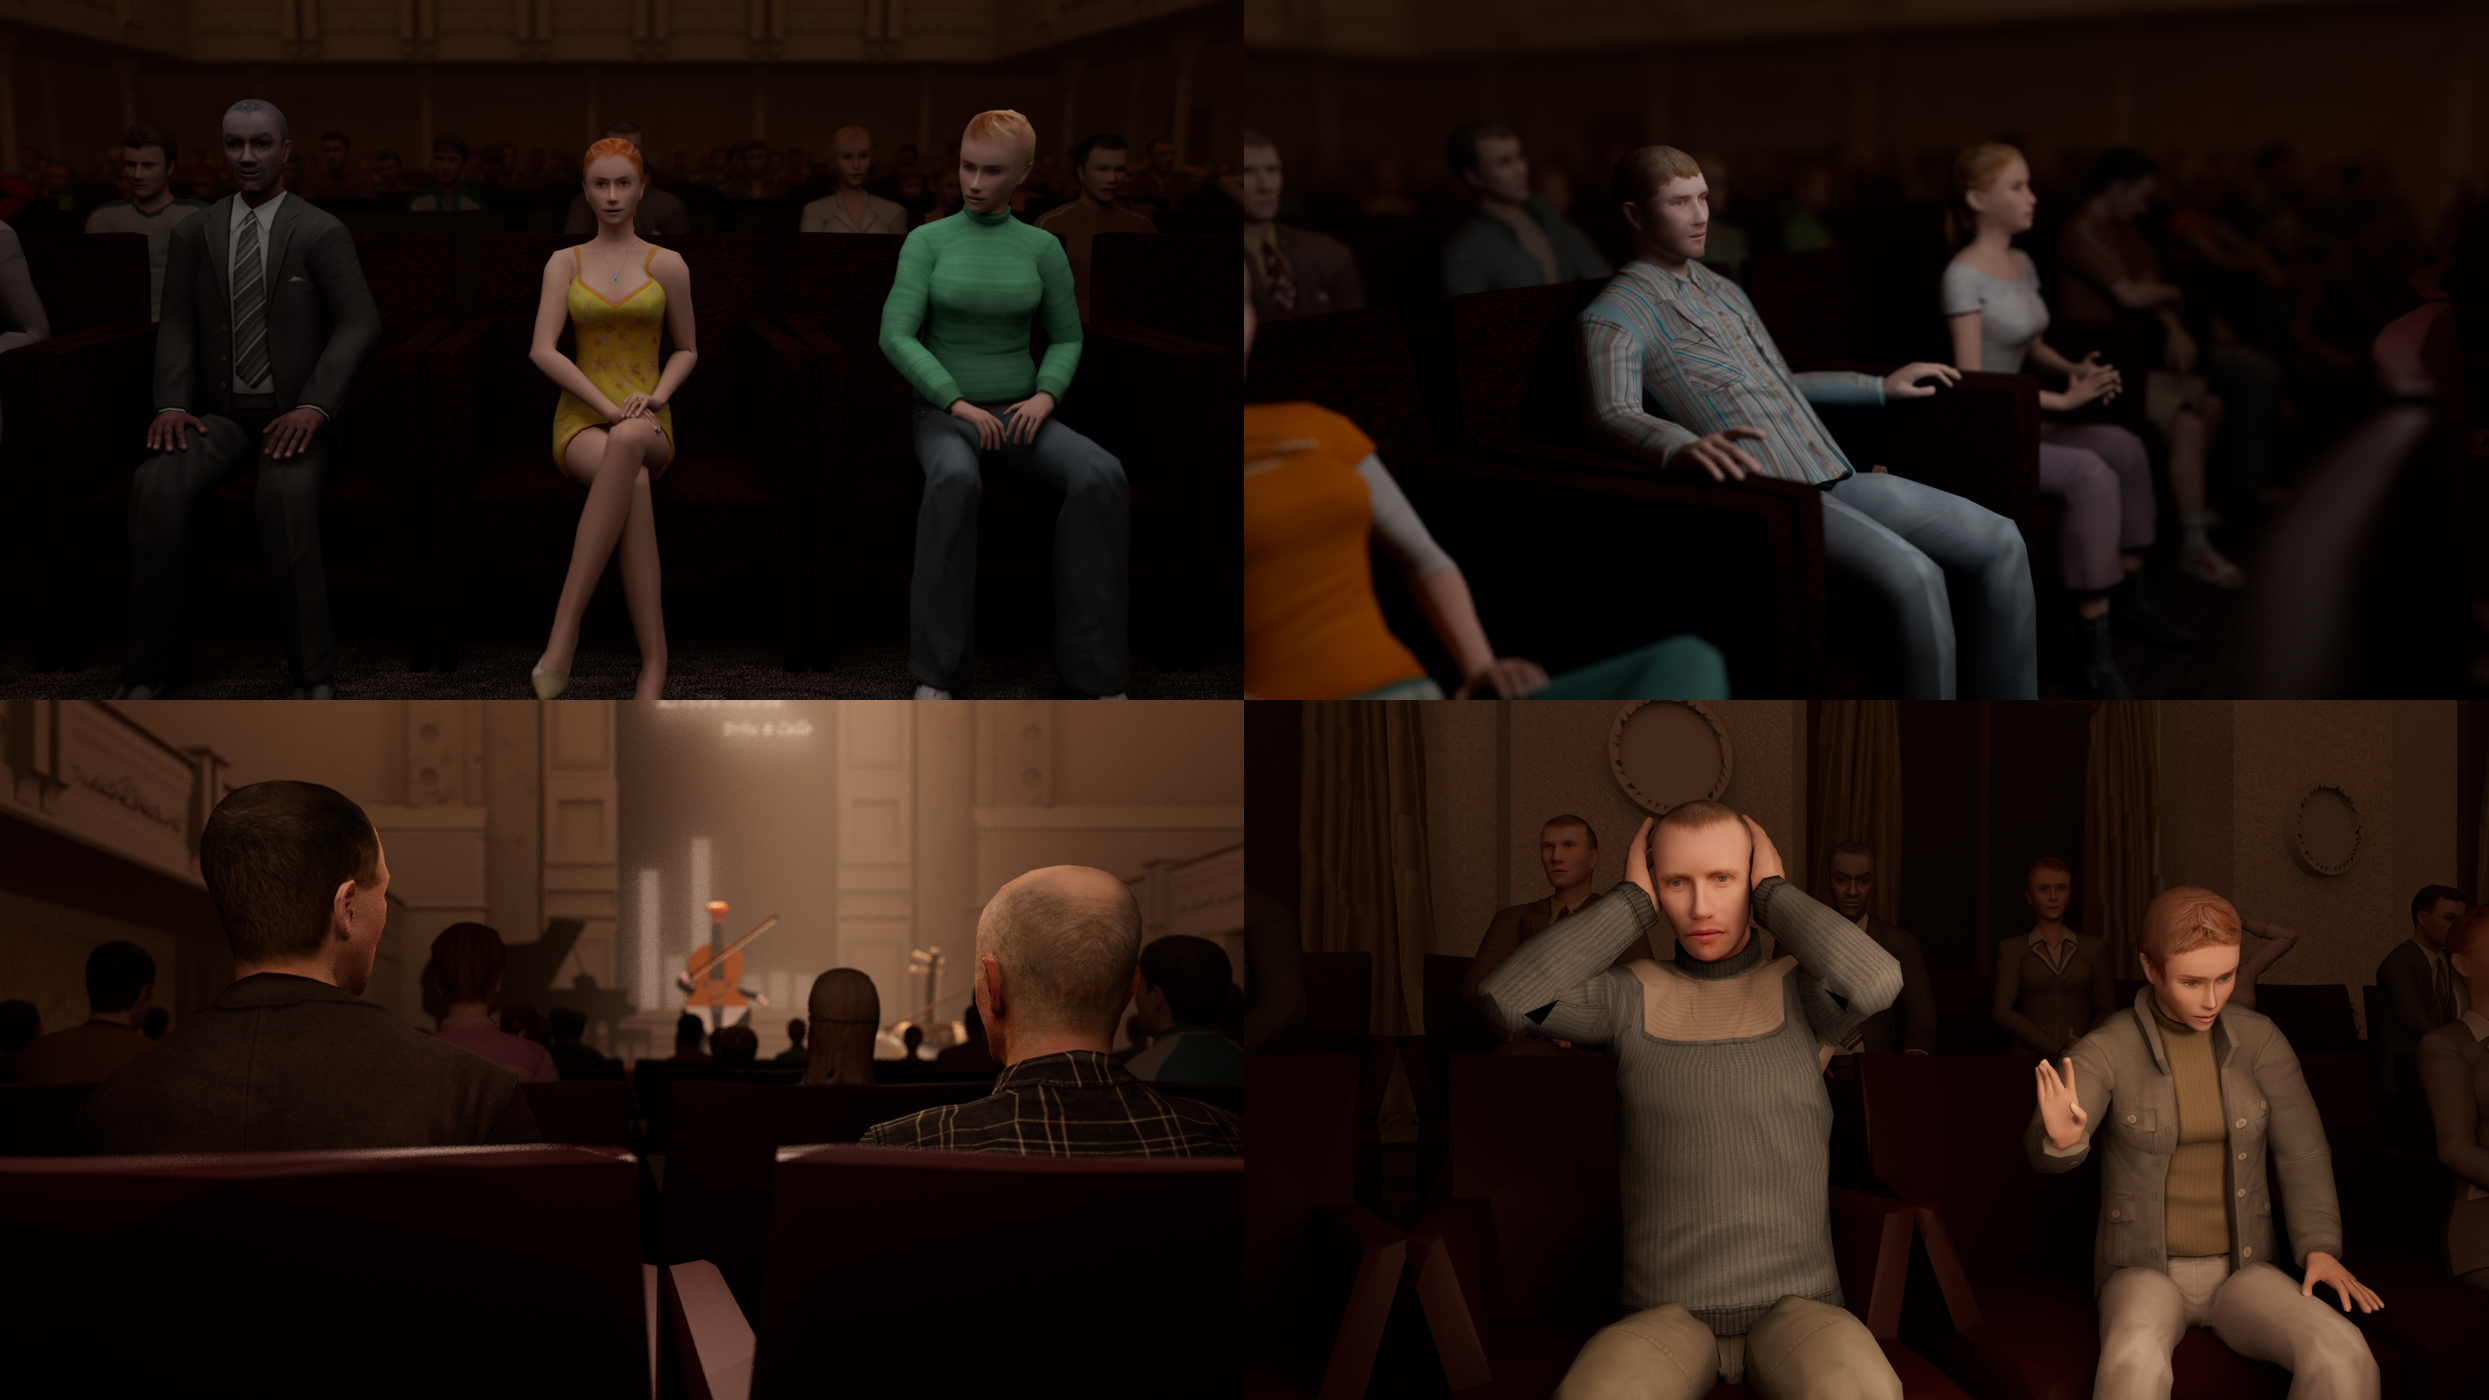
Figure 1: shots of the audience
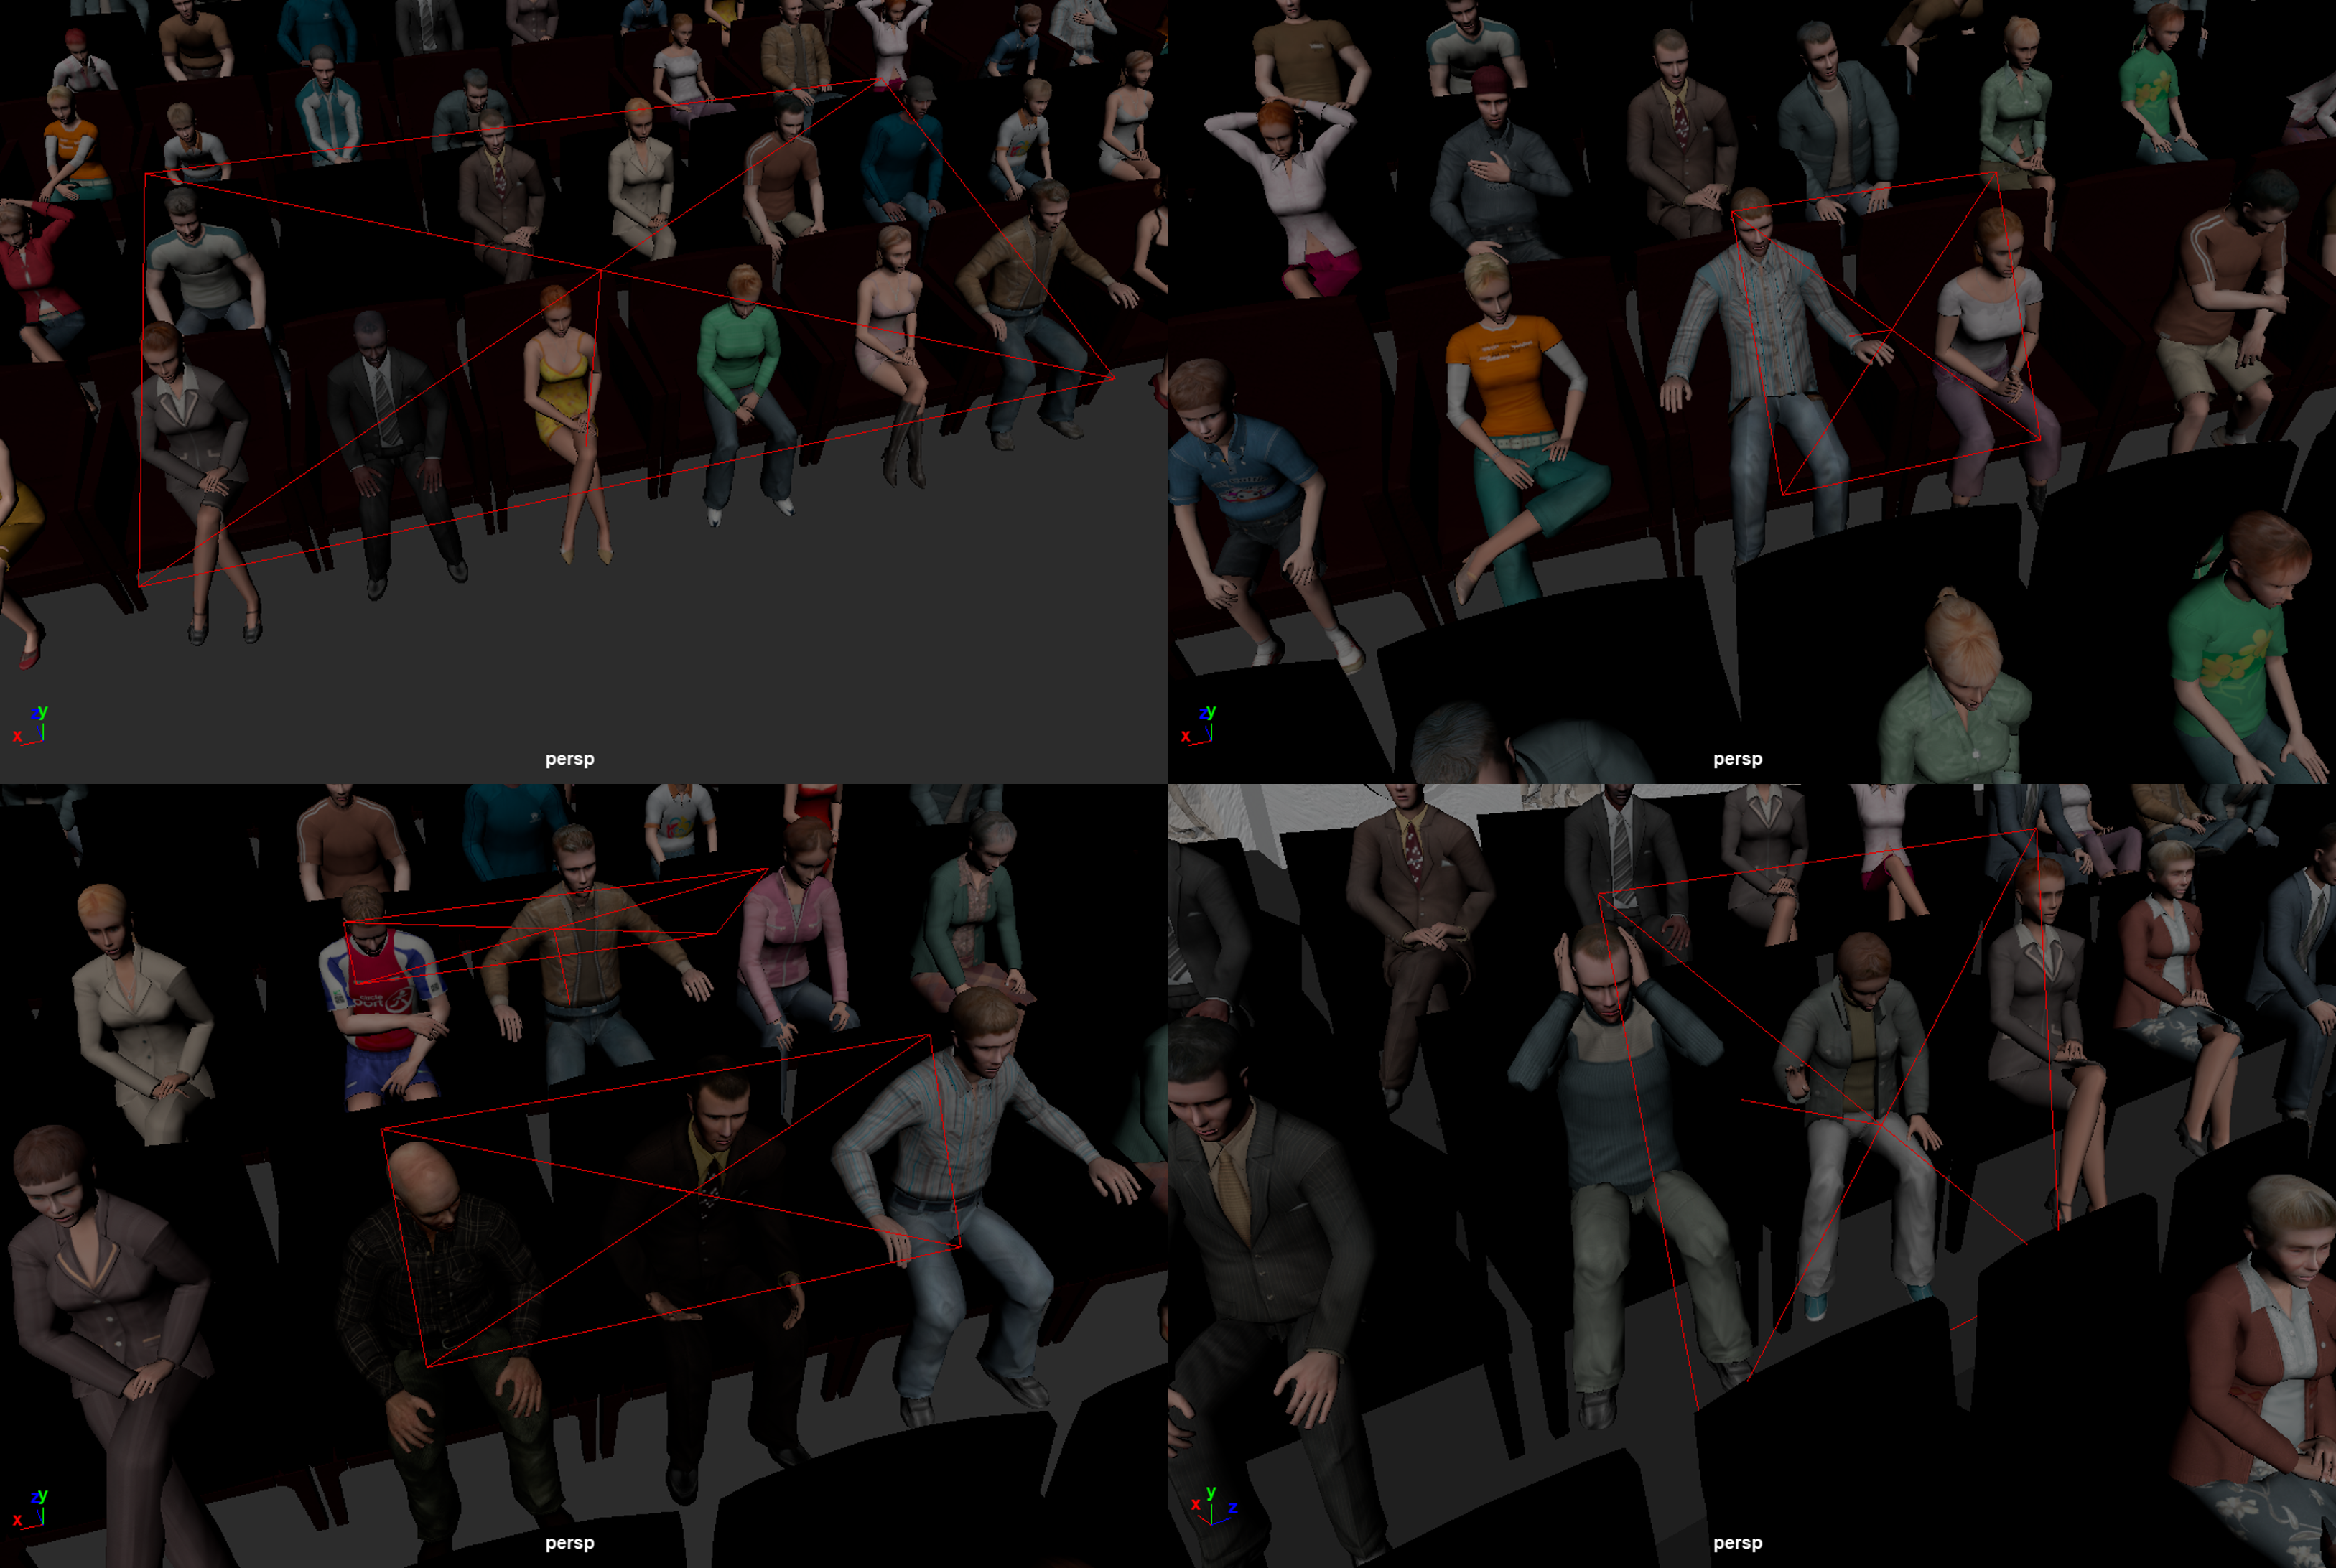
Figure 2: lighting set of the shots
The scene was not closed at the beginning, the back of the hall was empty,
I later added the back part, adding some decorative elements that fit.
Inside the hall, roman columns and carvings were added to make the scene more beautiful.
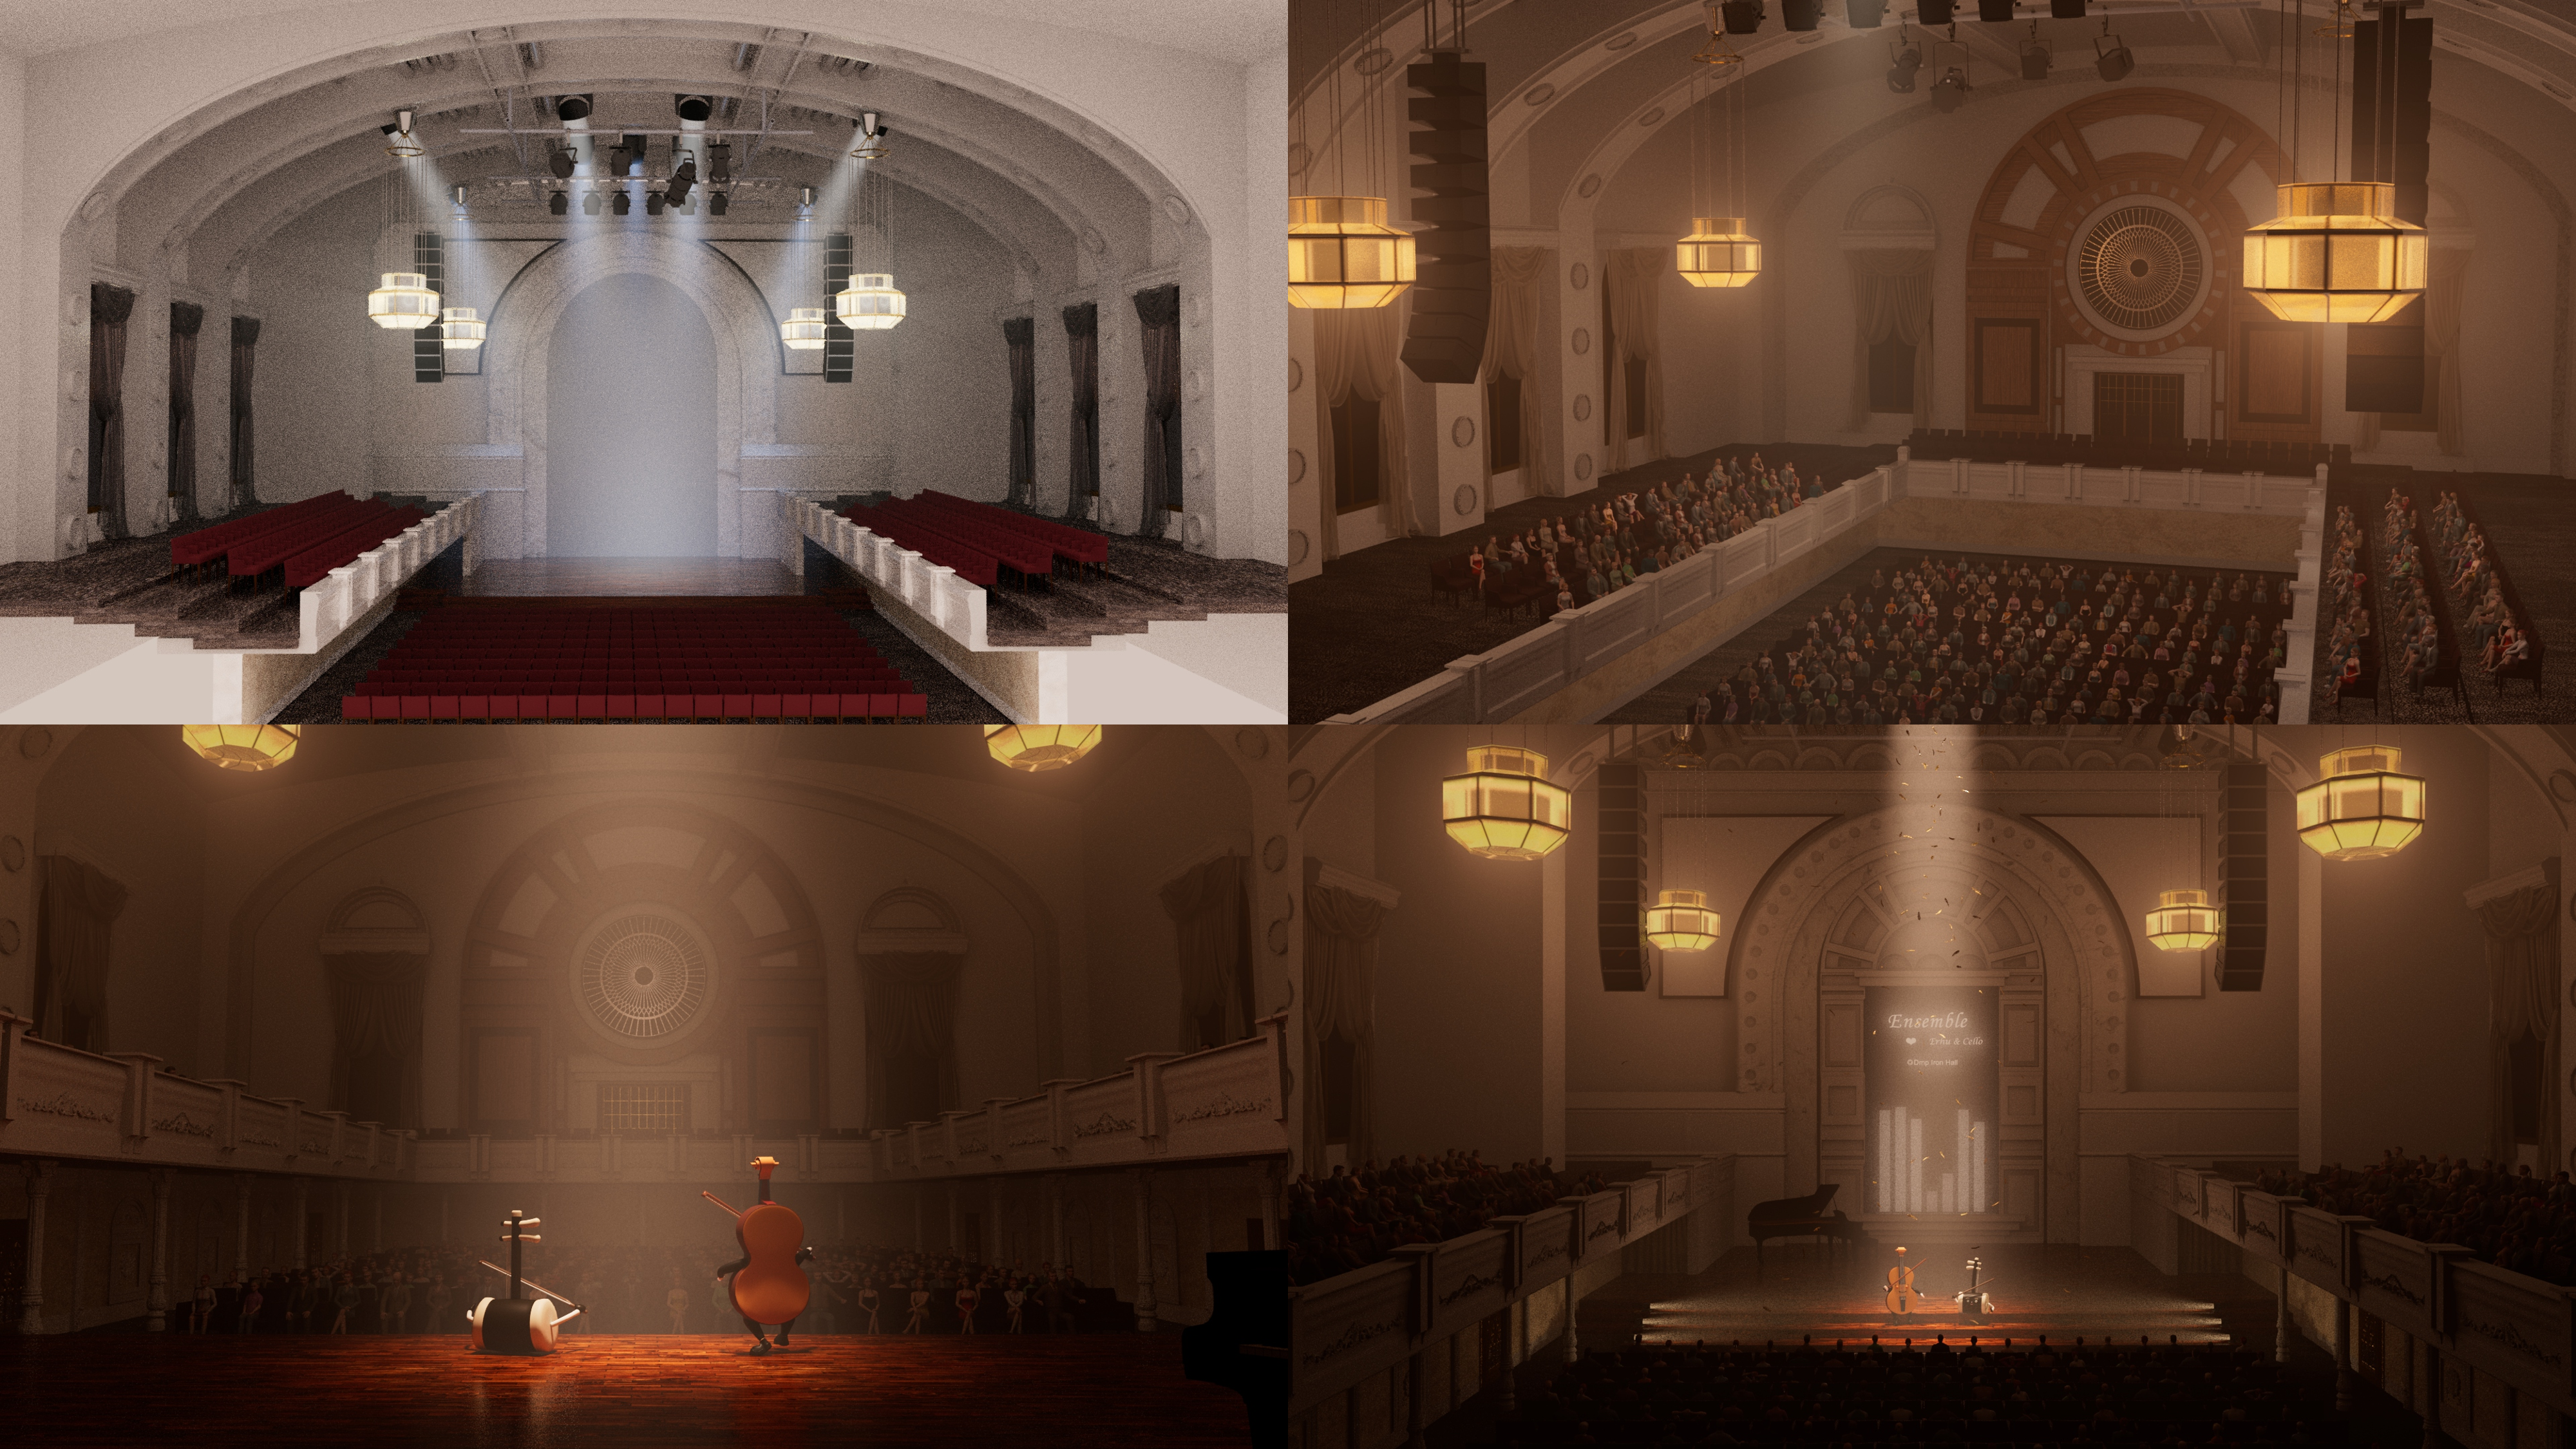
Figure 1: beautification of the scene
It was a very complicated process to animate the notes.
We referred to the actual audio and tried to correspond to each tone. However,
due to time constraints, we only completed the opening solo in this part of the work. But in fact, this part of the corresponding effect has been achieved enough,
the latter part of the notes only serve as atmosphere and beautification.
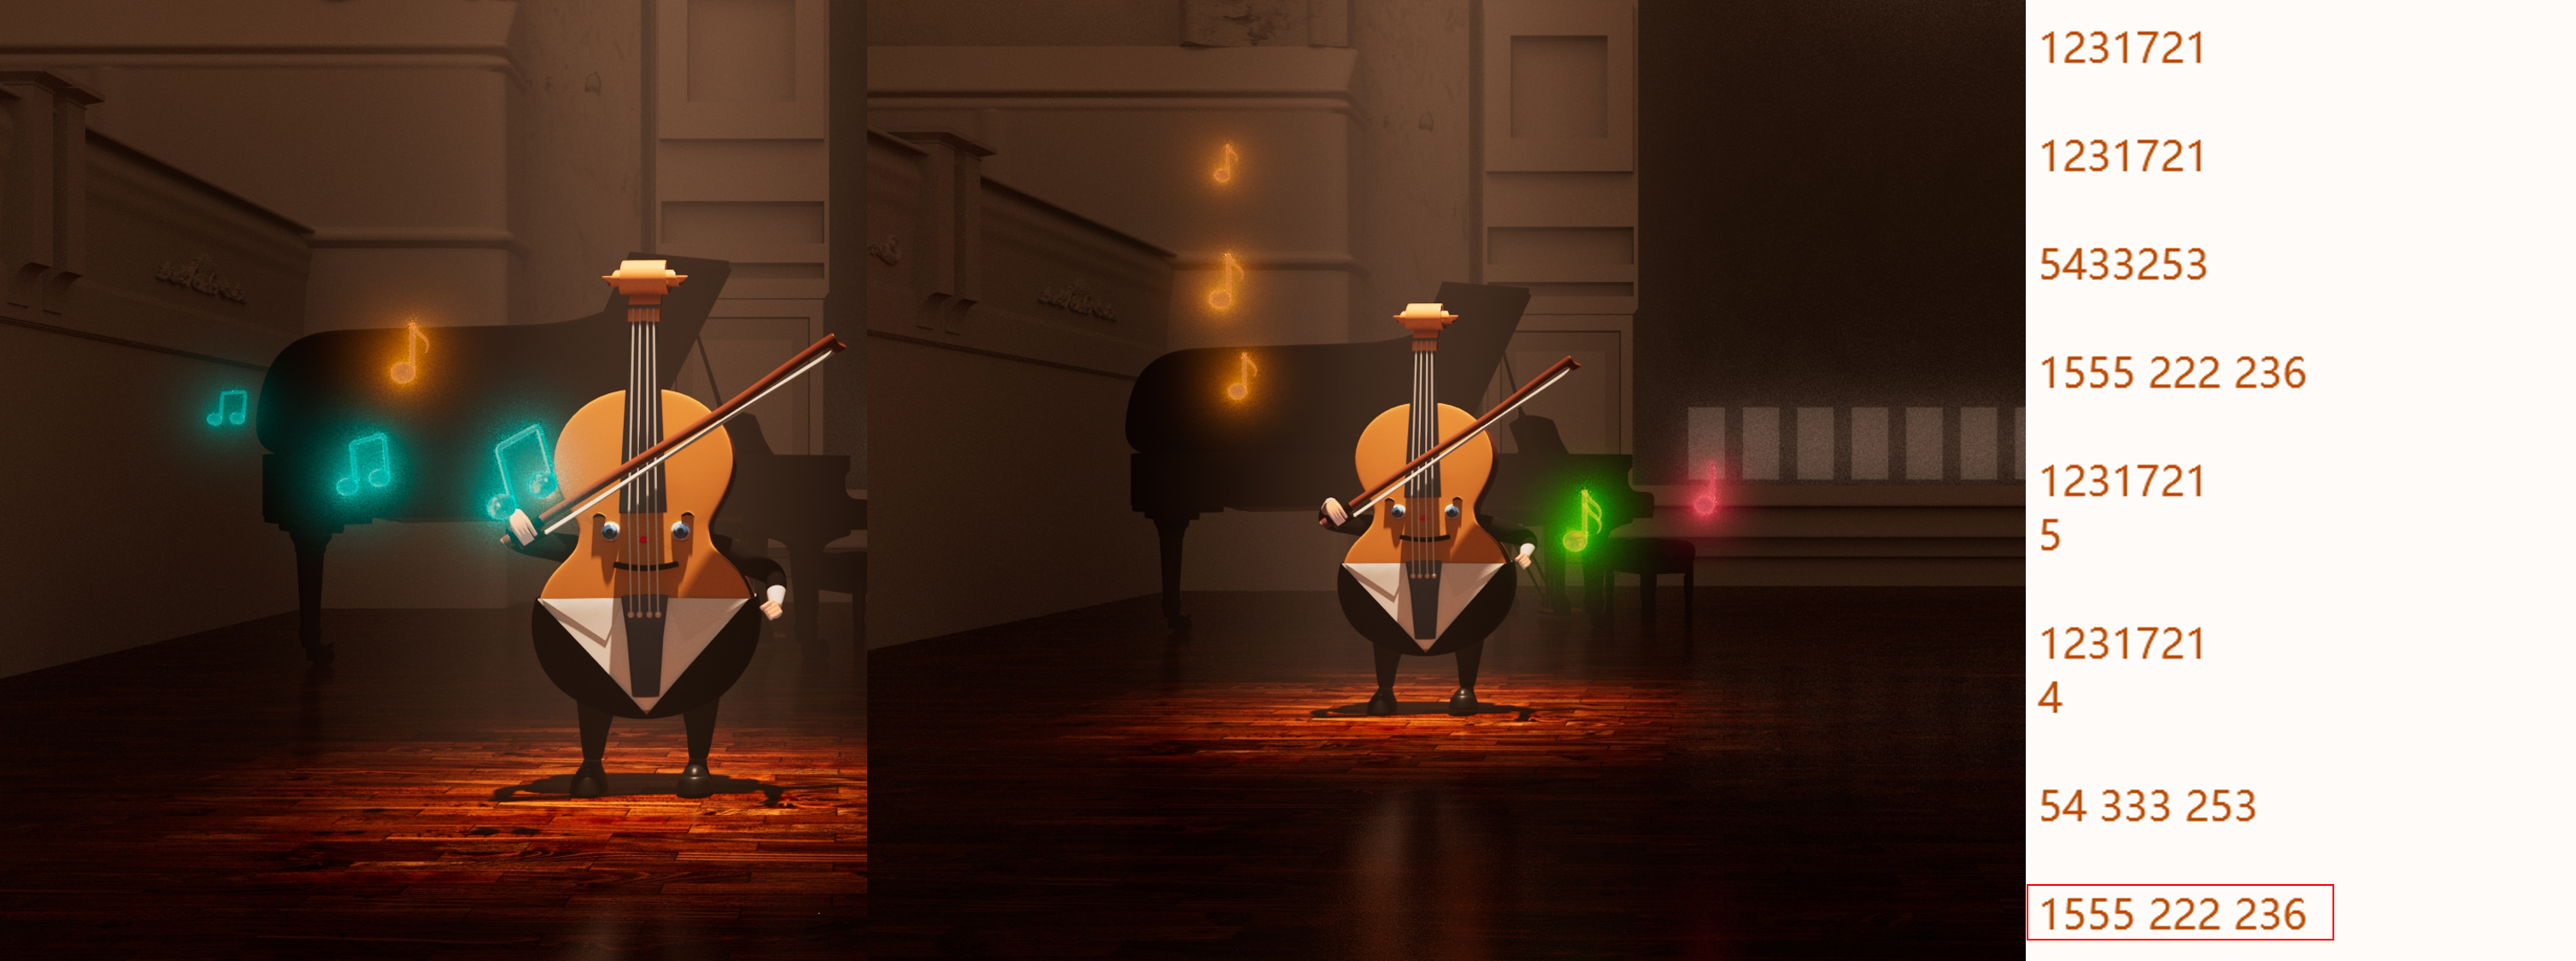
Figure 1: accordence with the melody
The progress of notes is 50%, which contradicts the previous story and adds music visualization on the big screen of the stage.
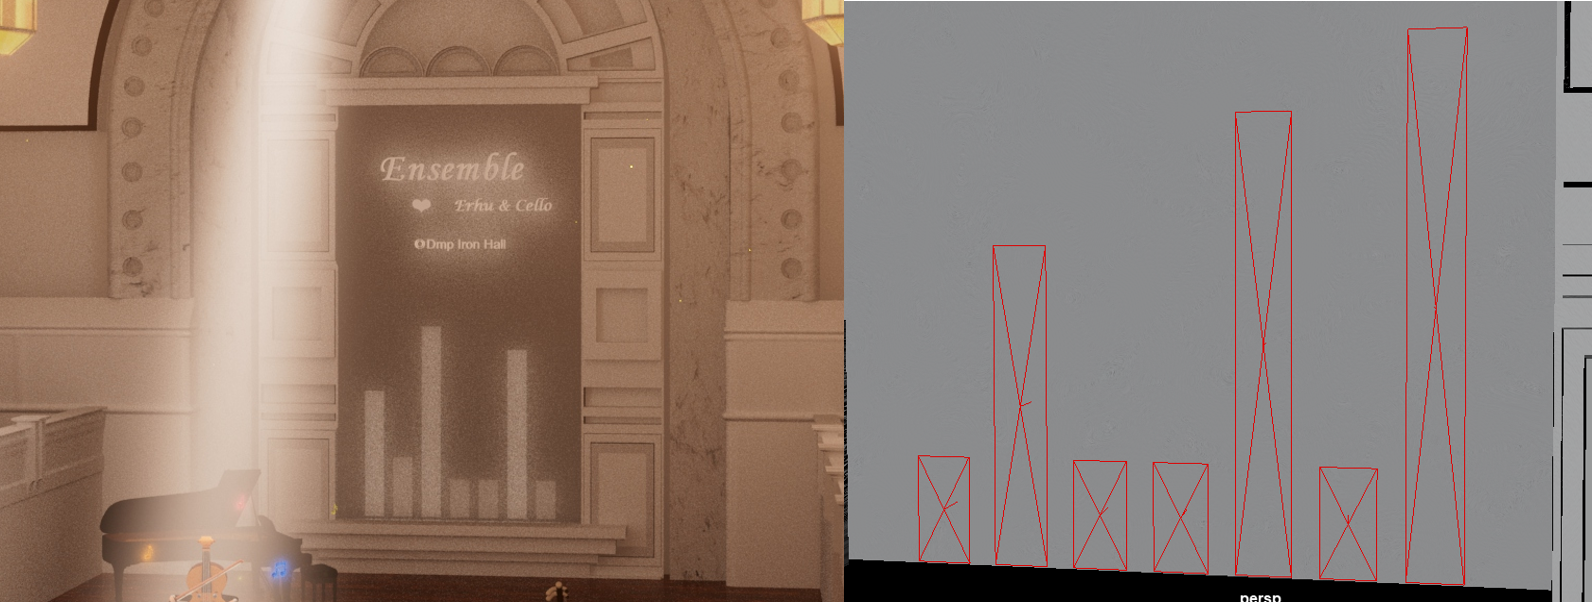
Figure 1: music visualization
The big screen on the stage was very empty, so I thought I could add more elements. Music visualization is one of the best choices, not to distract from the focus of the image, but also plays a good role in the background. The process of binding music visualization is quite troublesome, in this process I learned how to write expressions. In the process of realizing the effect, I tried many methods, such as rotating disk light 90 degrees and limiting the far profile of light decay, but the rendering effect was inconsistent due to the mirror reflection. Then try using the quad shape of the region light. Again, volume light. Set the spread value to 0 and change the scale Y of the light surface.
First, I set the driven key for intensity of light and its scale Y, then bind the driven key between scale Y of light and the displacement Y of controller. Finally, through expressions, bind the seven controller Y dispositions to the attribute of the group, and define seven volume attributes
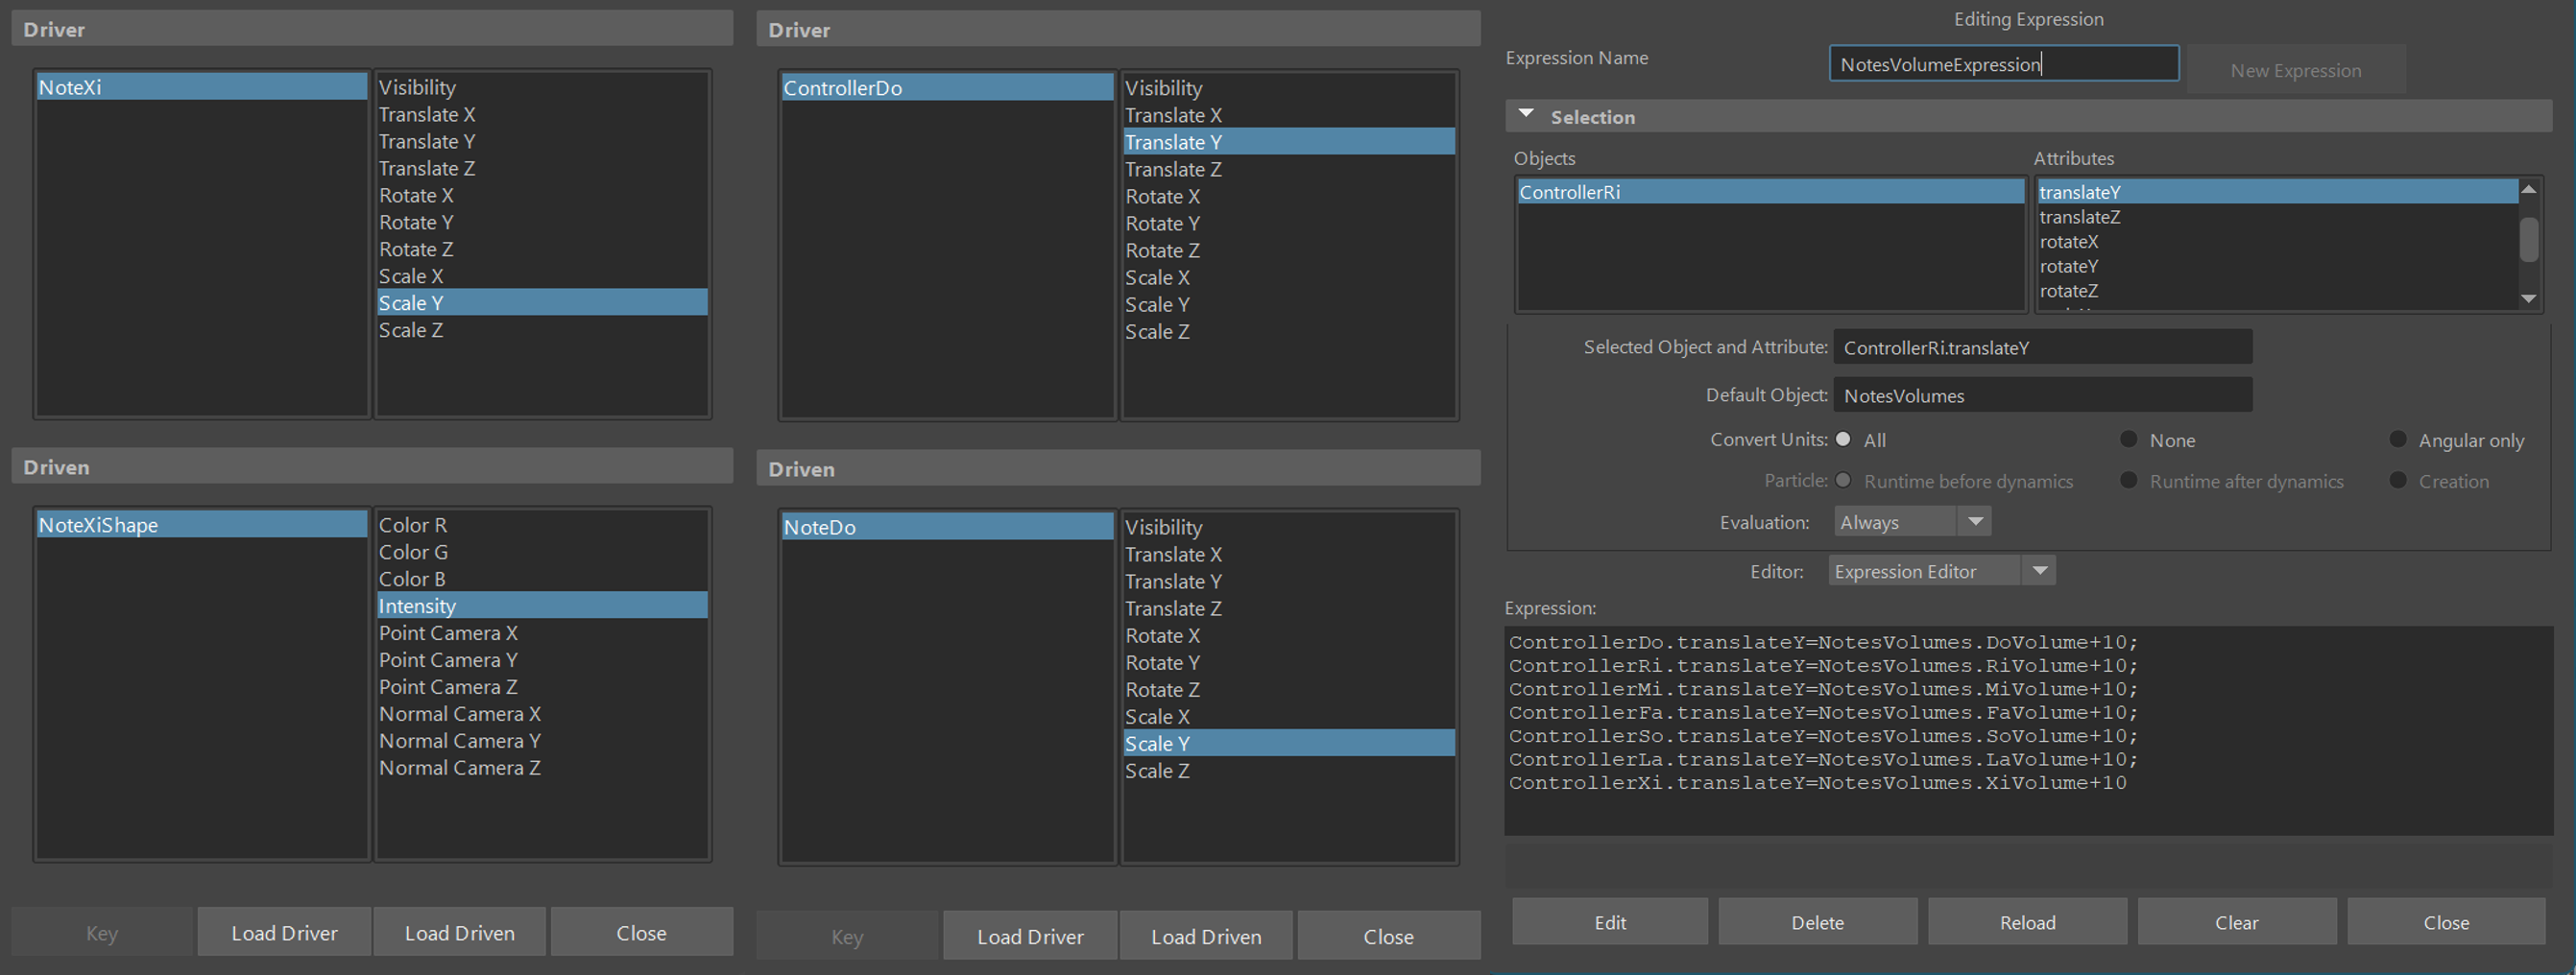
Figure 2: the process of visualization
In addition, the ups and downs of the volumes also accord with the melody. I made lots of tips to set keys for it.
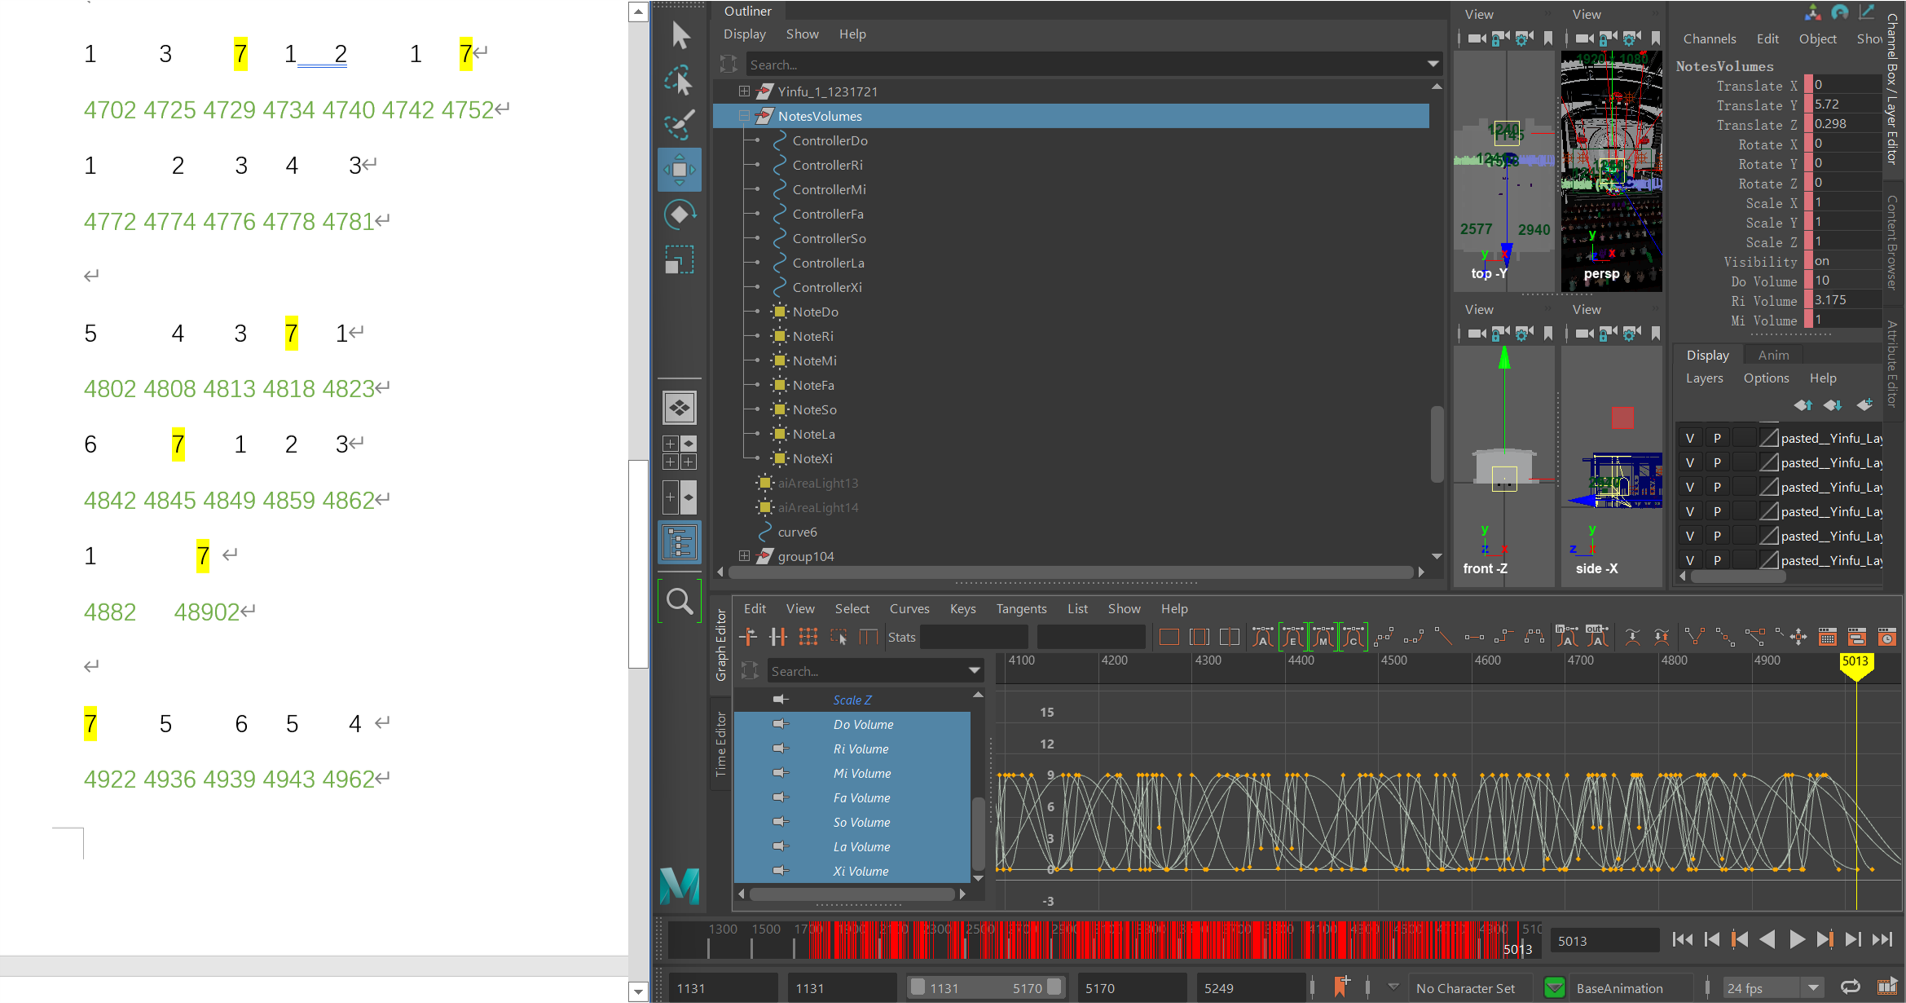
Figure 3: the records of the melody
When the contradictions were all completed, and the positions of ensemble and solo were set, the lighting performance was molded based on the role displacement
Overhead light, step light
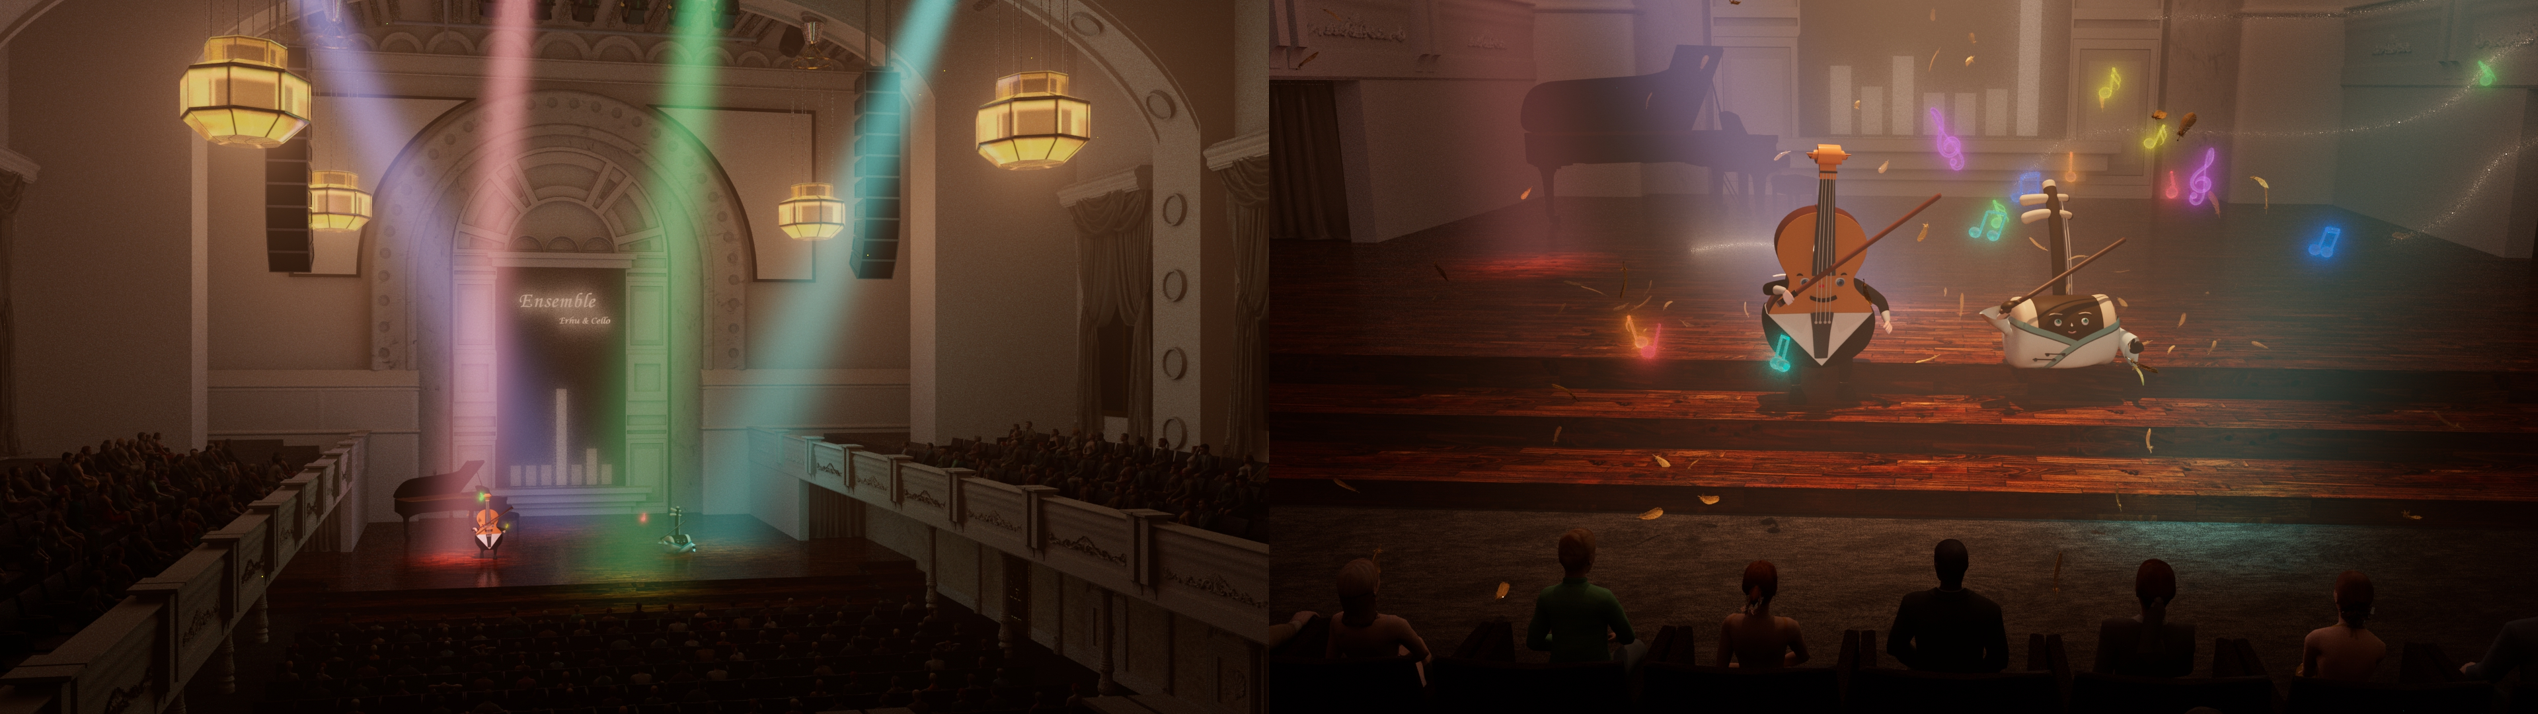
Figure 1: the lighting animation
The lighting design of ensemble is mainly introduced here. There are two animations in ensemble, the first is a revolving animation overlooking the panoramic lens, and the second is a bending animation, close-up shot. The lights all fade in and check out, and I added color to make the picture more lively
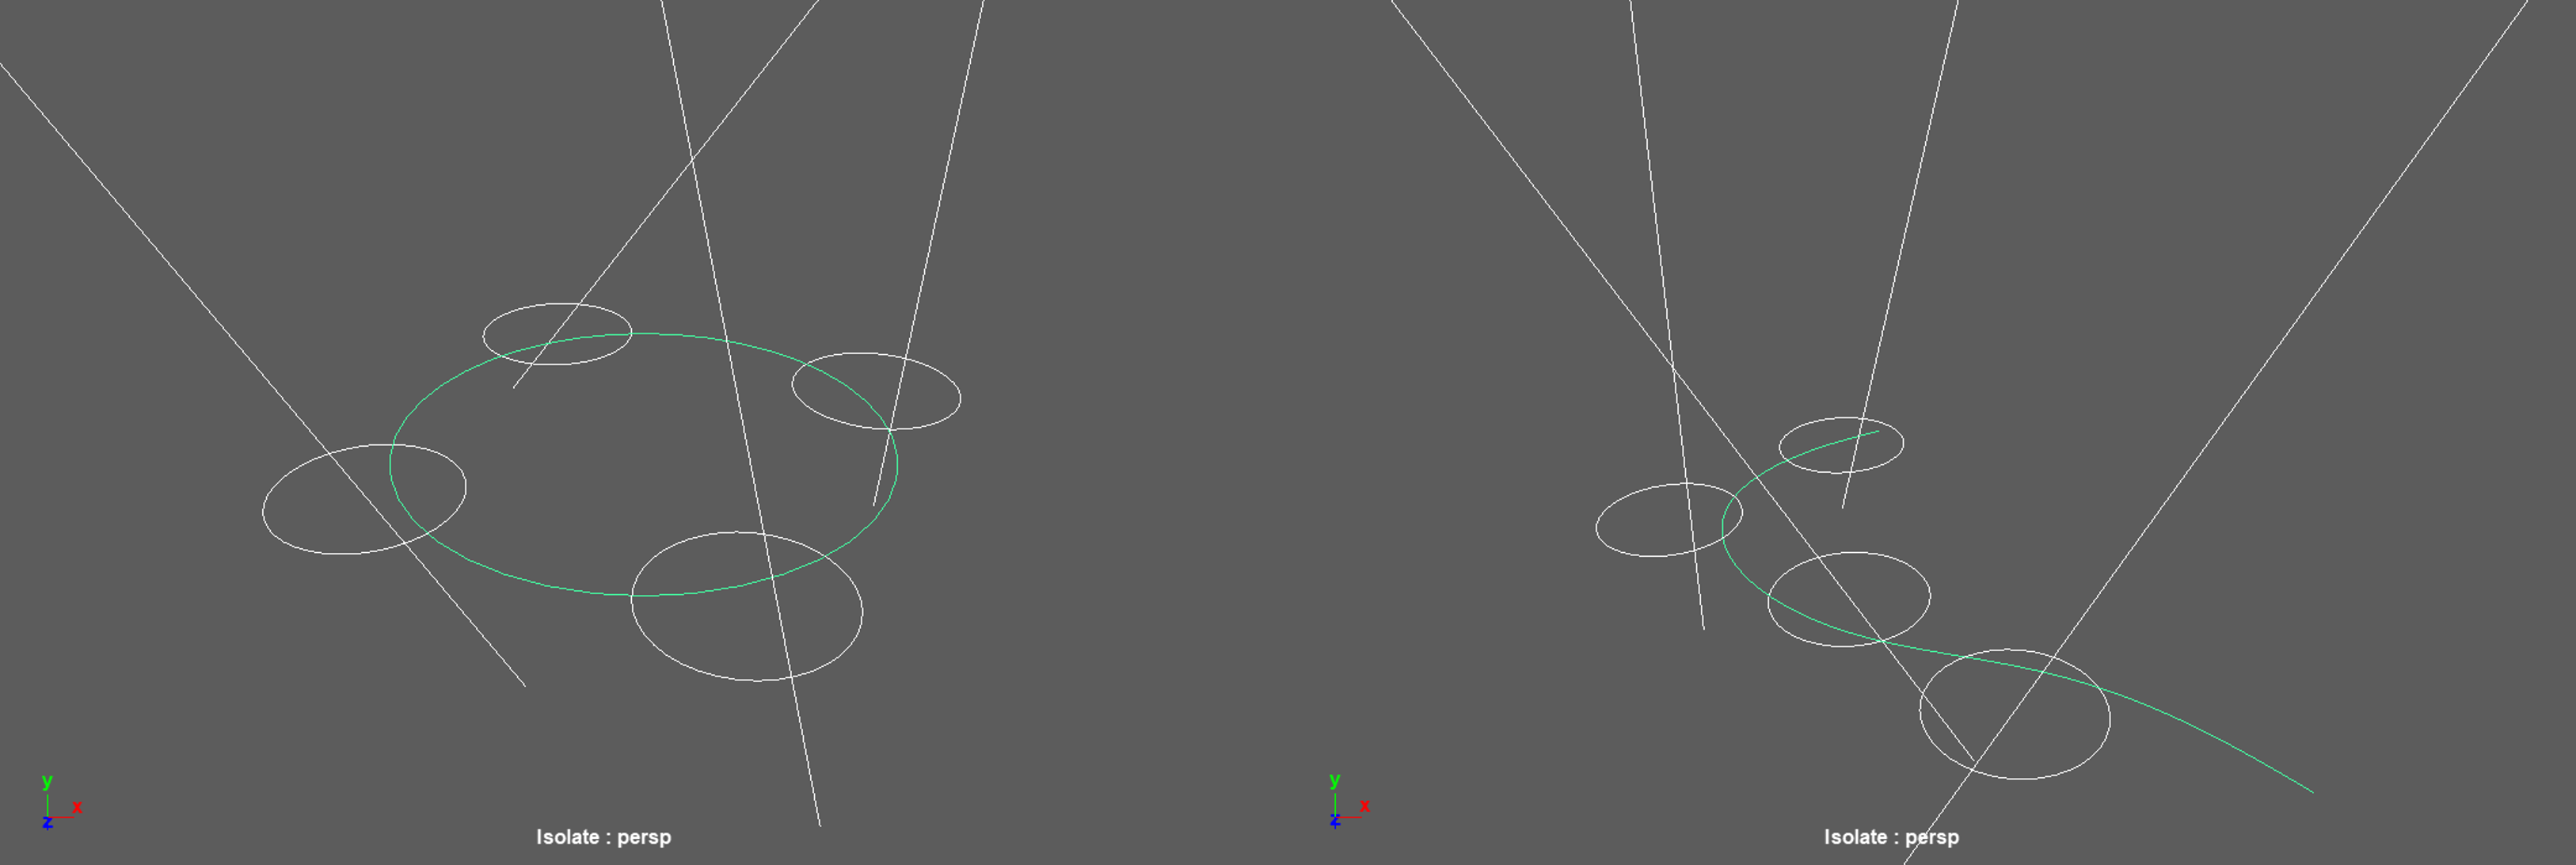
Figure 2: the paths of the lighting
All the pulling movements were completed, and I optimized the walking and turning movements at last.
In the end, the notes of the ensemble were not made according to the score due to time constraints, and were made by motion path.
As shown in the figure, I designed several tracks of notes, but the tracks were all similar in the end, trying to convey the message that although the sounds came from different instruments, they all merged into a wonderful ensemble in the end.

Figure 1: the paths of the lighting
At the end of the production, I reflected on the improvements to the whole project and noticed the effect of the vanishing notes.
In the previous implementation, I animated the notes to shrink and the lights to dim, but this animation caused some undeserved problems,
such as the problem of a fired file. Through learning, I found that the opacity of the material can be modified to achieve the effect.
I added a different material for each note, I thought there should be a more direct way to achieve this,
but due to the time problem I did this, unfortunately, there was no time to change the effect of the previous note.
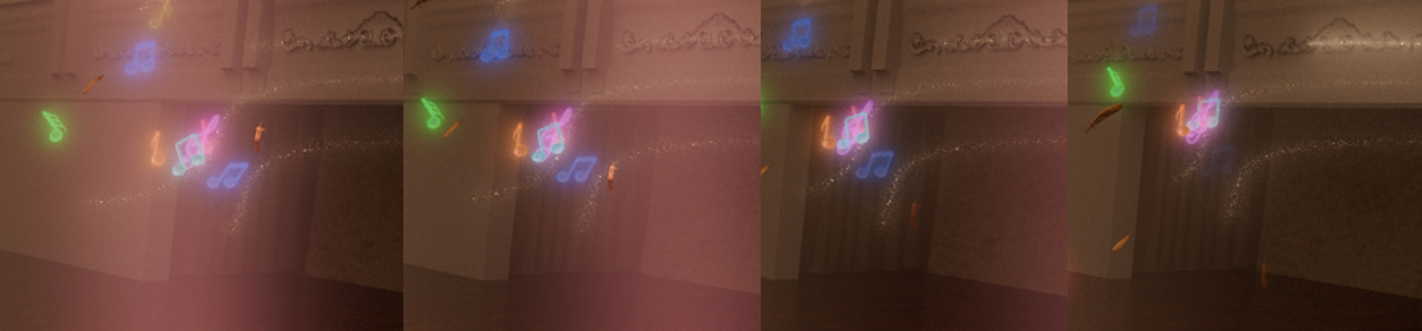
Figure 1: the fading of the notes
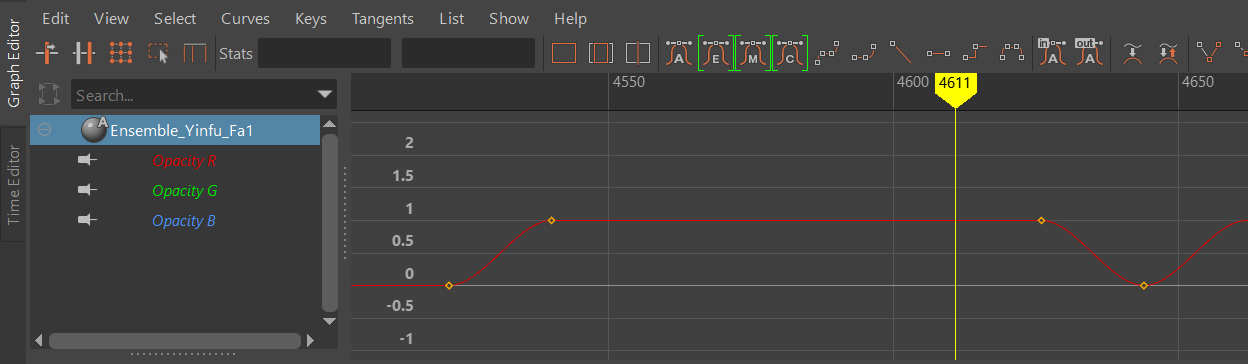
Figure 2: the keys of the opacity of the material
Added particle effects for final ensemble, instantiated feathers, and learned expressions to write expressions to control effects.
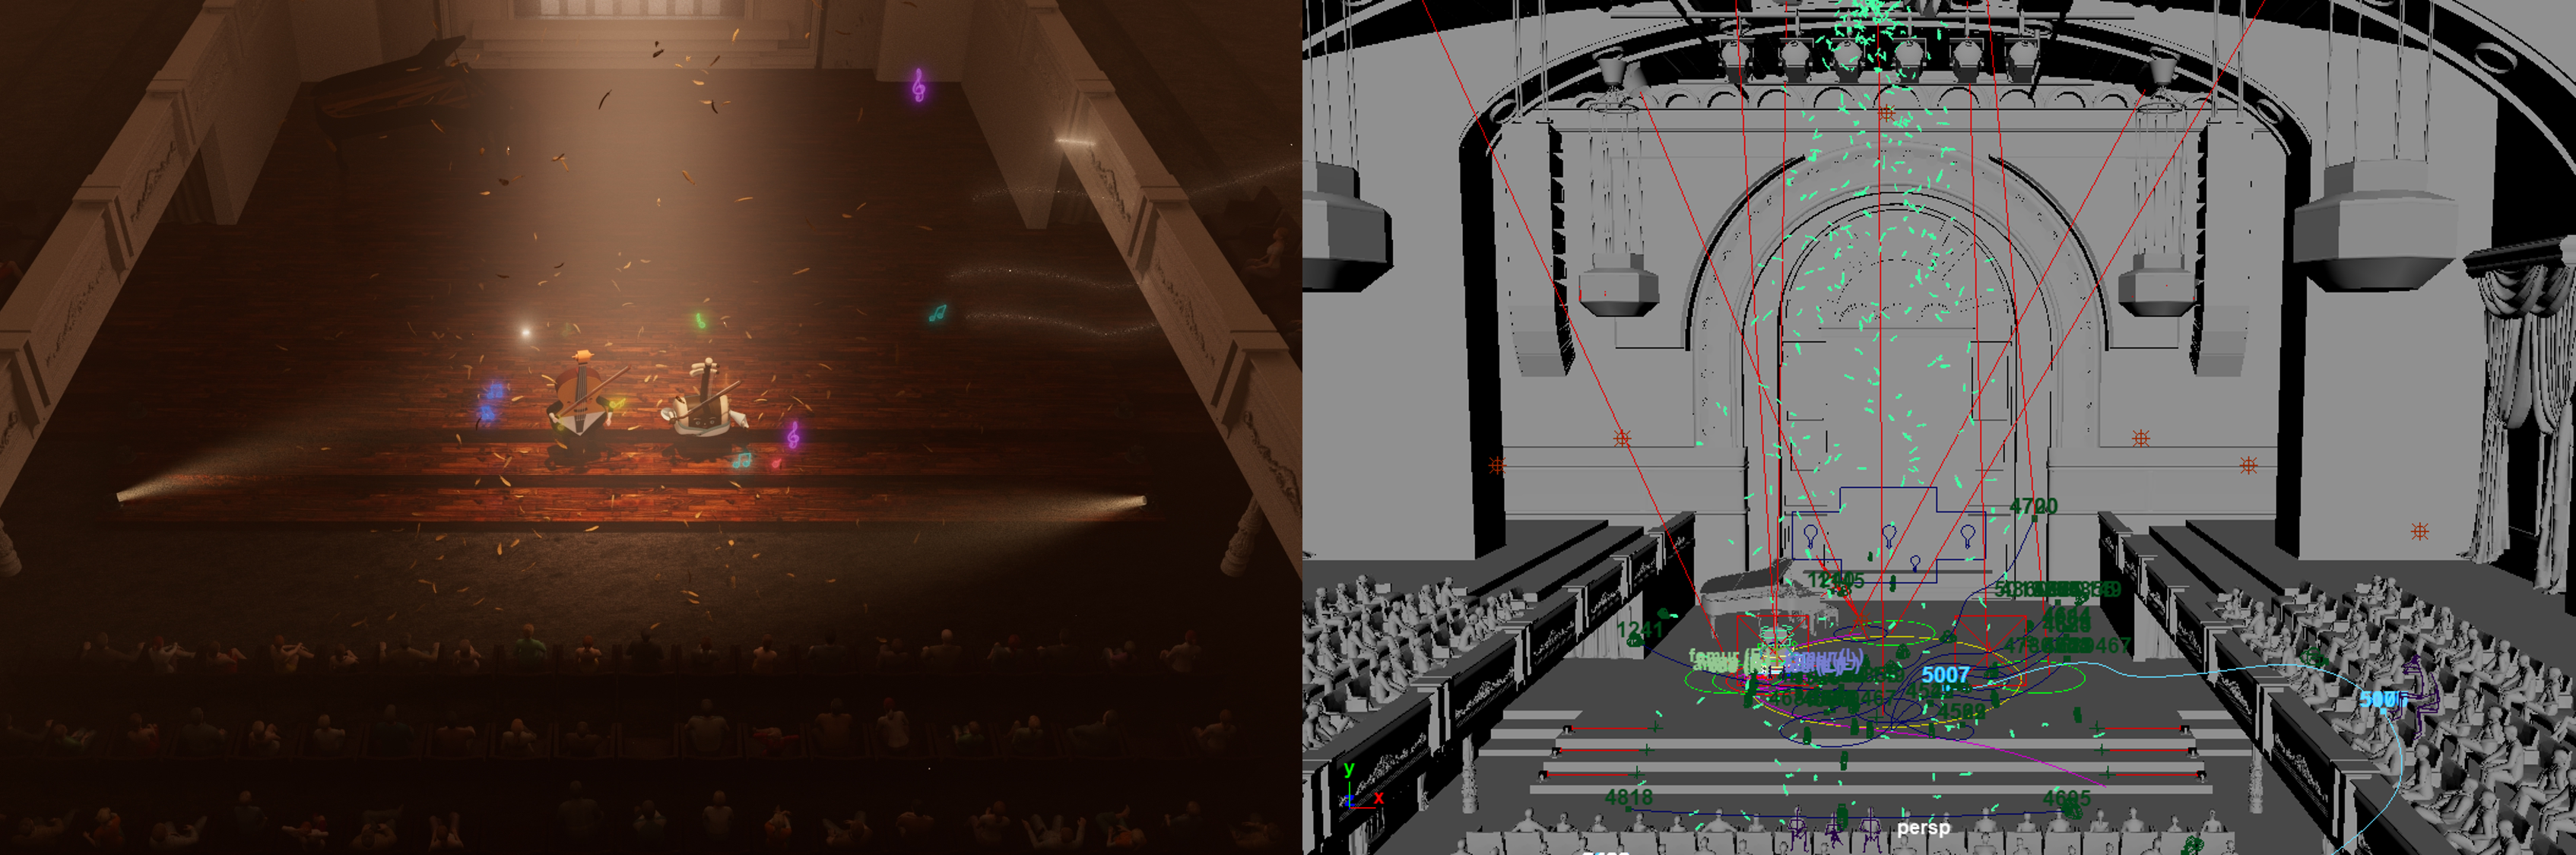
Figure 1: the particle effect
In order to achieve a better picture effect, I designed the effect of the feather falling from the sky during the final ensemble.
Particle special effect is a strange tool for me. Through online learning and expression writing,
I can control the size, rotation, stagnation and then disappearance of every particle on the ground.
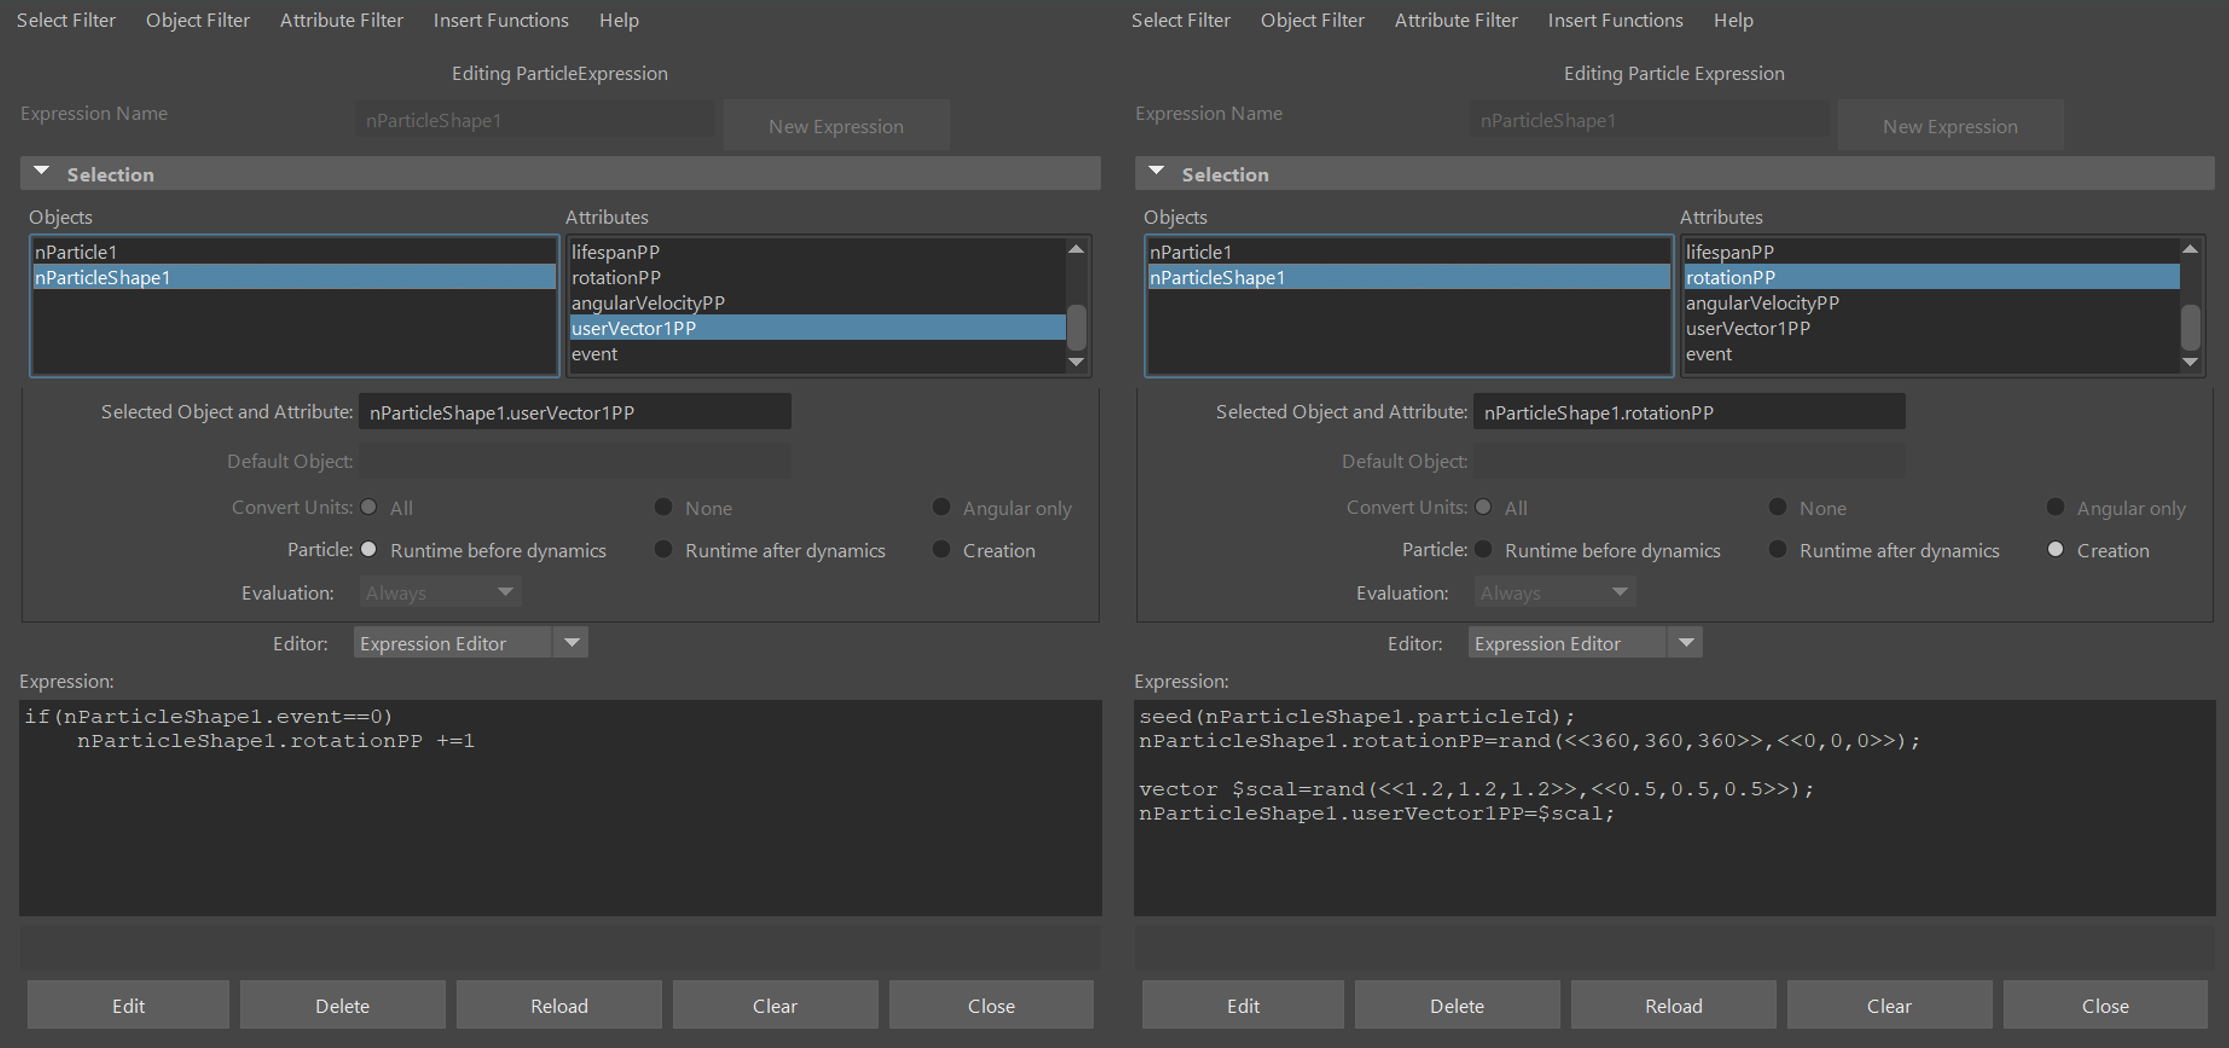
Figure 2: the expression of the particle
After all the animations were rendered and composited, I adjusted the sound effects and optimized some transitions
Soften the changes by adding some dark transitions. In the aspect of sound effect, I edited the audio by Audition and added reverb of the hall to achieve the final effect. The ambient sound with low volume was in line with the reality during the whole music stage.
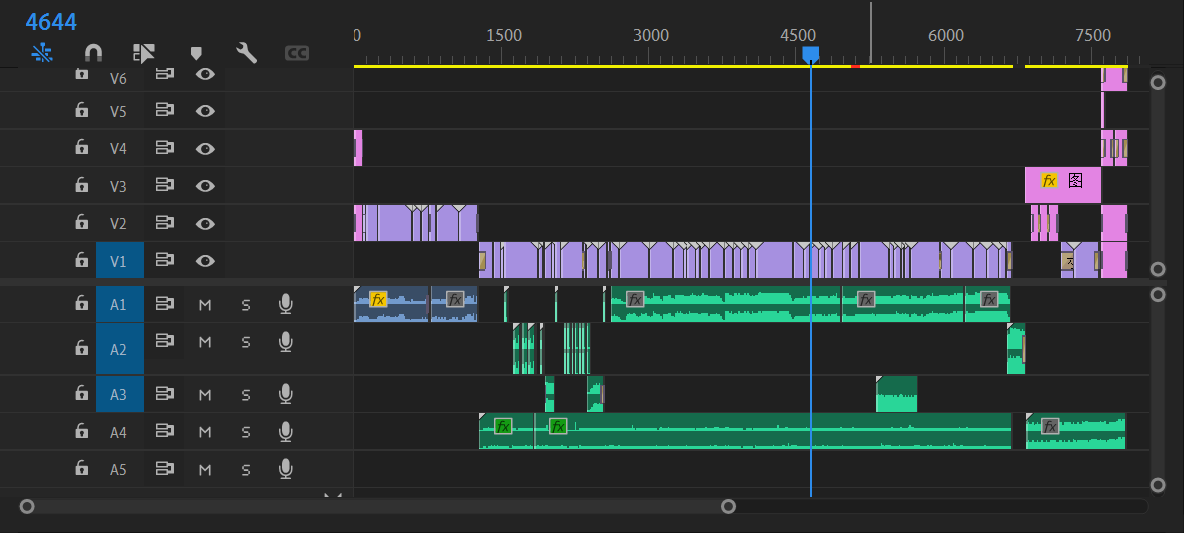
Figure 1: the animation synthesis in PR
At last, I added the cast in the end of the animation
Figure 2: the cast
To conclude, to research on the language of lenses, I obtained relevant literature from camera, composition and lighting. In practice, through complete scenes, various lighting changes and multiple combinations of lenses, I explored how to implement informative and concentrative animations. The art of lenses was strongly demonstrated in our animation, the final outcome is close to satisfactory. In the production of visual works, we should make good use of the language of lenses and present what we want to present to the audience in an appropriate way.
In addition, there are some more details I didn't mention in this article, including the on-screen music visualization of the stage background, where the volume bar moves with the rhythm of the music and plays each note of the first part roughly in line with the rhythm of the music. In the end of the animation, we designed to give shots to the audiences again who were ought to applaud, which was not realized within limited time. Nevertheless, through this project, I've learned a lot of animation techniques, the importance of cooperation and self-learning.